 December 9, 2025 | 9 min Read
Decky Loader: How to Start Developing Plugins. Part 1
Table Of Contents
In this guide, we will set up a development environment, build a test plugin for Decky Loader, and run it on the Steam Deck.
For development we will use Windows with an Ubuntu Server virtual machine on VirtualBox and the Steam Deck itself.
All three devices must be connected to the same network.
If you use Linux instead of Windows — skip the preparation part. Visual Studio Code setup is the same.
Before you start
Install on Windows:
Install on Steam Deck:
Make sure you understand how to work in a terminal — any AI can help you with that.
Installing Ubuntu Server on VirtualBox
The simplest way to build a plugin is by using Linux. I chose Ubuntu Server. Lightweight, fast, without a graphical interface — a perfect option for remote development.
You can use any other Linux distribution.
Creating the machine
Download the image Ubuntu Server LTS 24.04.3 or newer.
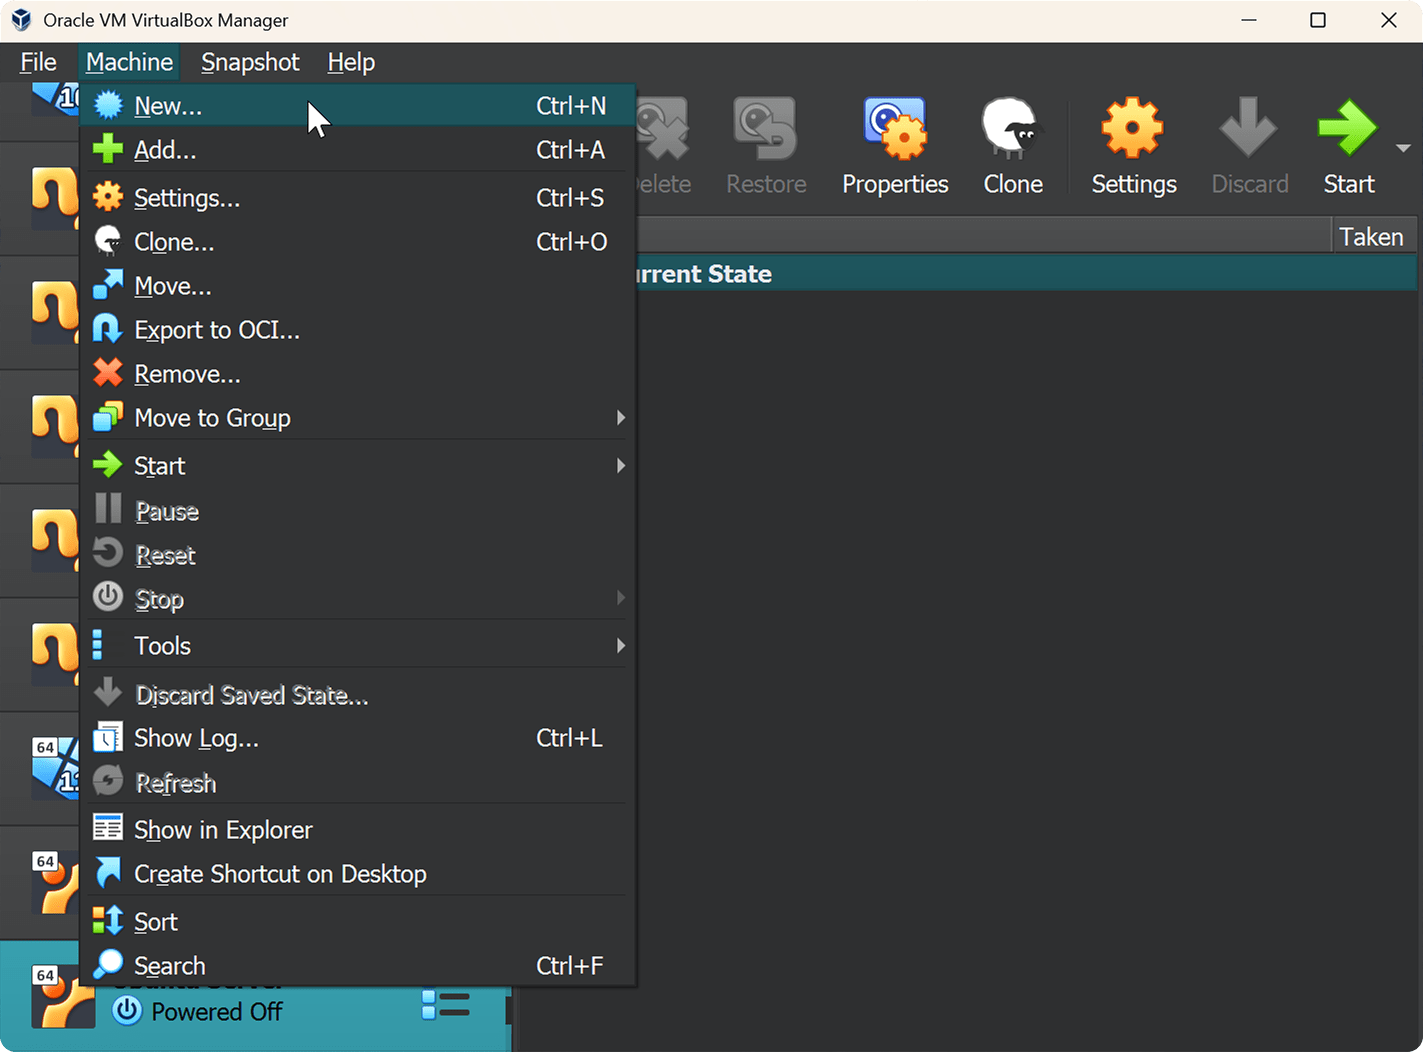
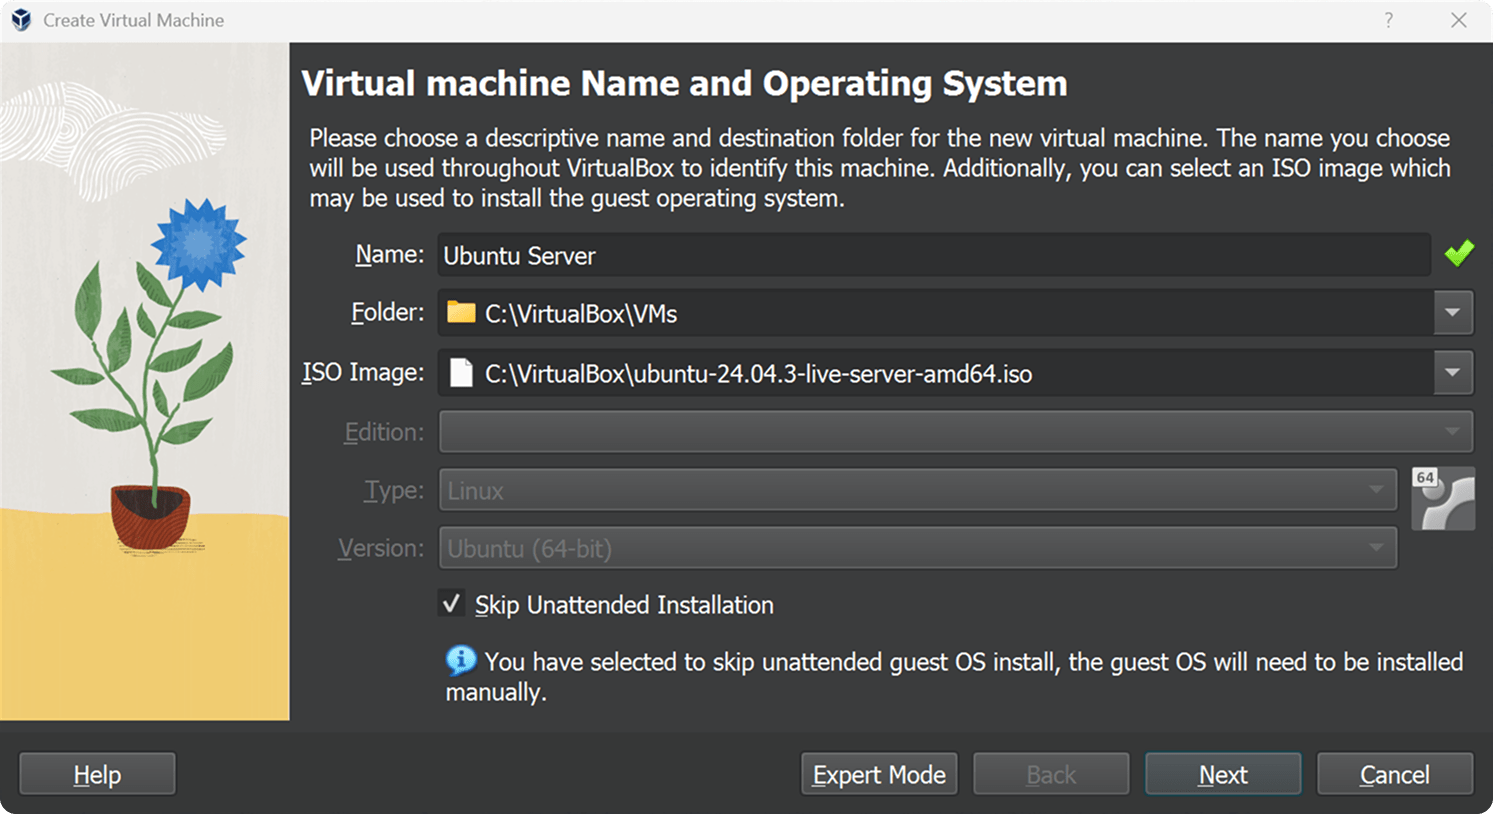
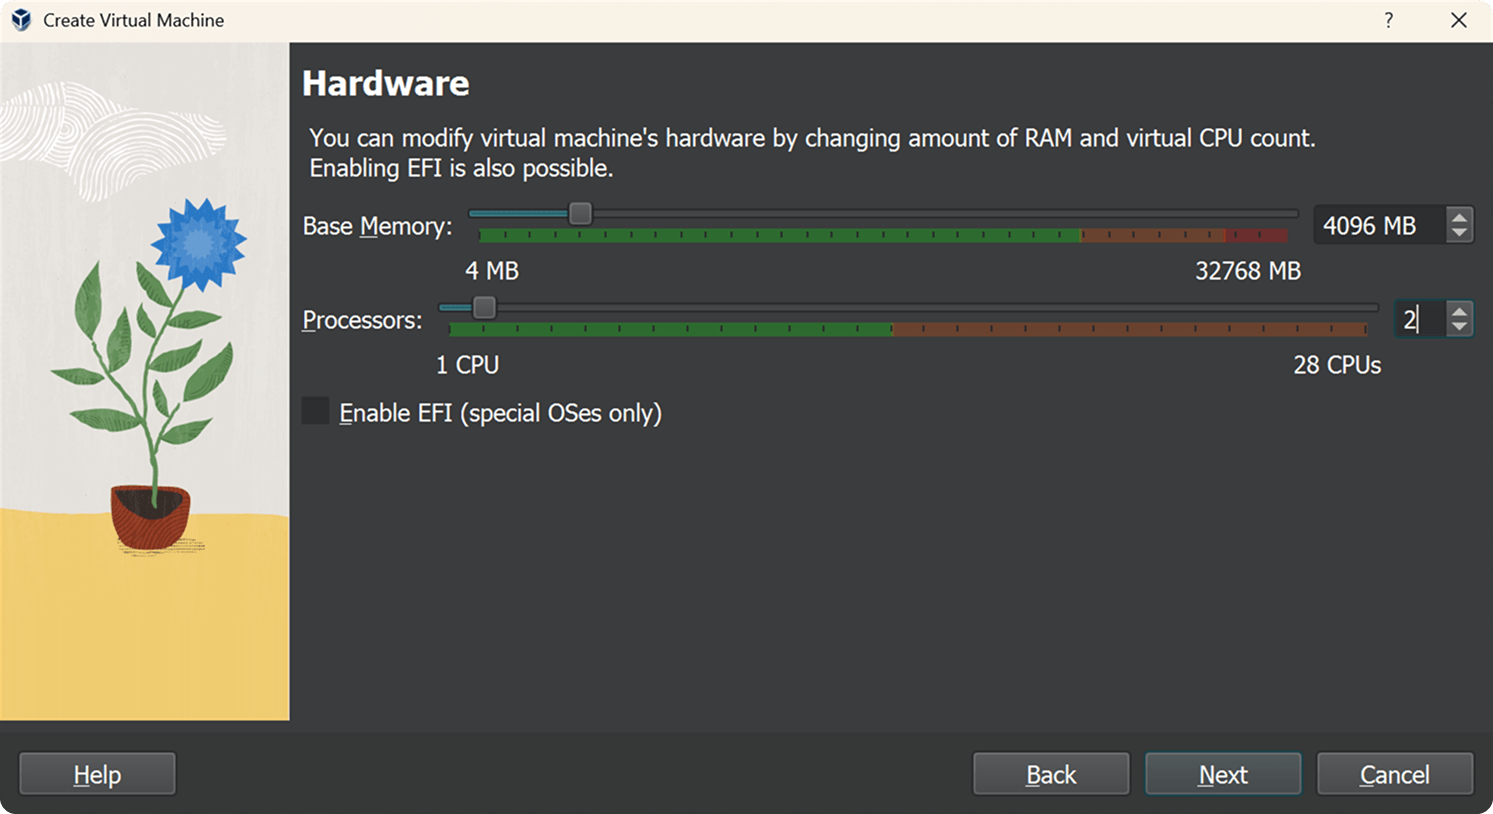
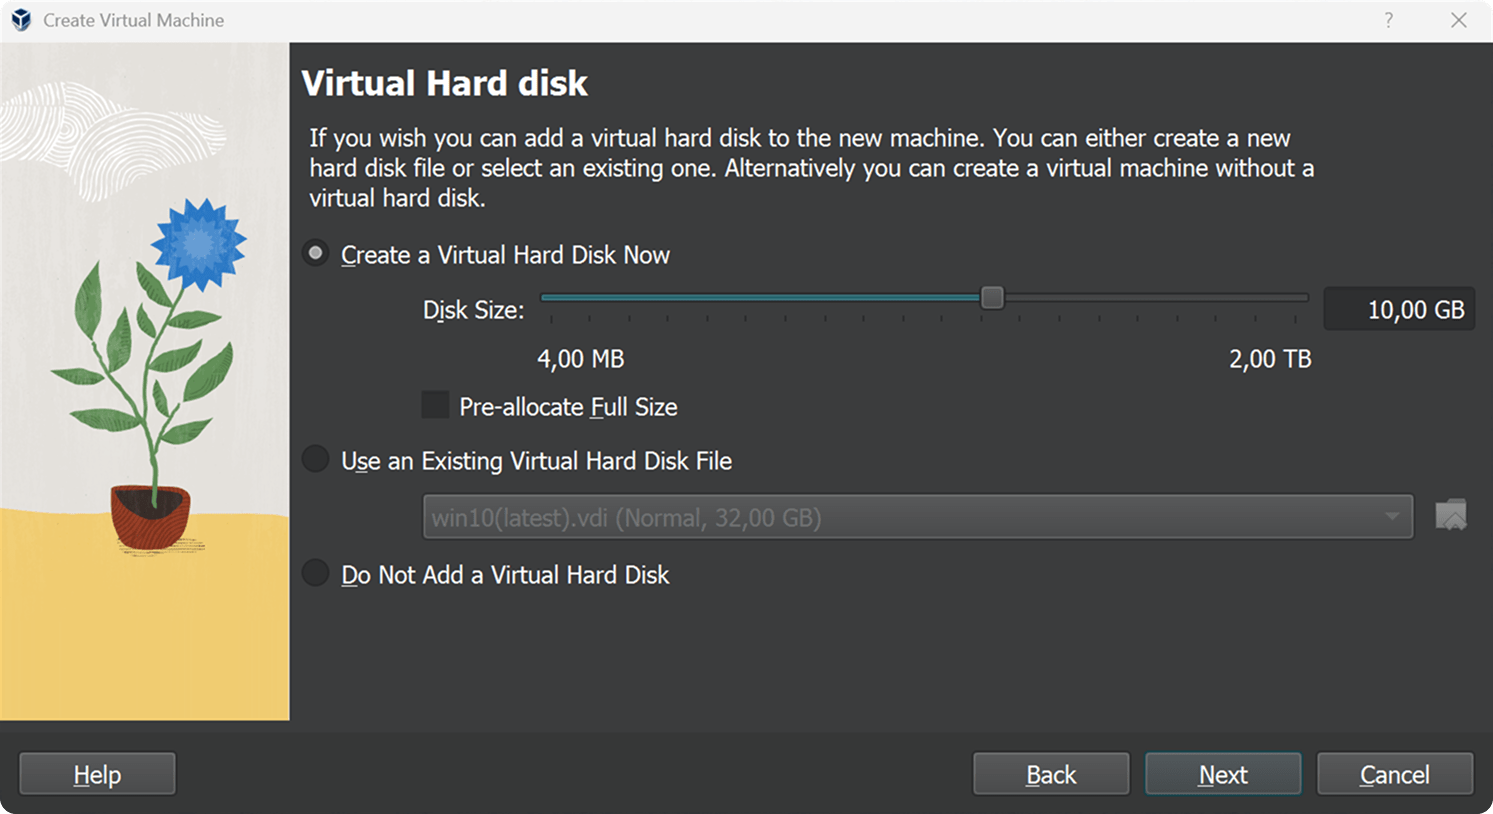
Open VirtualBox in Windows. In the Machine menu choose New. Configure the settings as shown in the screenshots below.
1. Virtual Machine and Operating System
- Name: Ubuntu Server
- ISO Image: Specify the path to the downloaded ISO file
- Type: Linux
- Version: Ubuntu (64 bit)
- Skip Unattended Installation: Yes
2. Hardware
- Base Memory: 4096 MB
- Processors: 2
3. Virtual Hard Disk
- Disk Size: 10GB
4. Network Configuration
Open the settings of the created Ubuntu Server machine. Go to the Network tab and select Bridged Adapter.
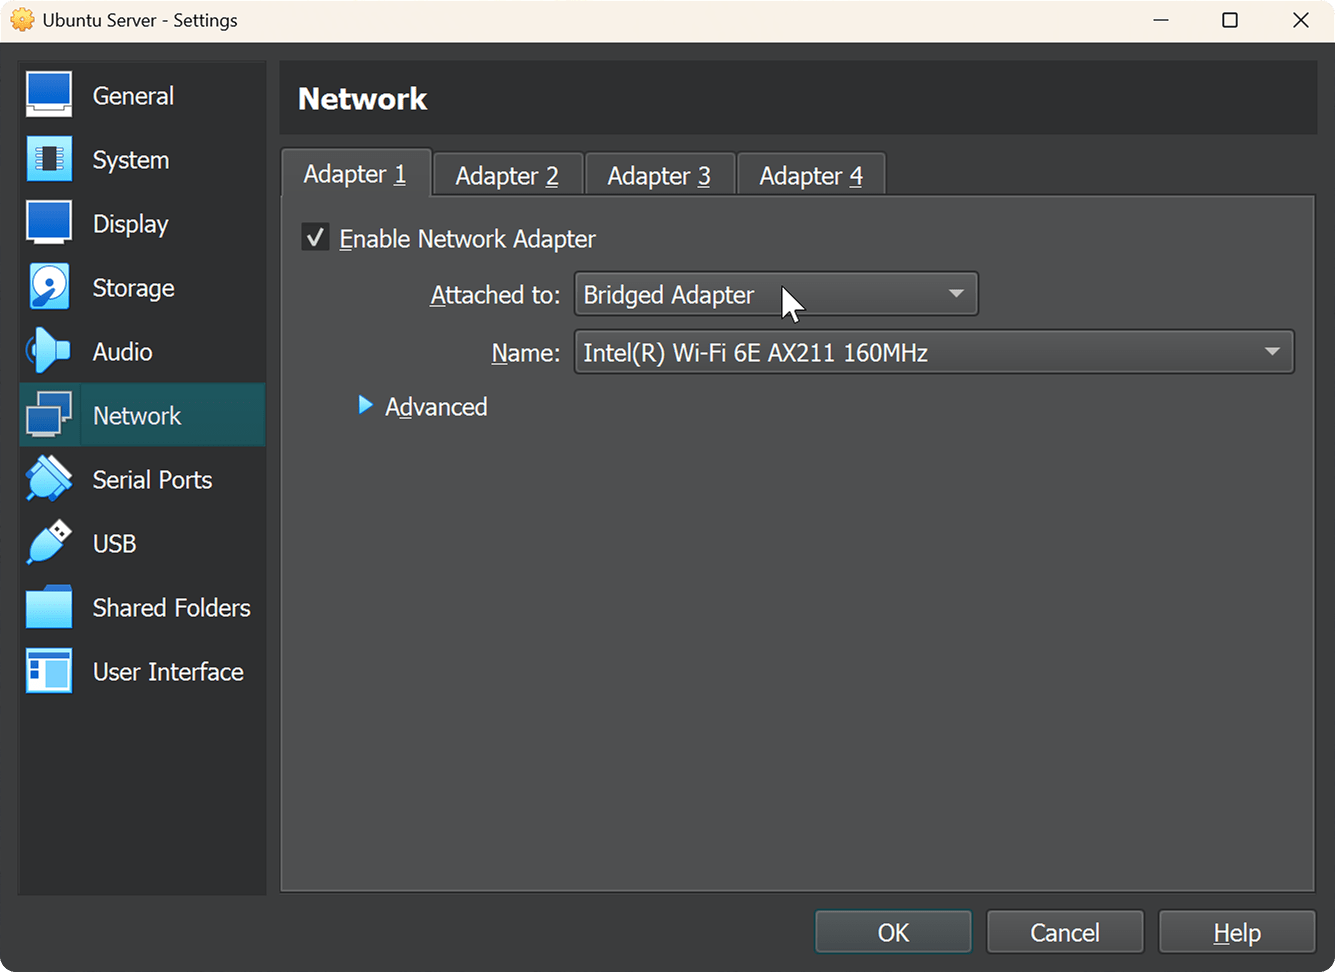
Now the virtual machine can connect to other devices in the network, and other devices — to it.
Installing Ubuntu Server
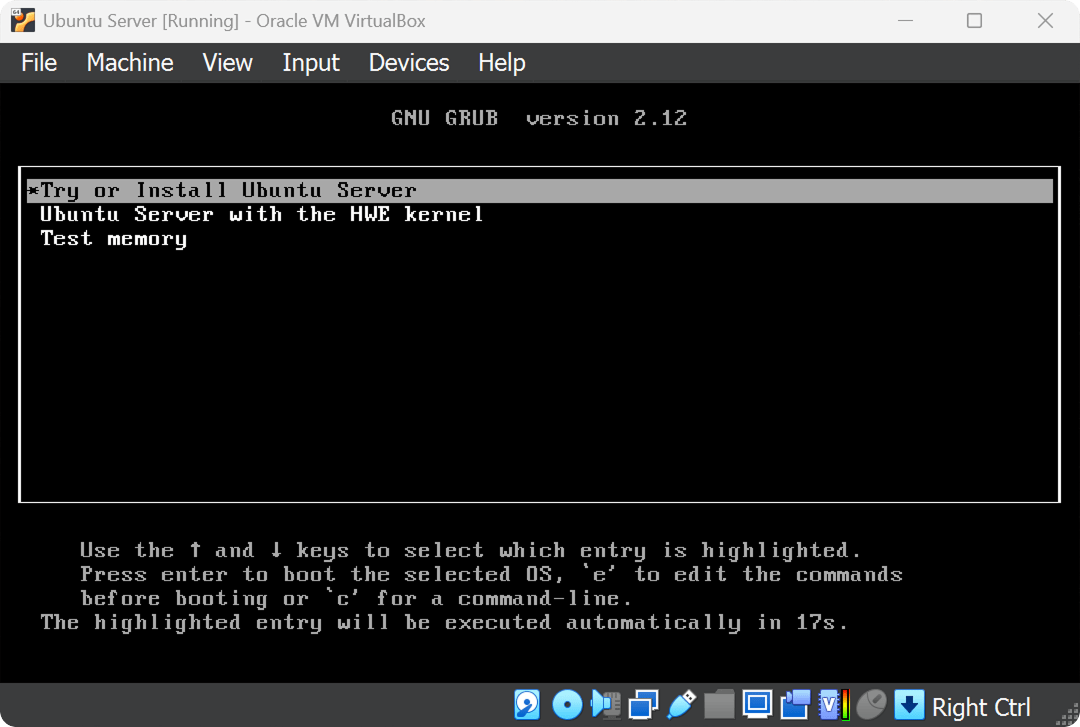
Start Ubuntu Server and follow the installer. Use arrow keys, Tab, space, and Enter to navigate.
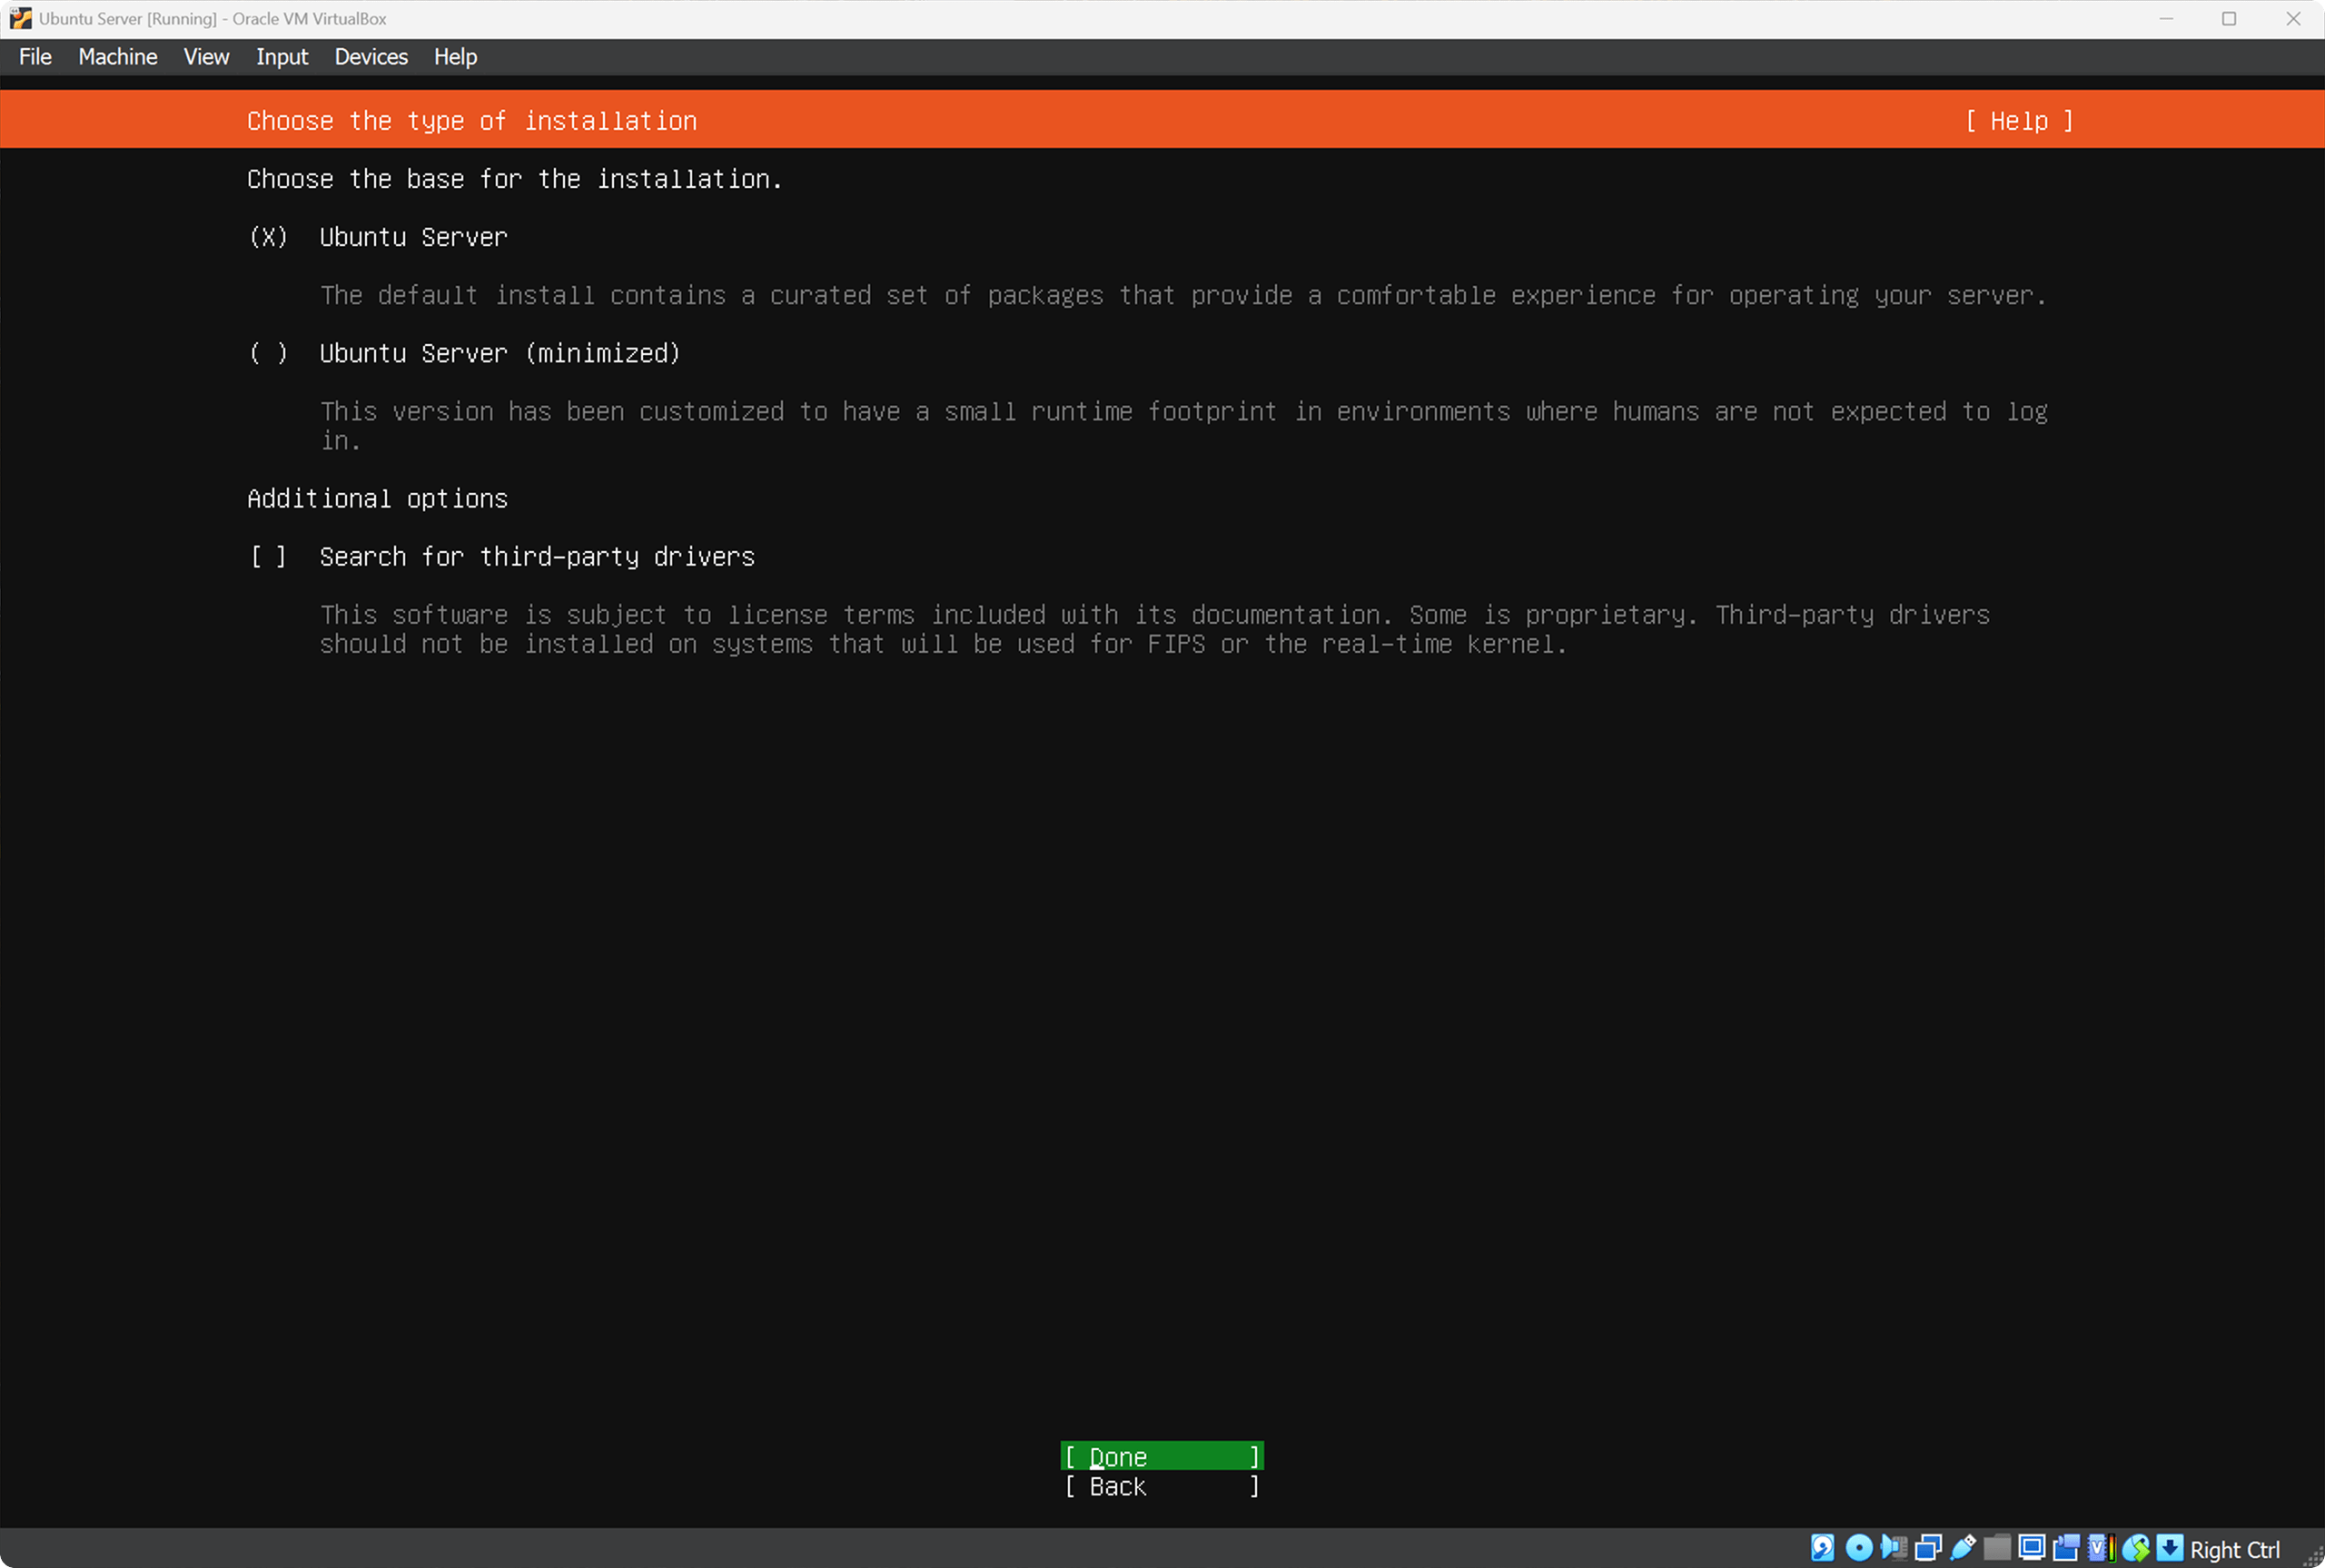
On the Choose the type of installation screen choose Ubuntu Server.
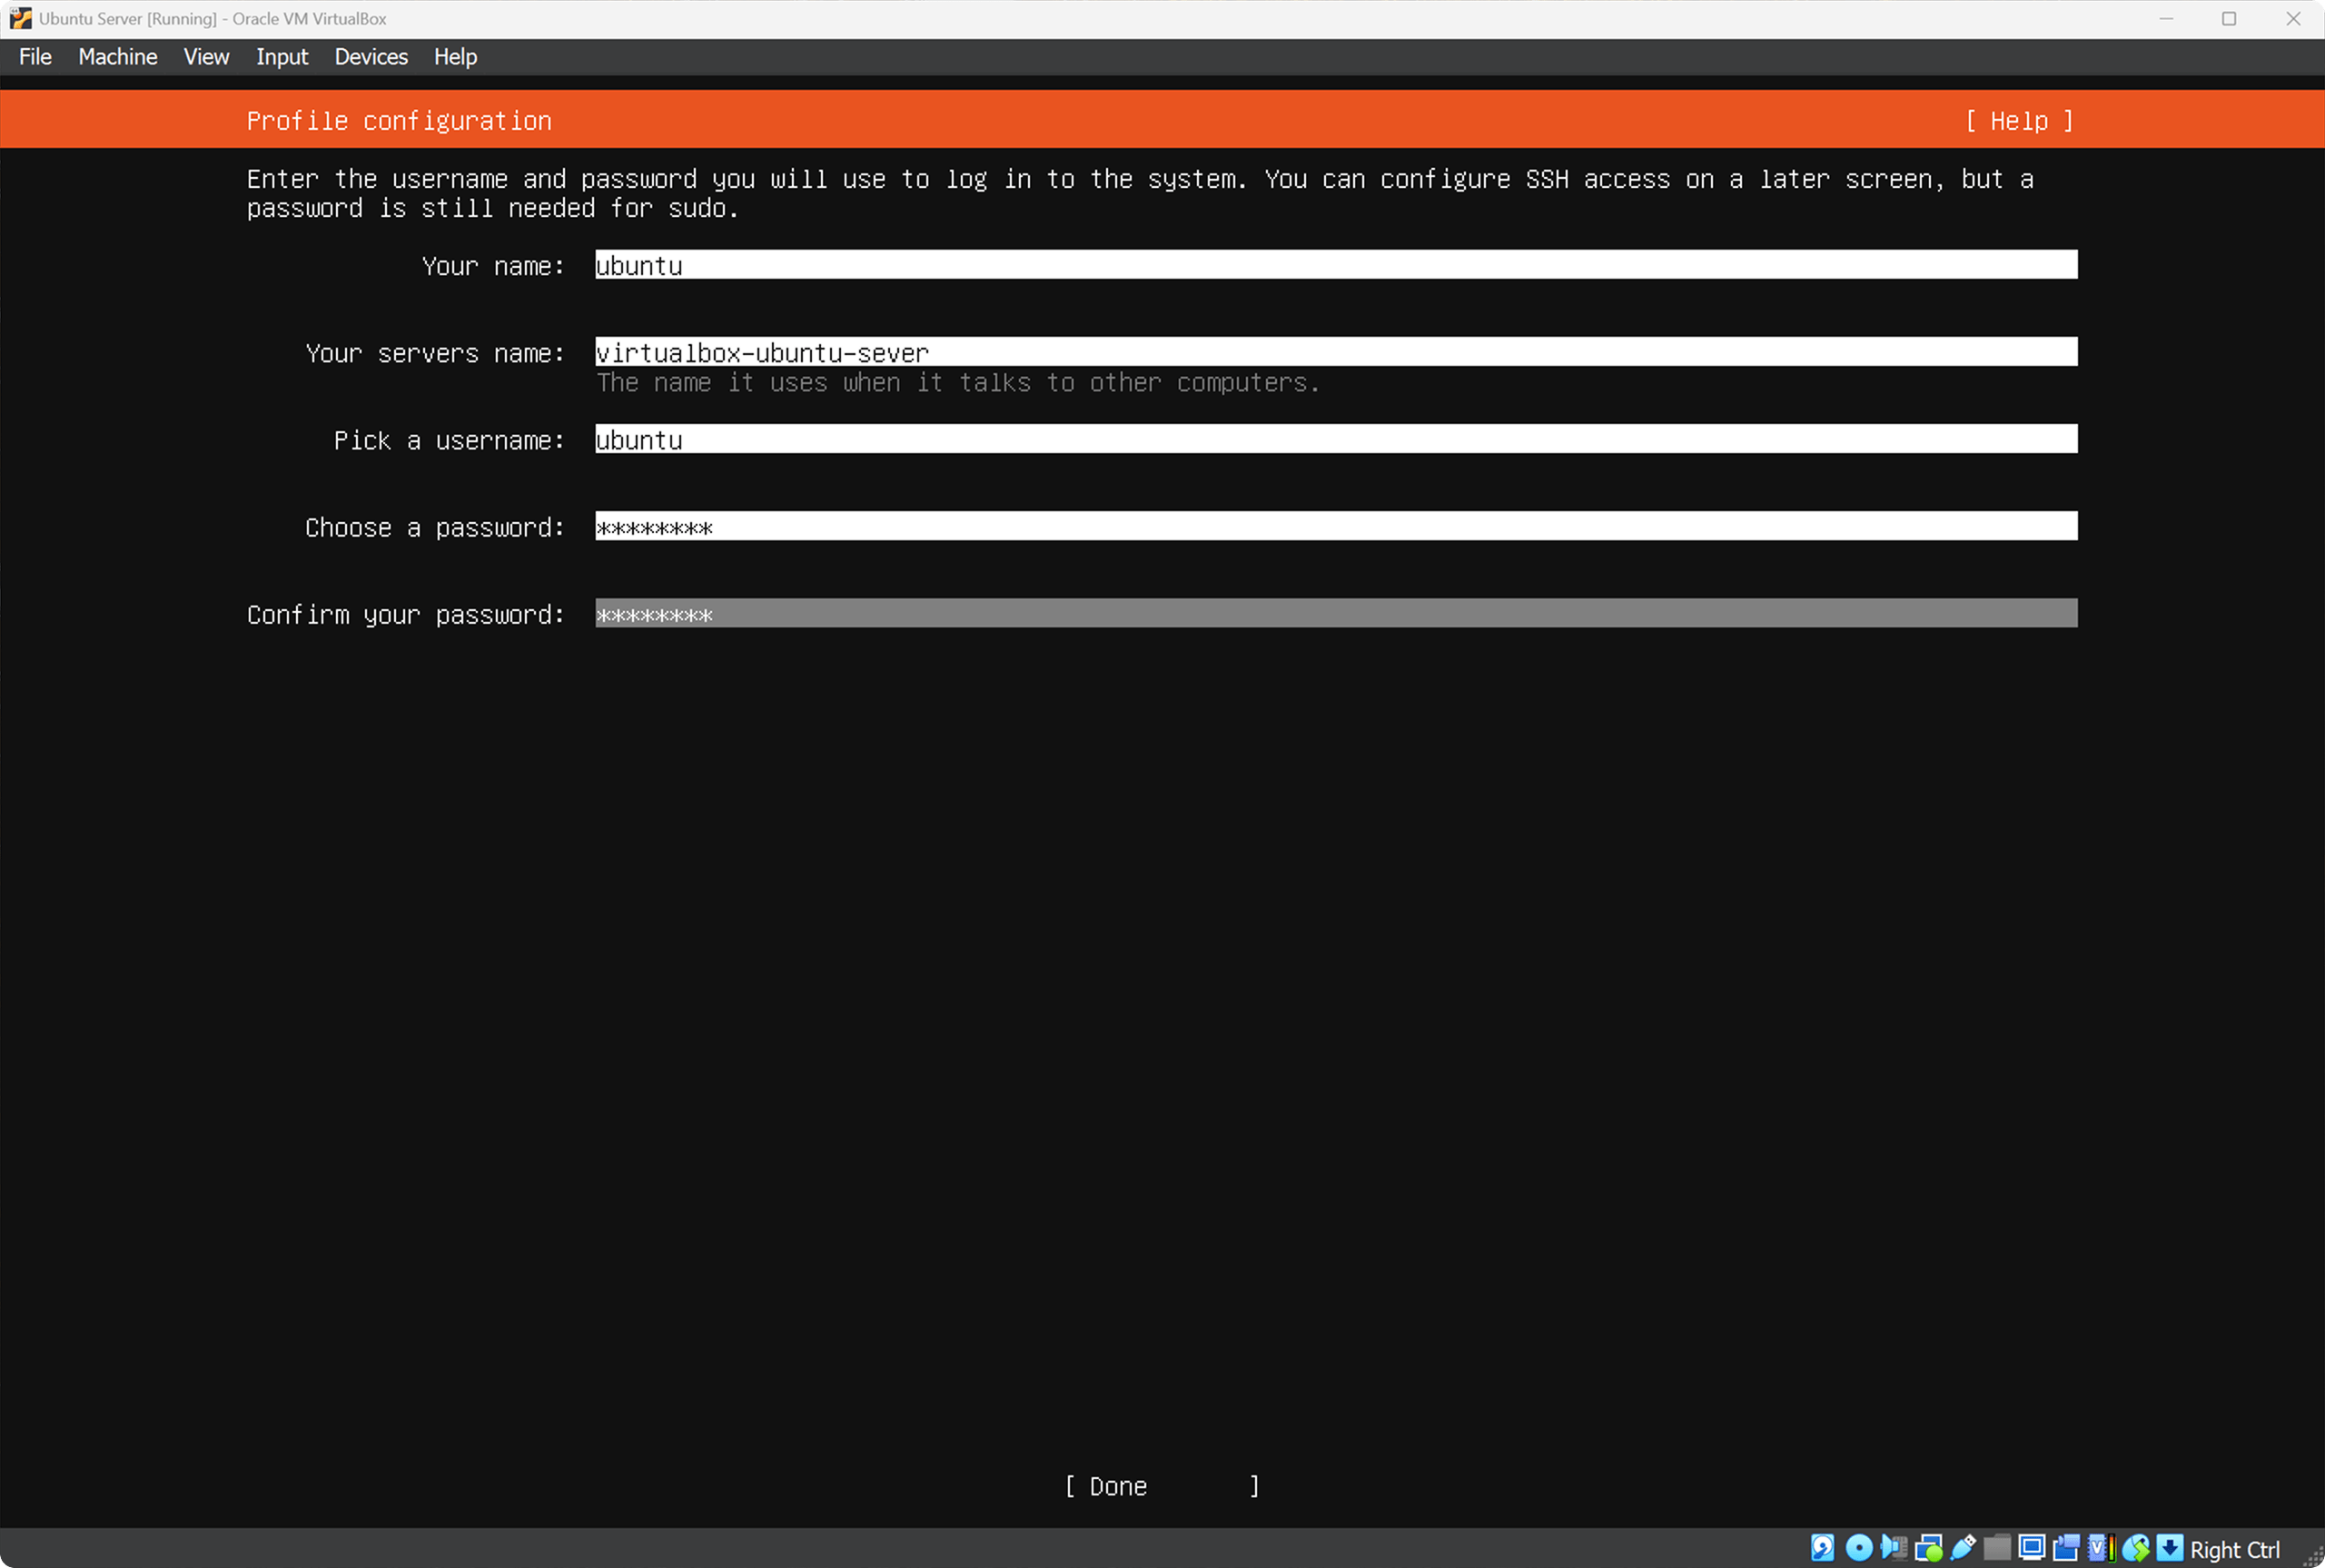
On the Profile configuration screen create a user. I will create a user ubuntu with password password.
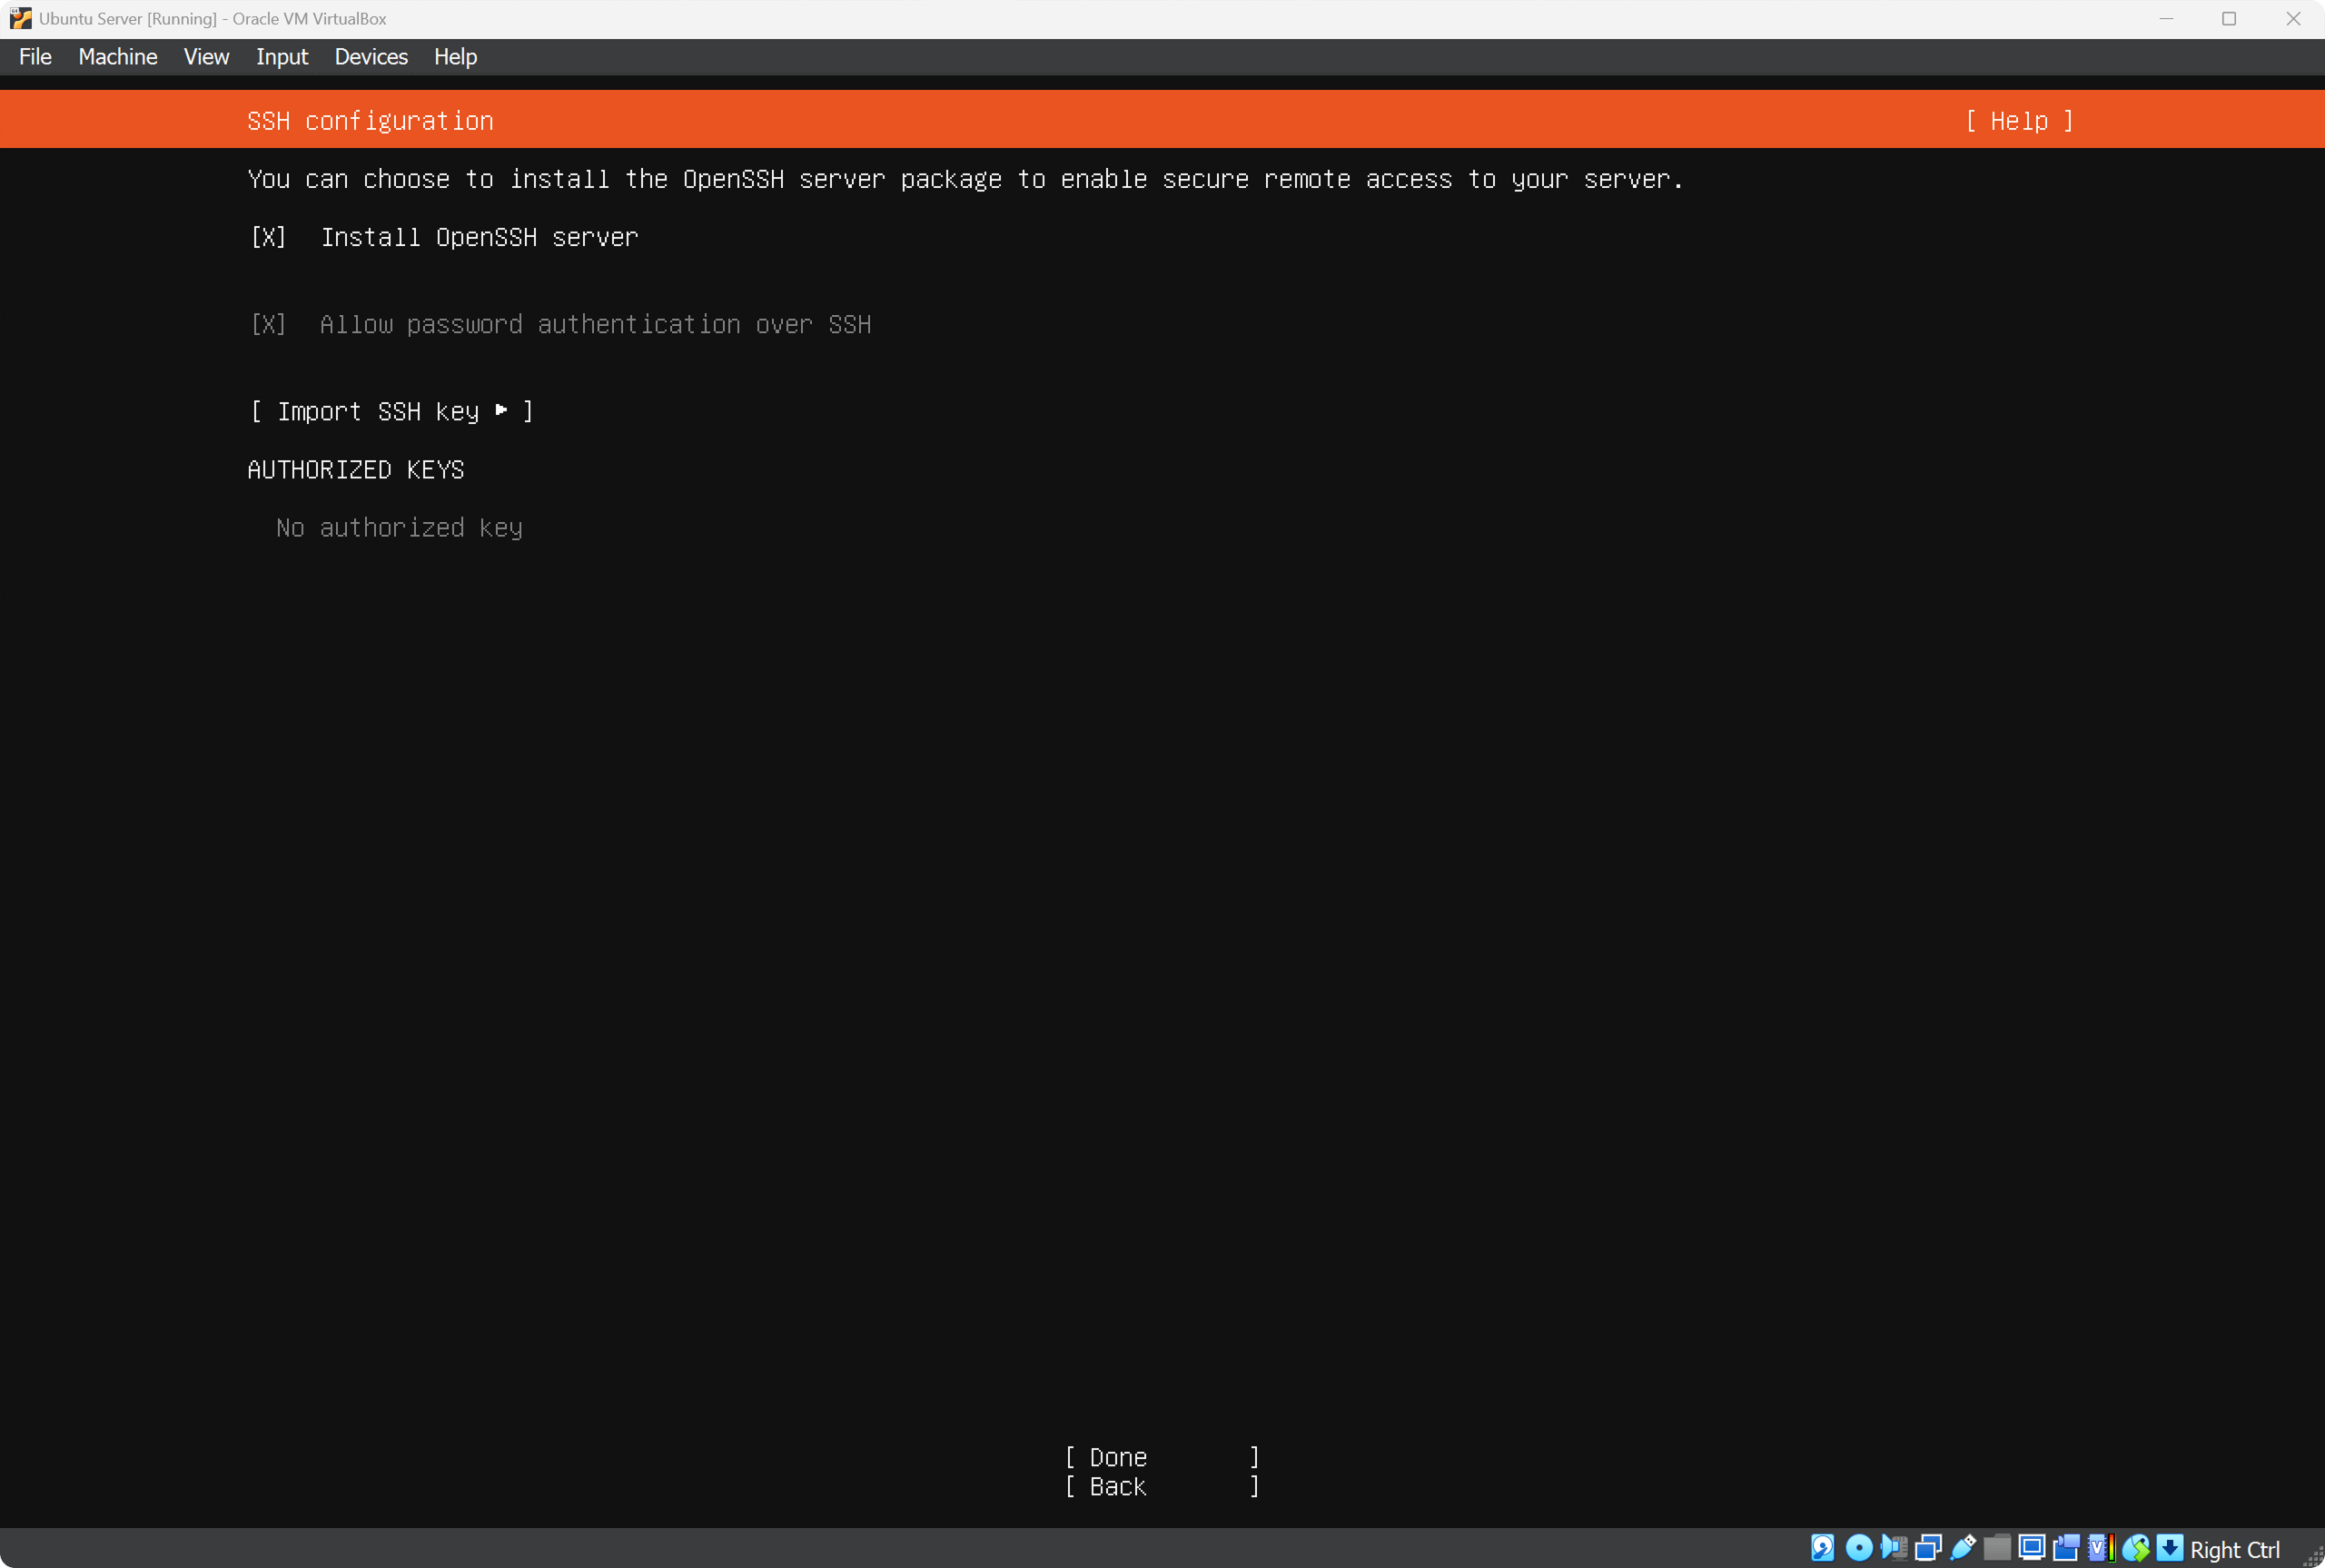
On the SSH configuration screen check the box Install OpenSSH server.
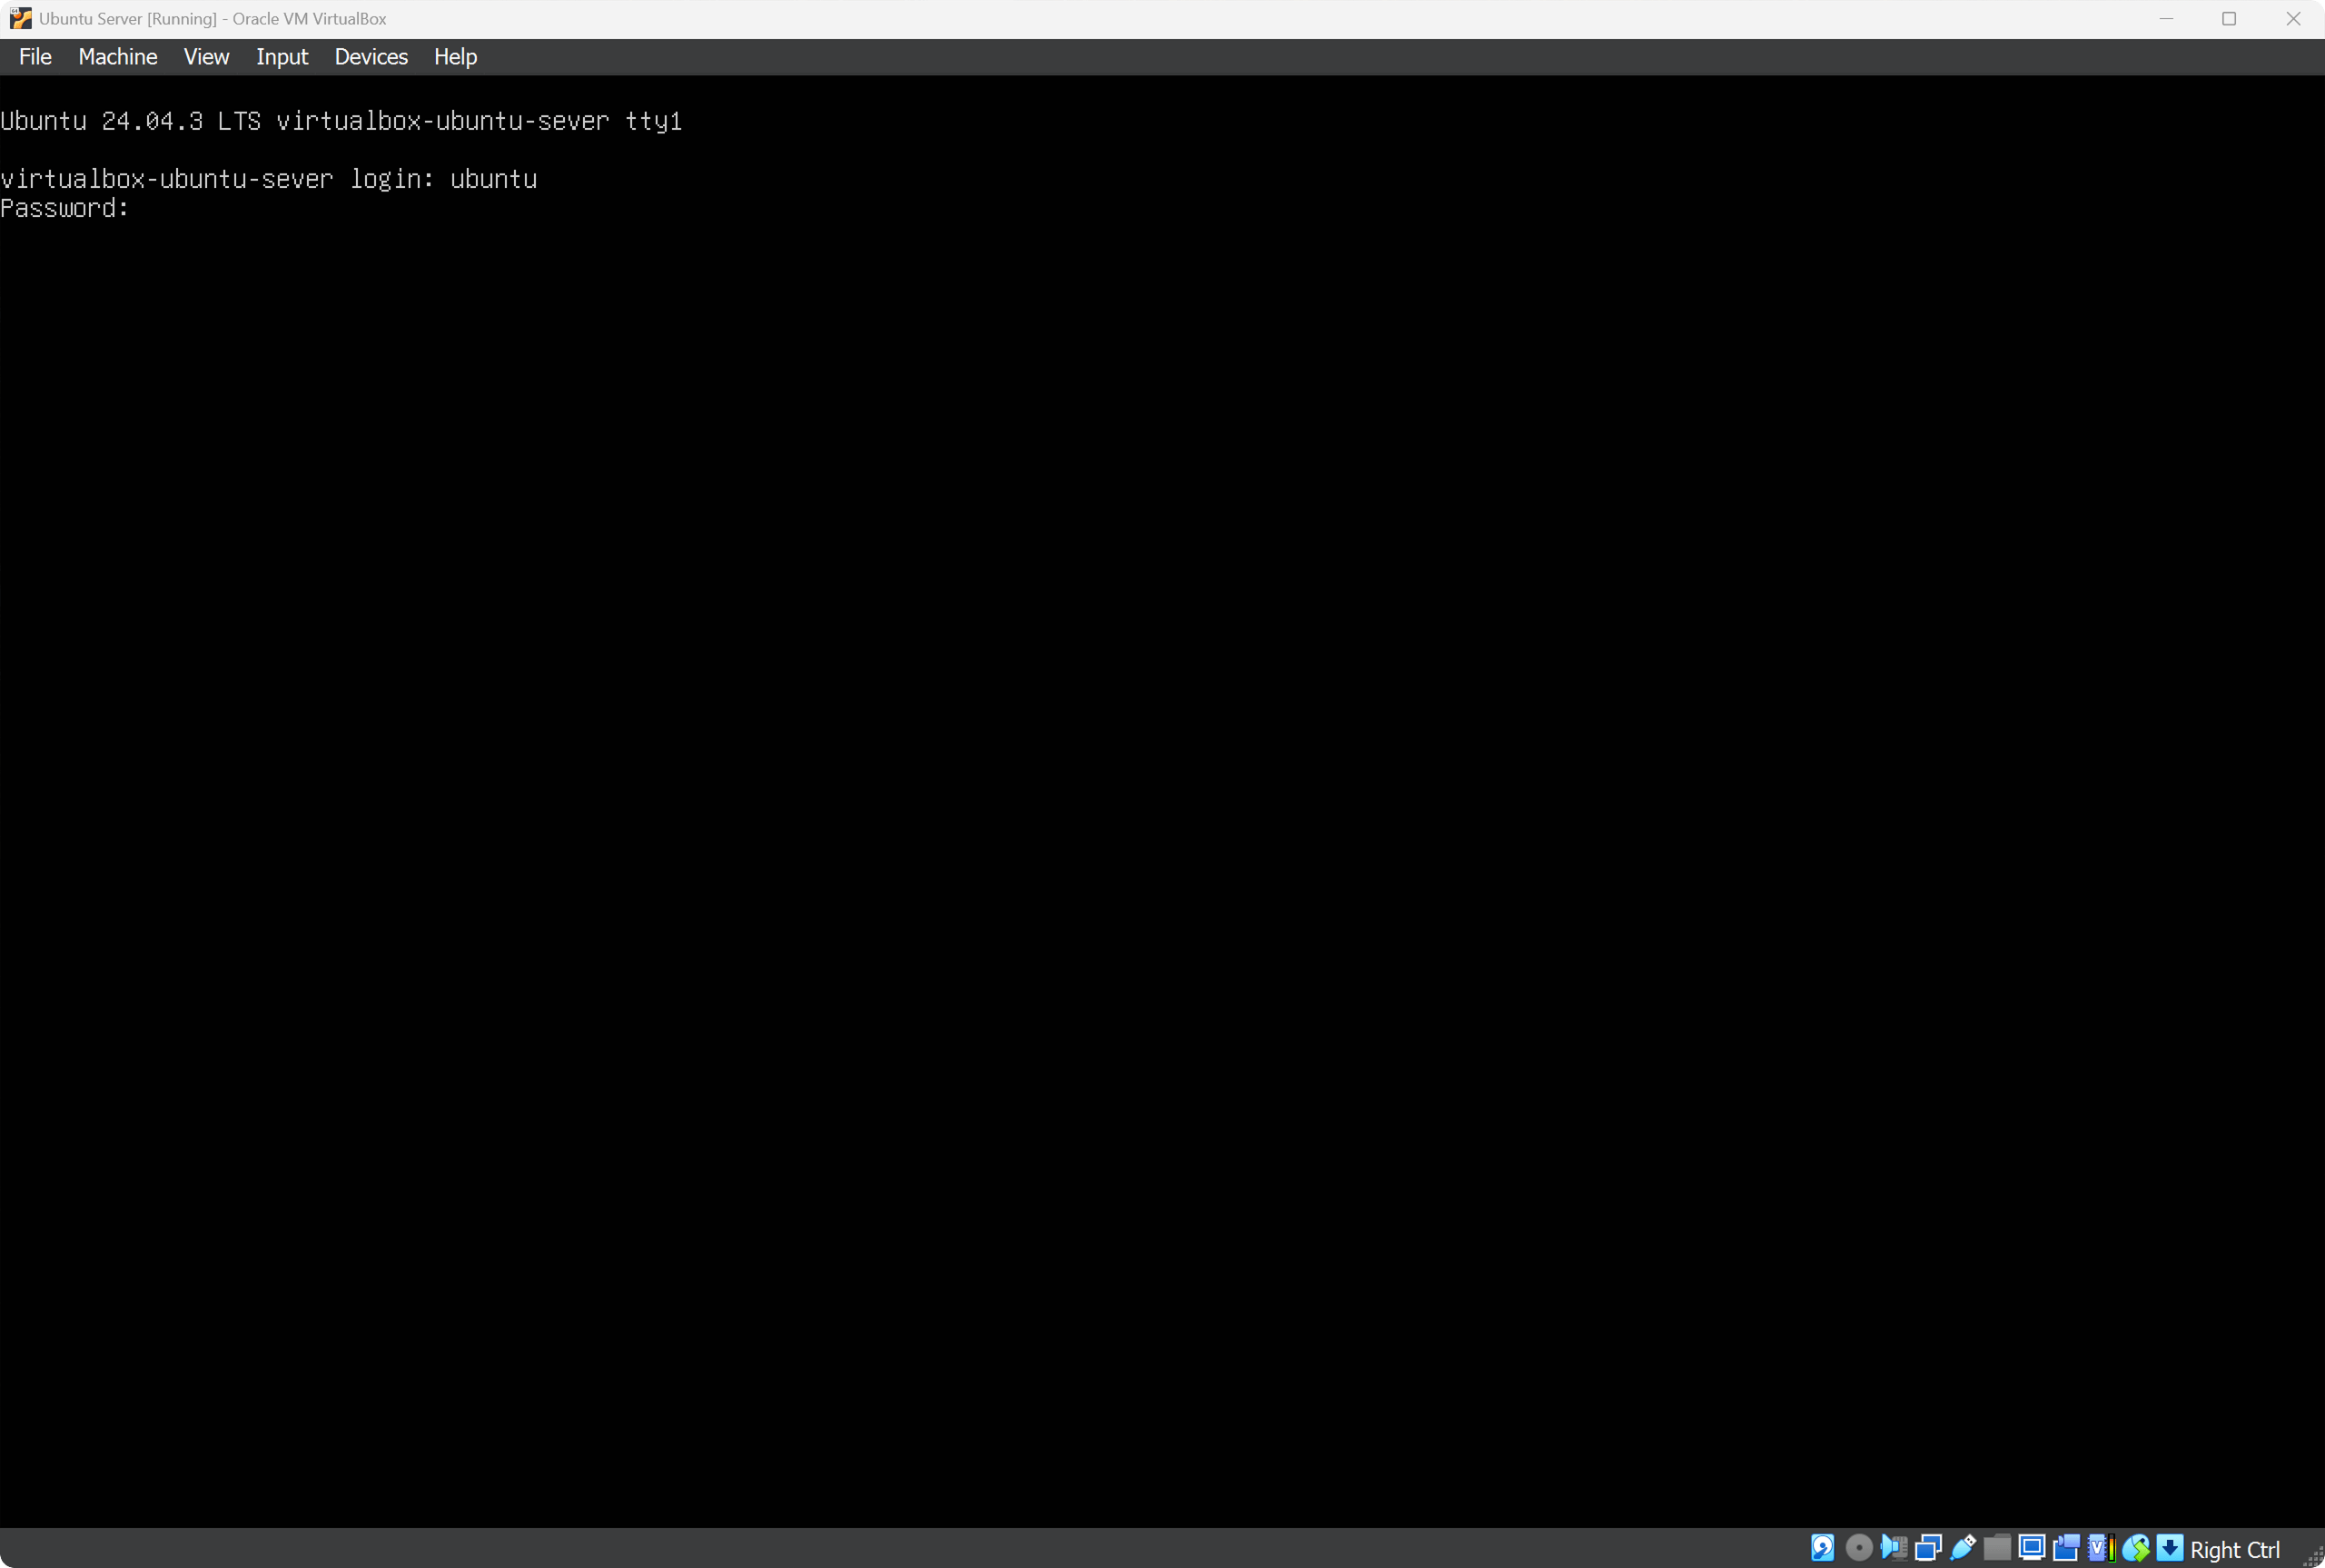
After installation finishes, Ubuntu Server will reboot and show the login screen. Login as ubuntu with password password.
SSH allows remote access to Ubuntu terminal from Windows, so let’s enable SSH:
Enable SSH service:
sudo systemctl enable ssh
Check SSH status:
sudo systemctl status ssh
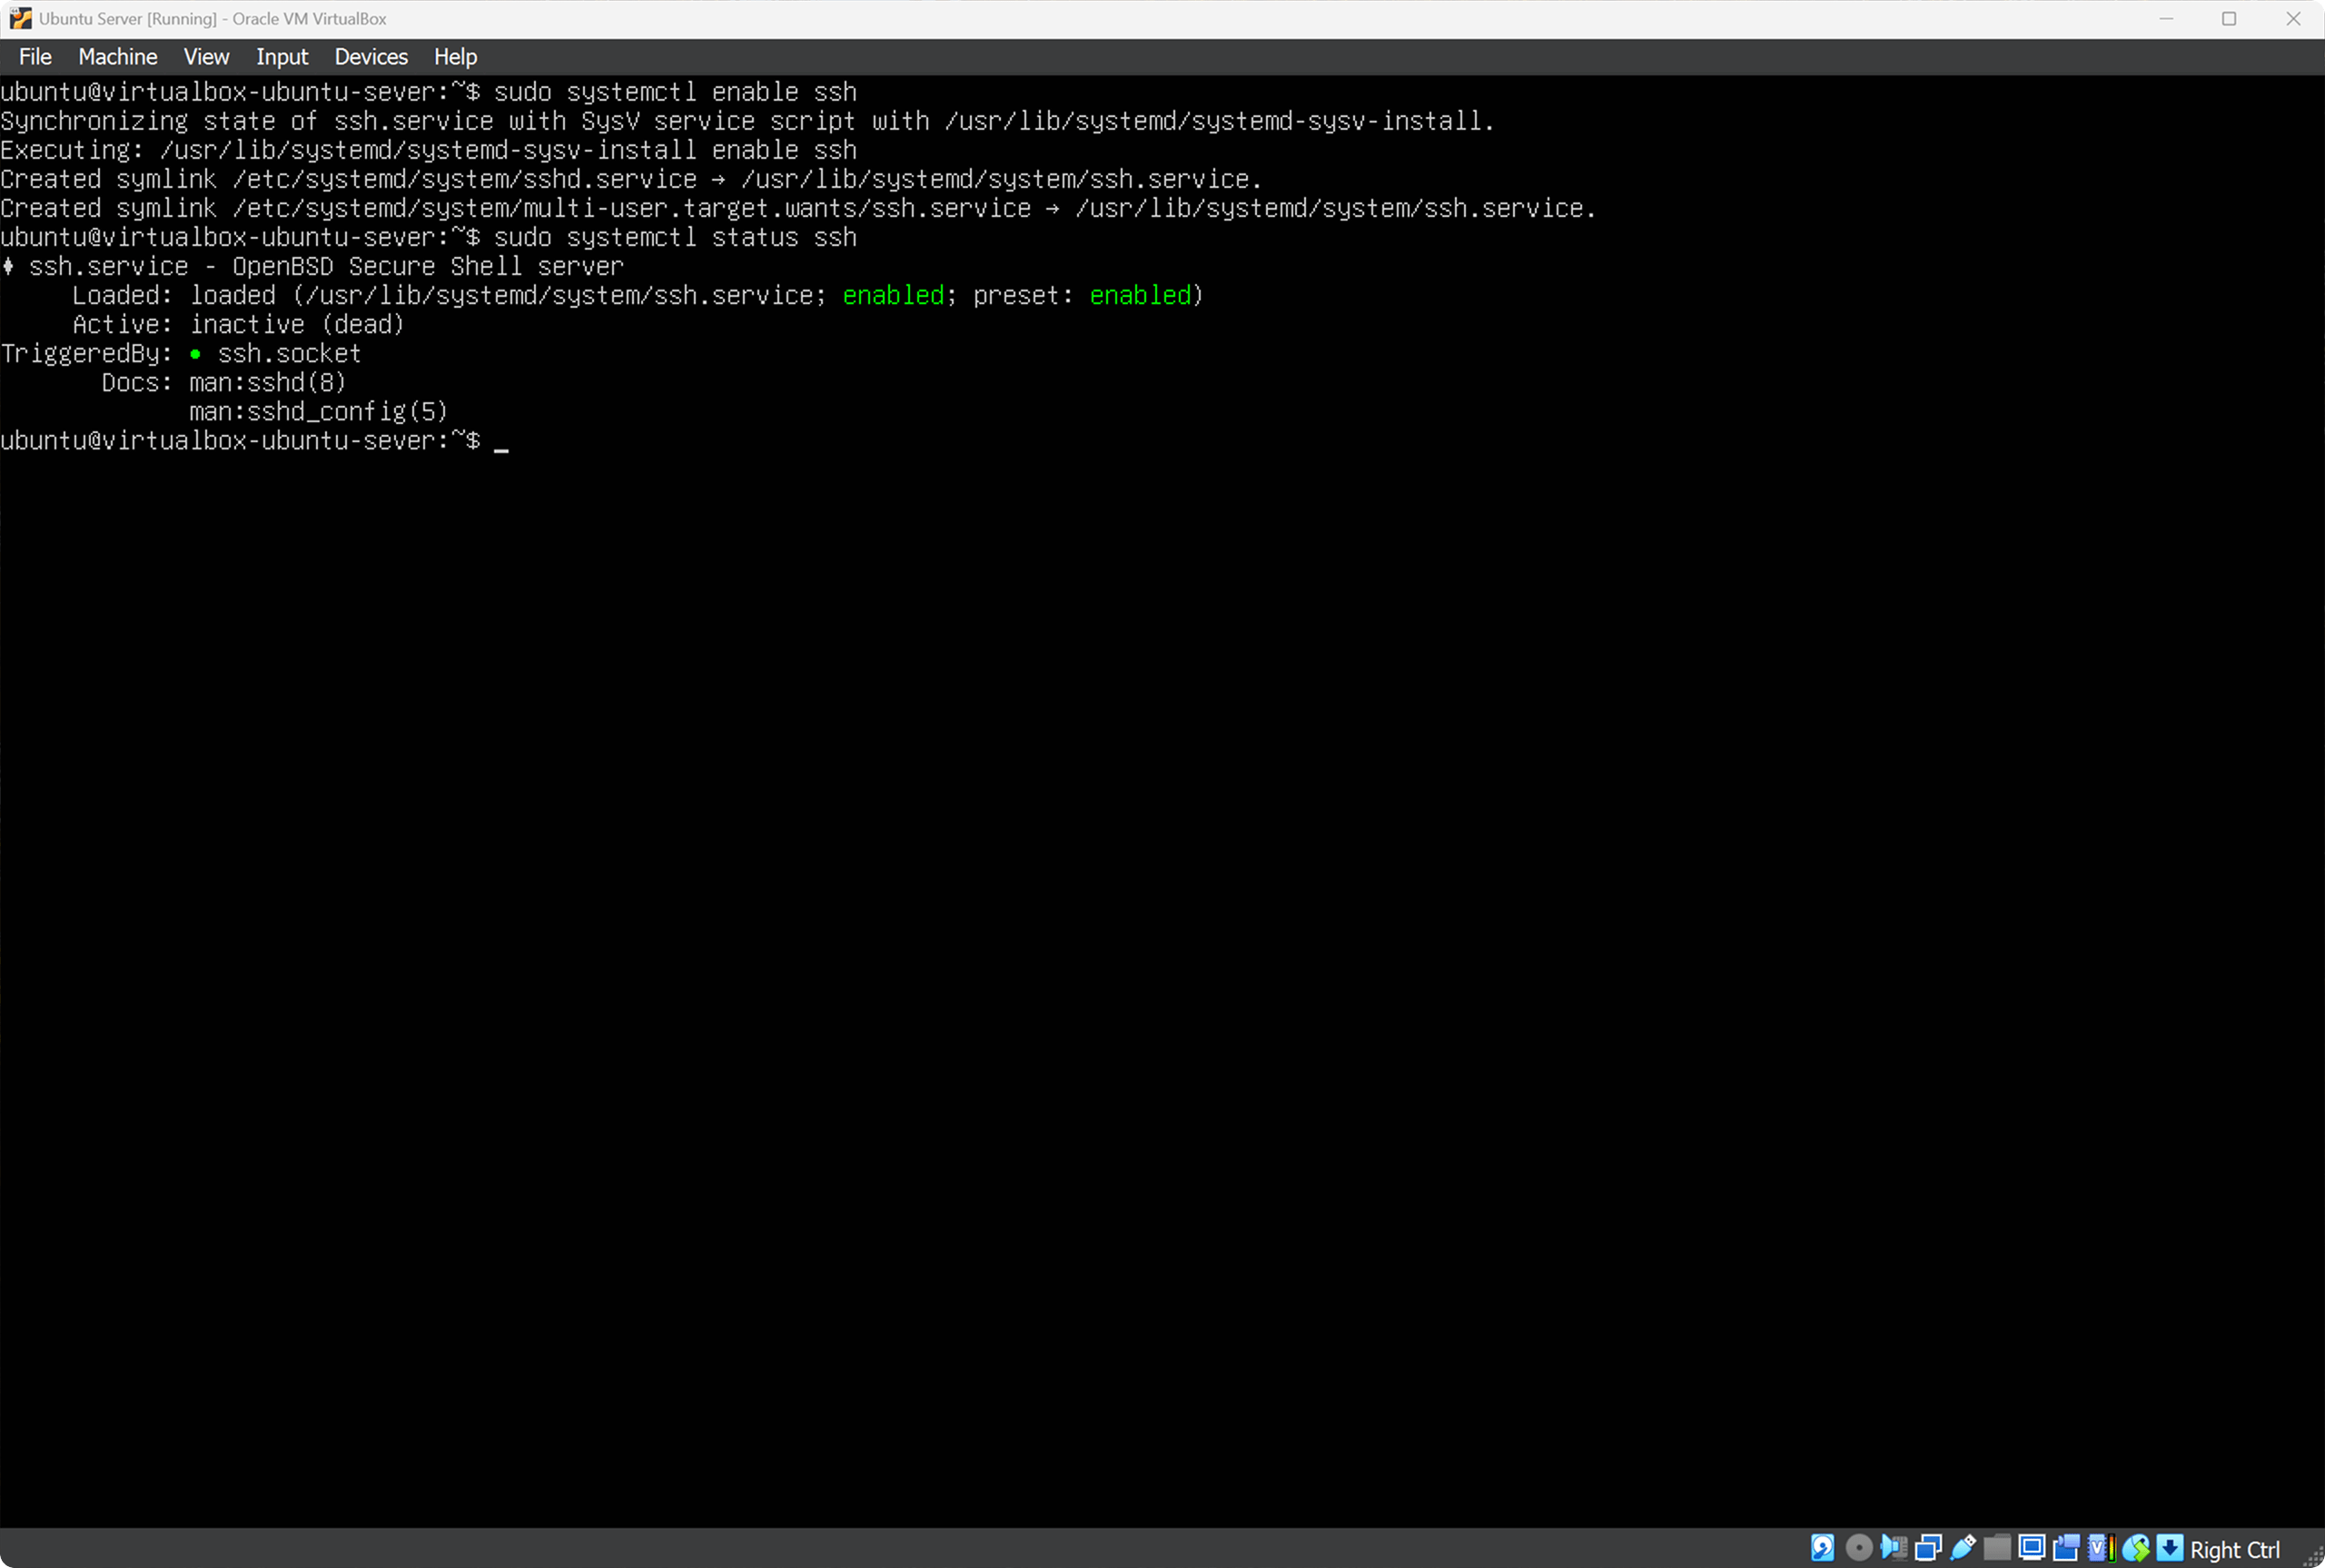
Status enabled means SSH is running.
To connect via SSH we need the IP address of the Ubuntu Server. Check the address assigned by your router:
ip a
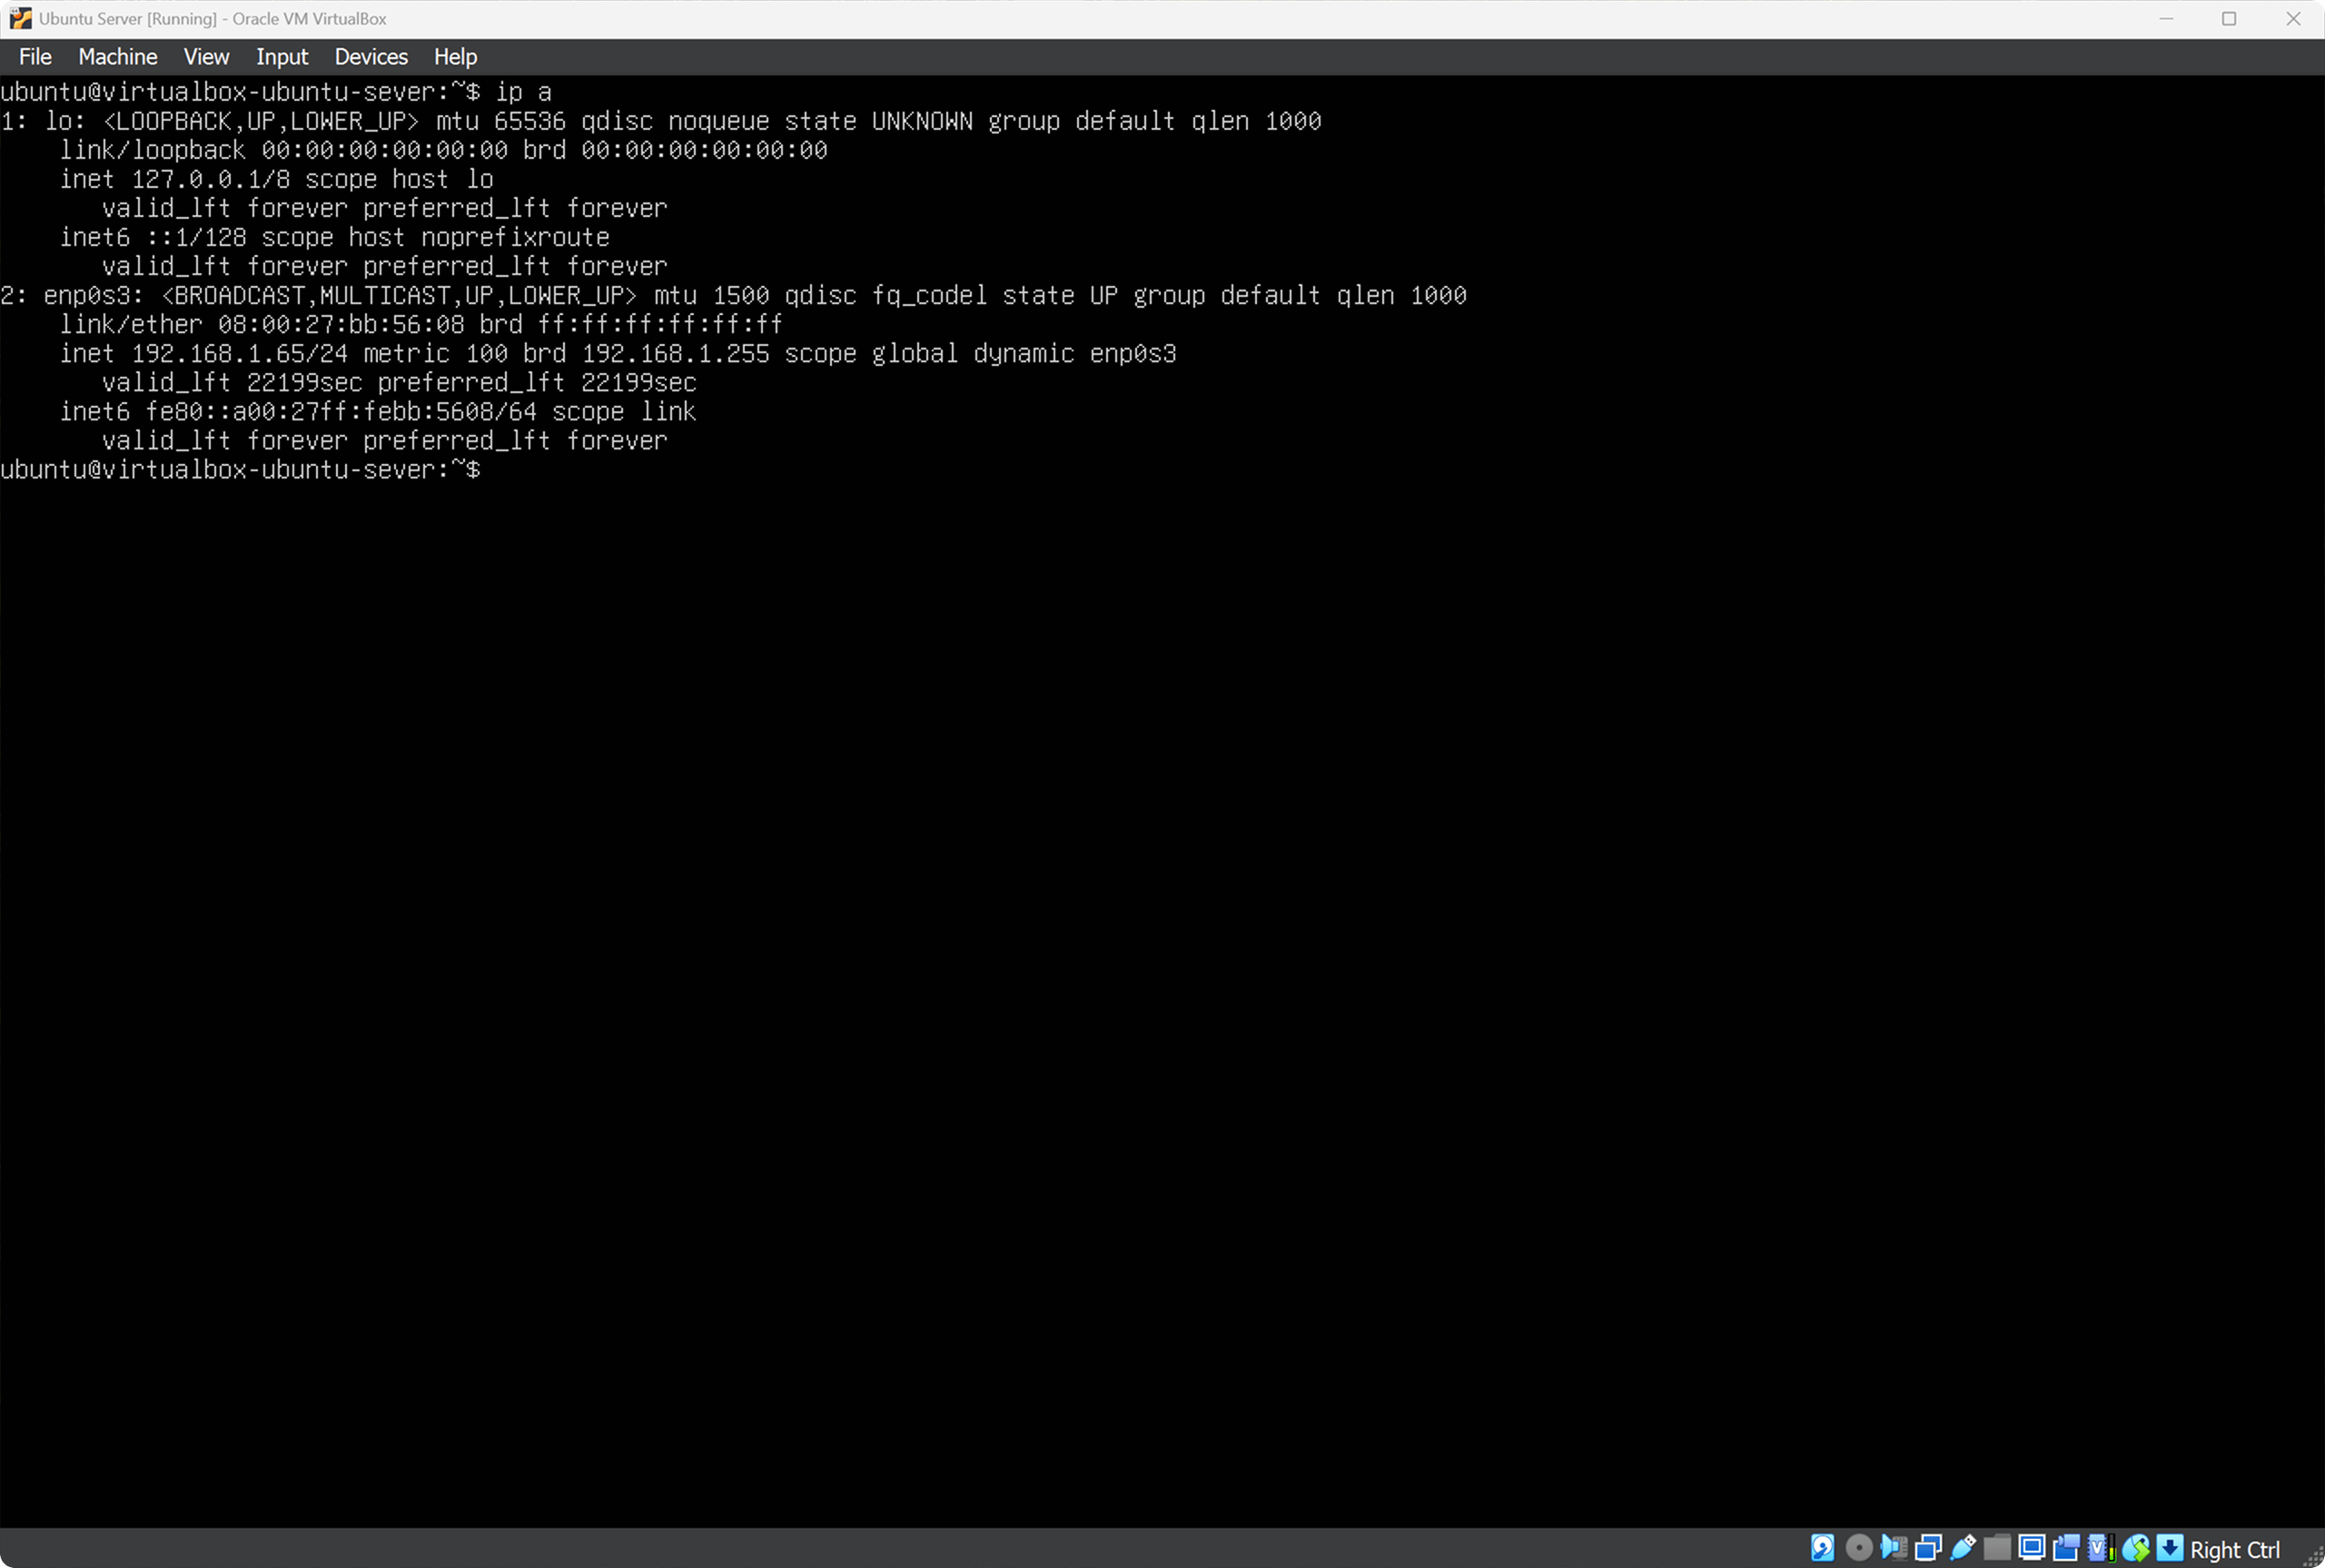
We are looking for the line:
inet 192.168.1.65/24
Our IP: 192.168.1.65 — we will use it for remote connection from Windows.
I recommend assigning a static IP to Ubuntu Server in router settings so it doesn’t change.
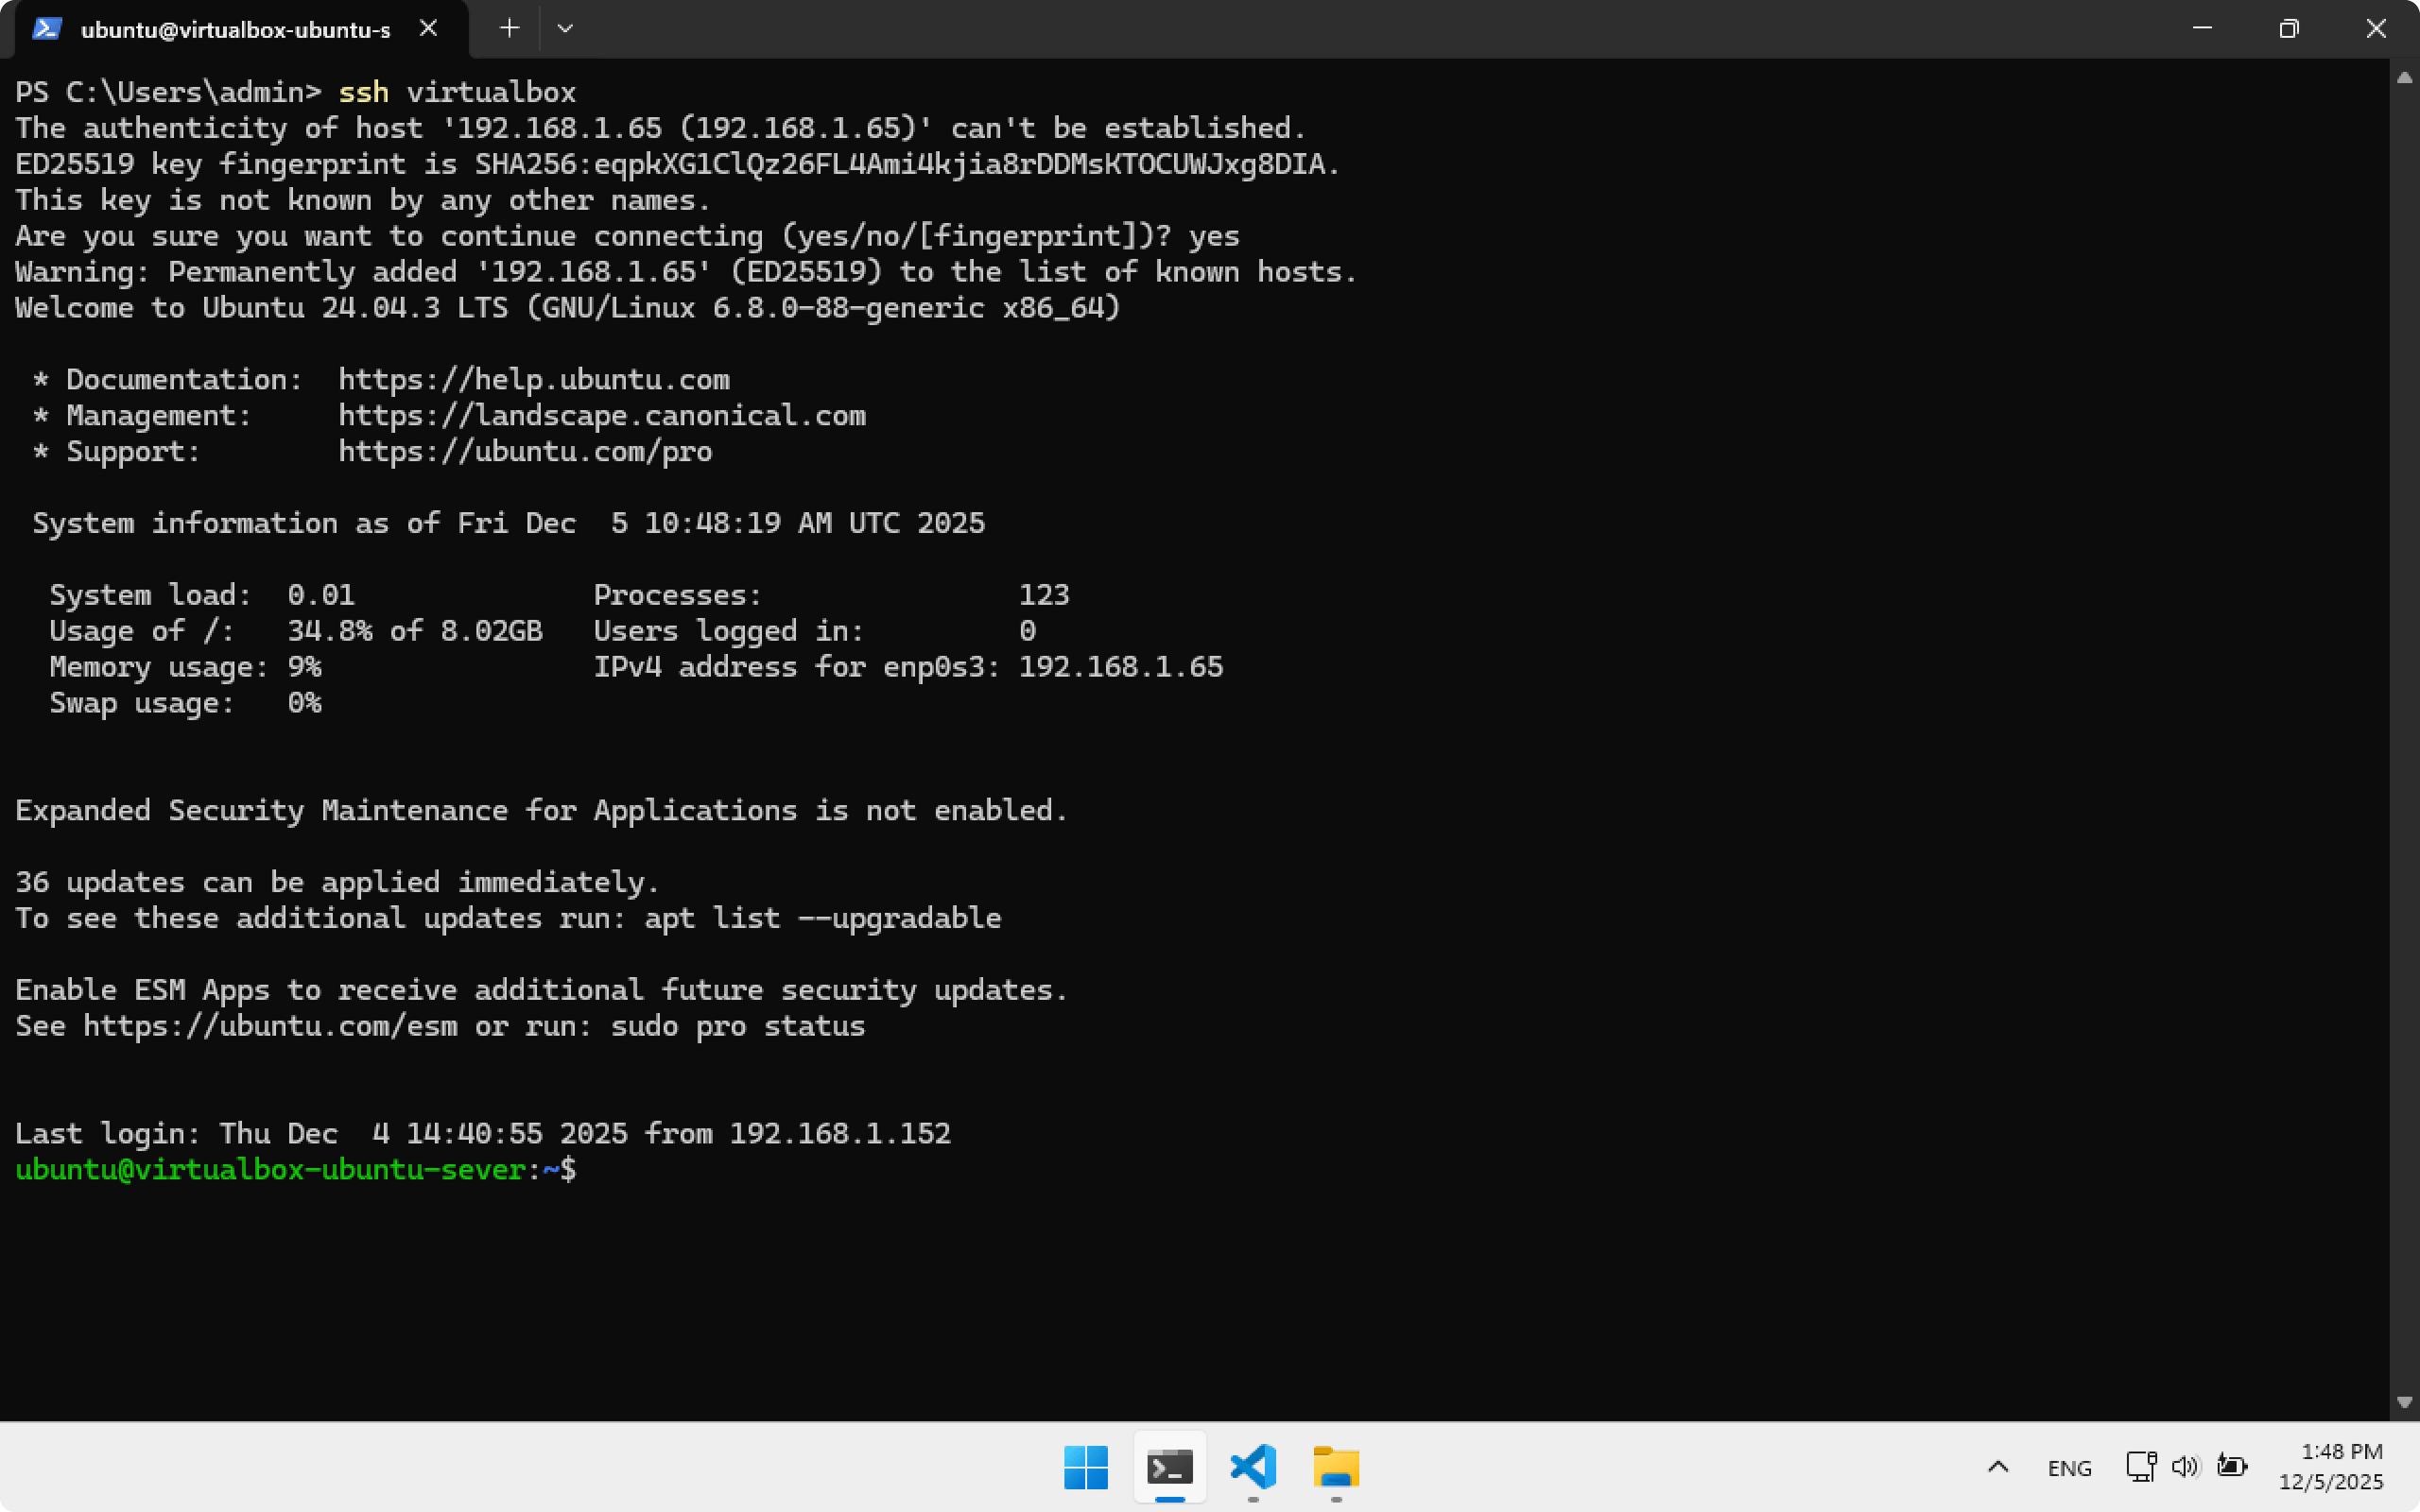
Test SSH connection to Ubuntu Server. Open Terminal in Windows and run:
ubuntu— the user on Ubuntu Server192.168.1.65— its address in our network
ssh ubuntu@192.168.1.65
On first connection, type yes, then enter the password password.
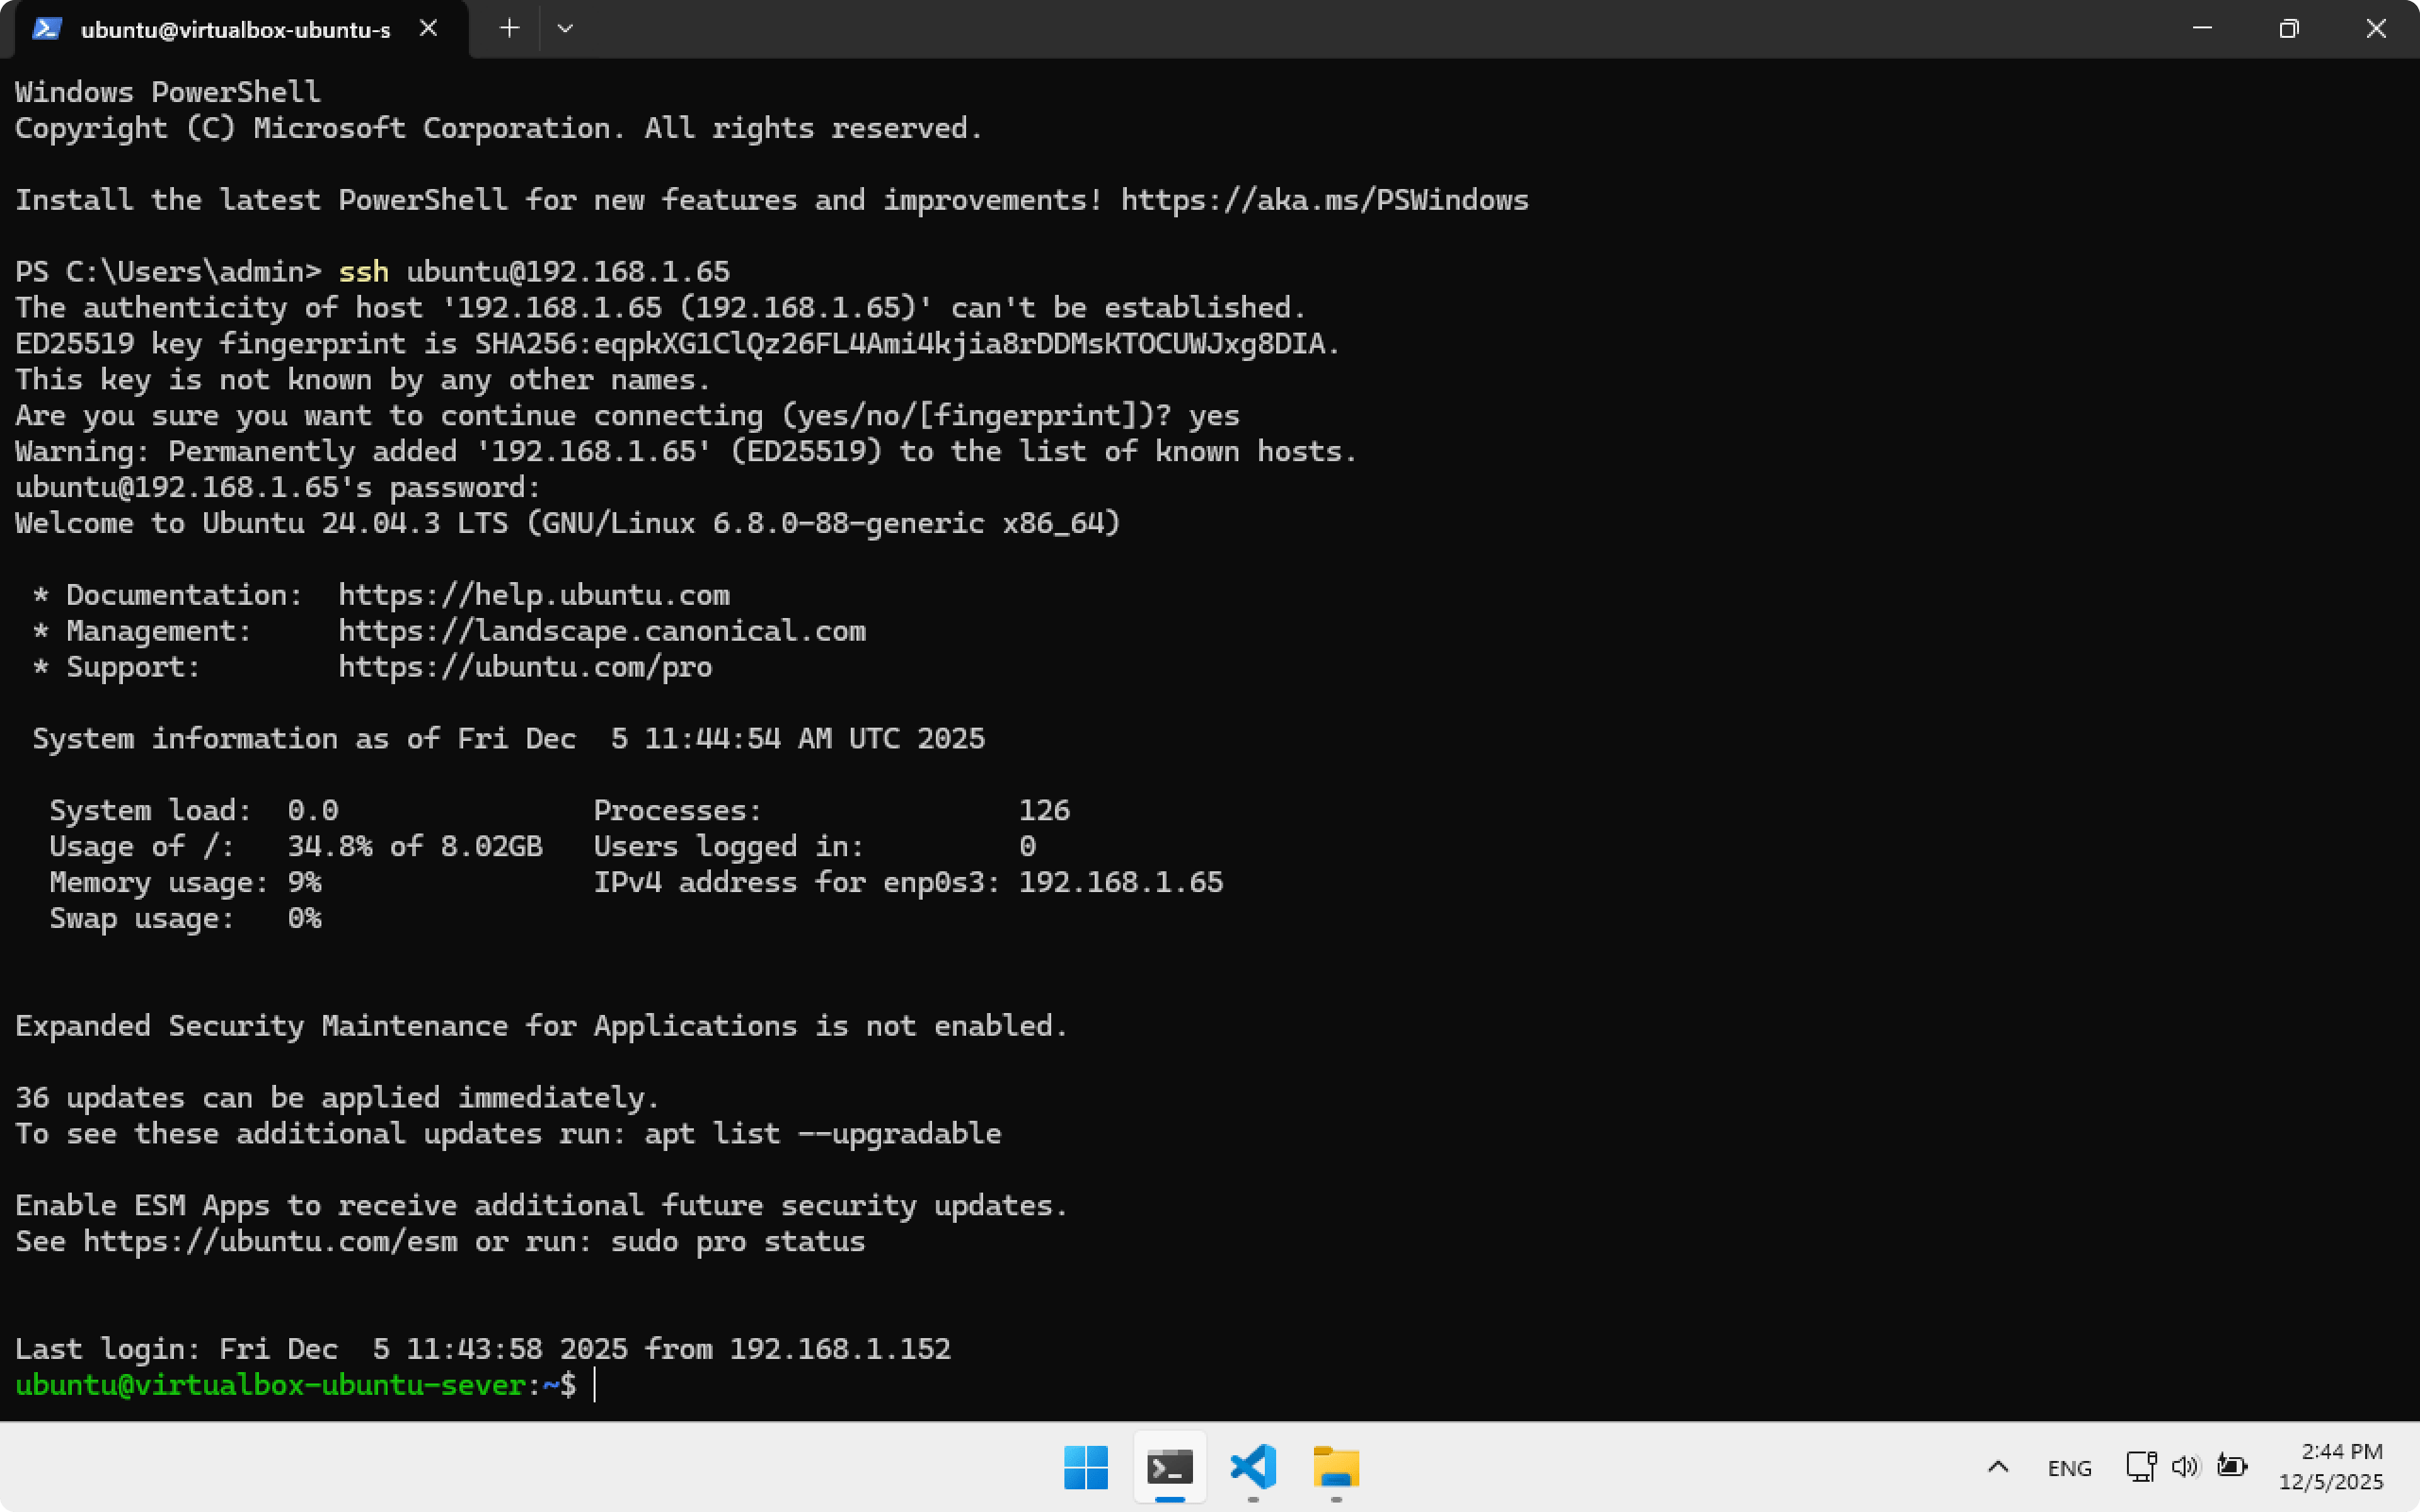
In the last line you will see:
ubuntu@virtualbox-ubuntu-server:~$
This means SSH connection was successful.
ubuntu— the user we are working as now- virtualbox-ubuntu-server — the machine we connected to
Now every command you type in Windows terminal will run on Ubuntu Server.
End SSH session by closing Terminal or running:
exit
Configuring SSH on Windows
Let’s set up SSH key login to avoid typing the password every time.
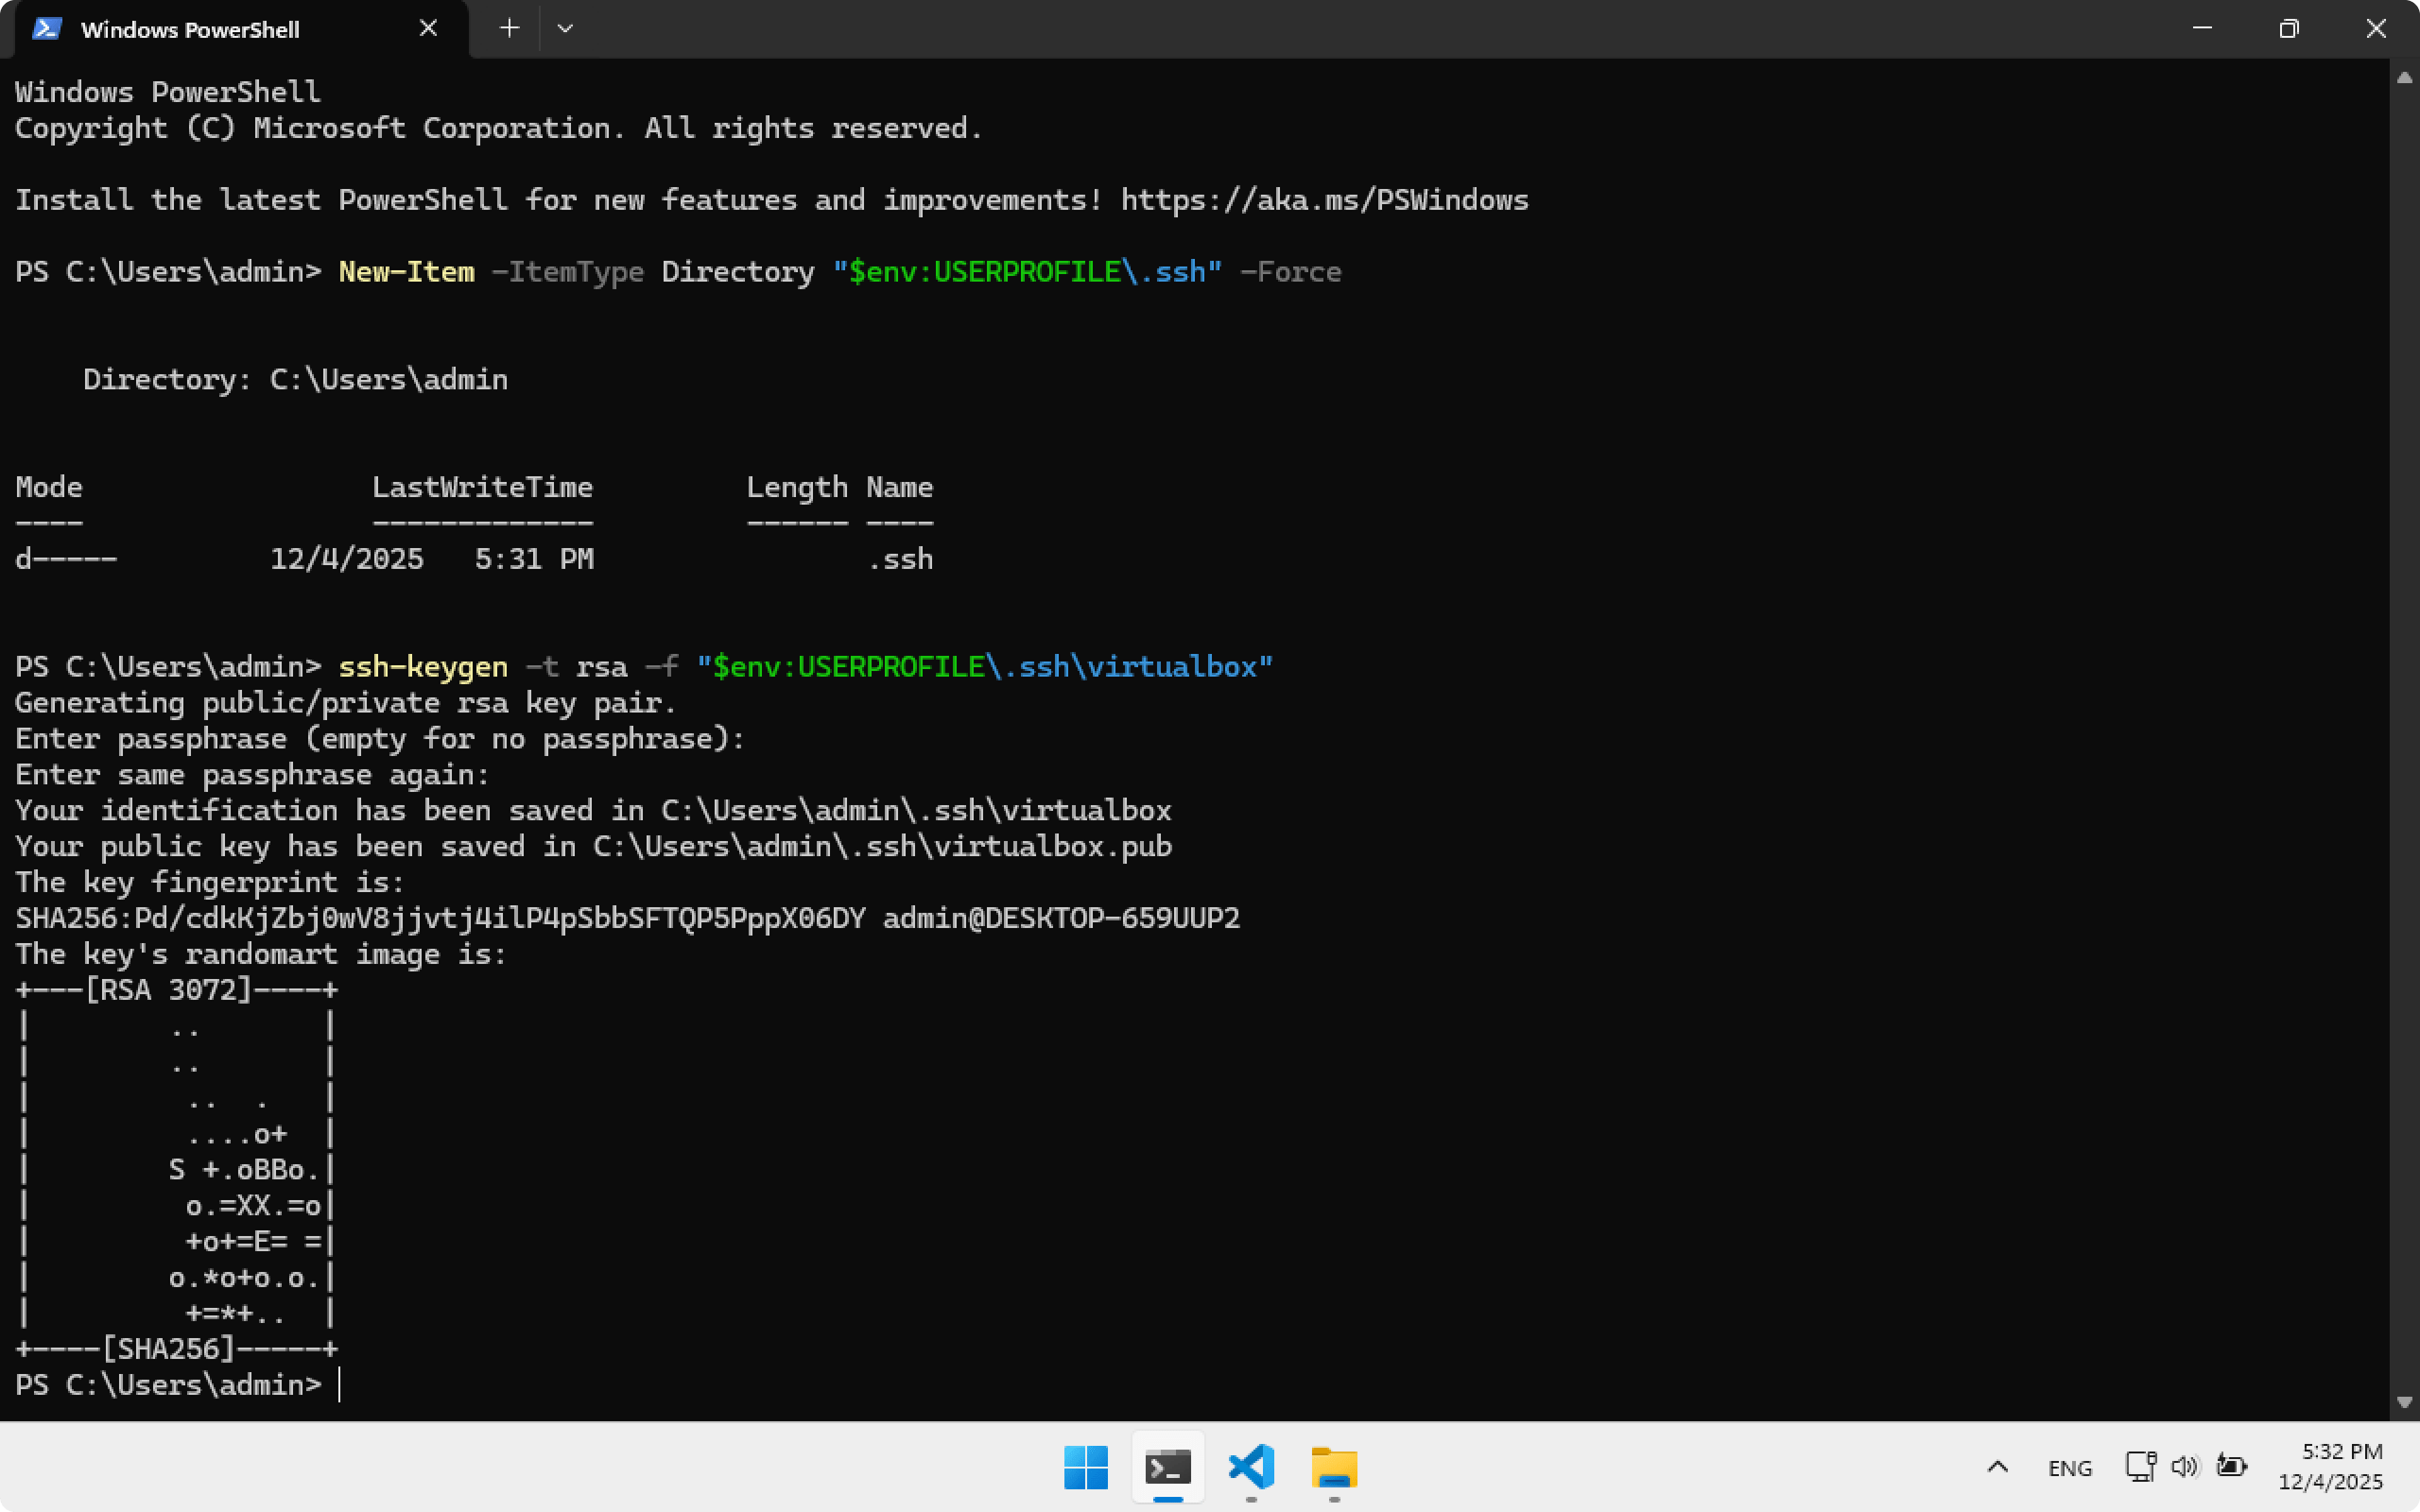
Create the .ssh folder where SSH keys will be stored:
New-Item -ItemType Directory "$env:USERPROFILE\.ssh" -Force
Create an SSH key, skip passphrase by pressing Enter:
ssh-keygen -t rsa -f "$env:USERPROFILE\.ssh\virtualbox"
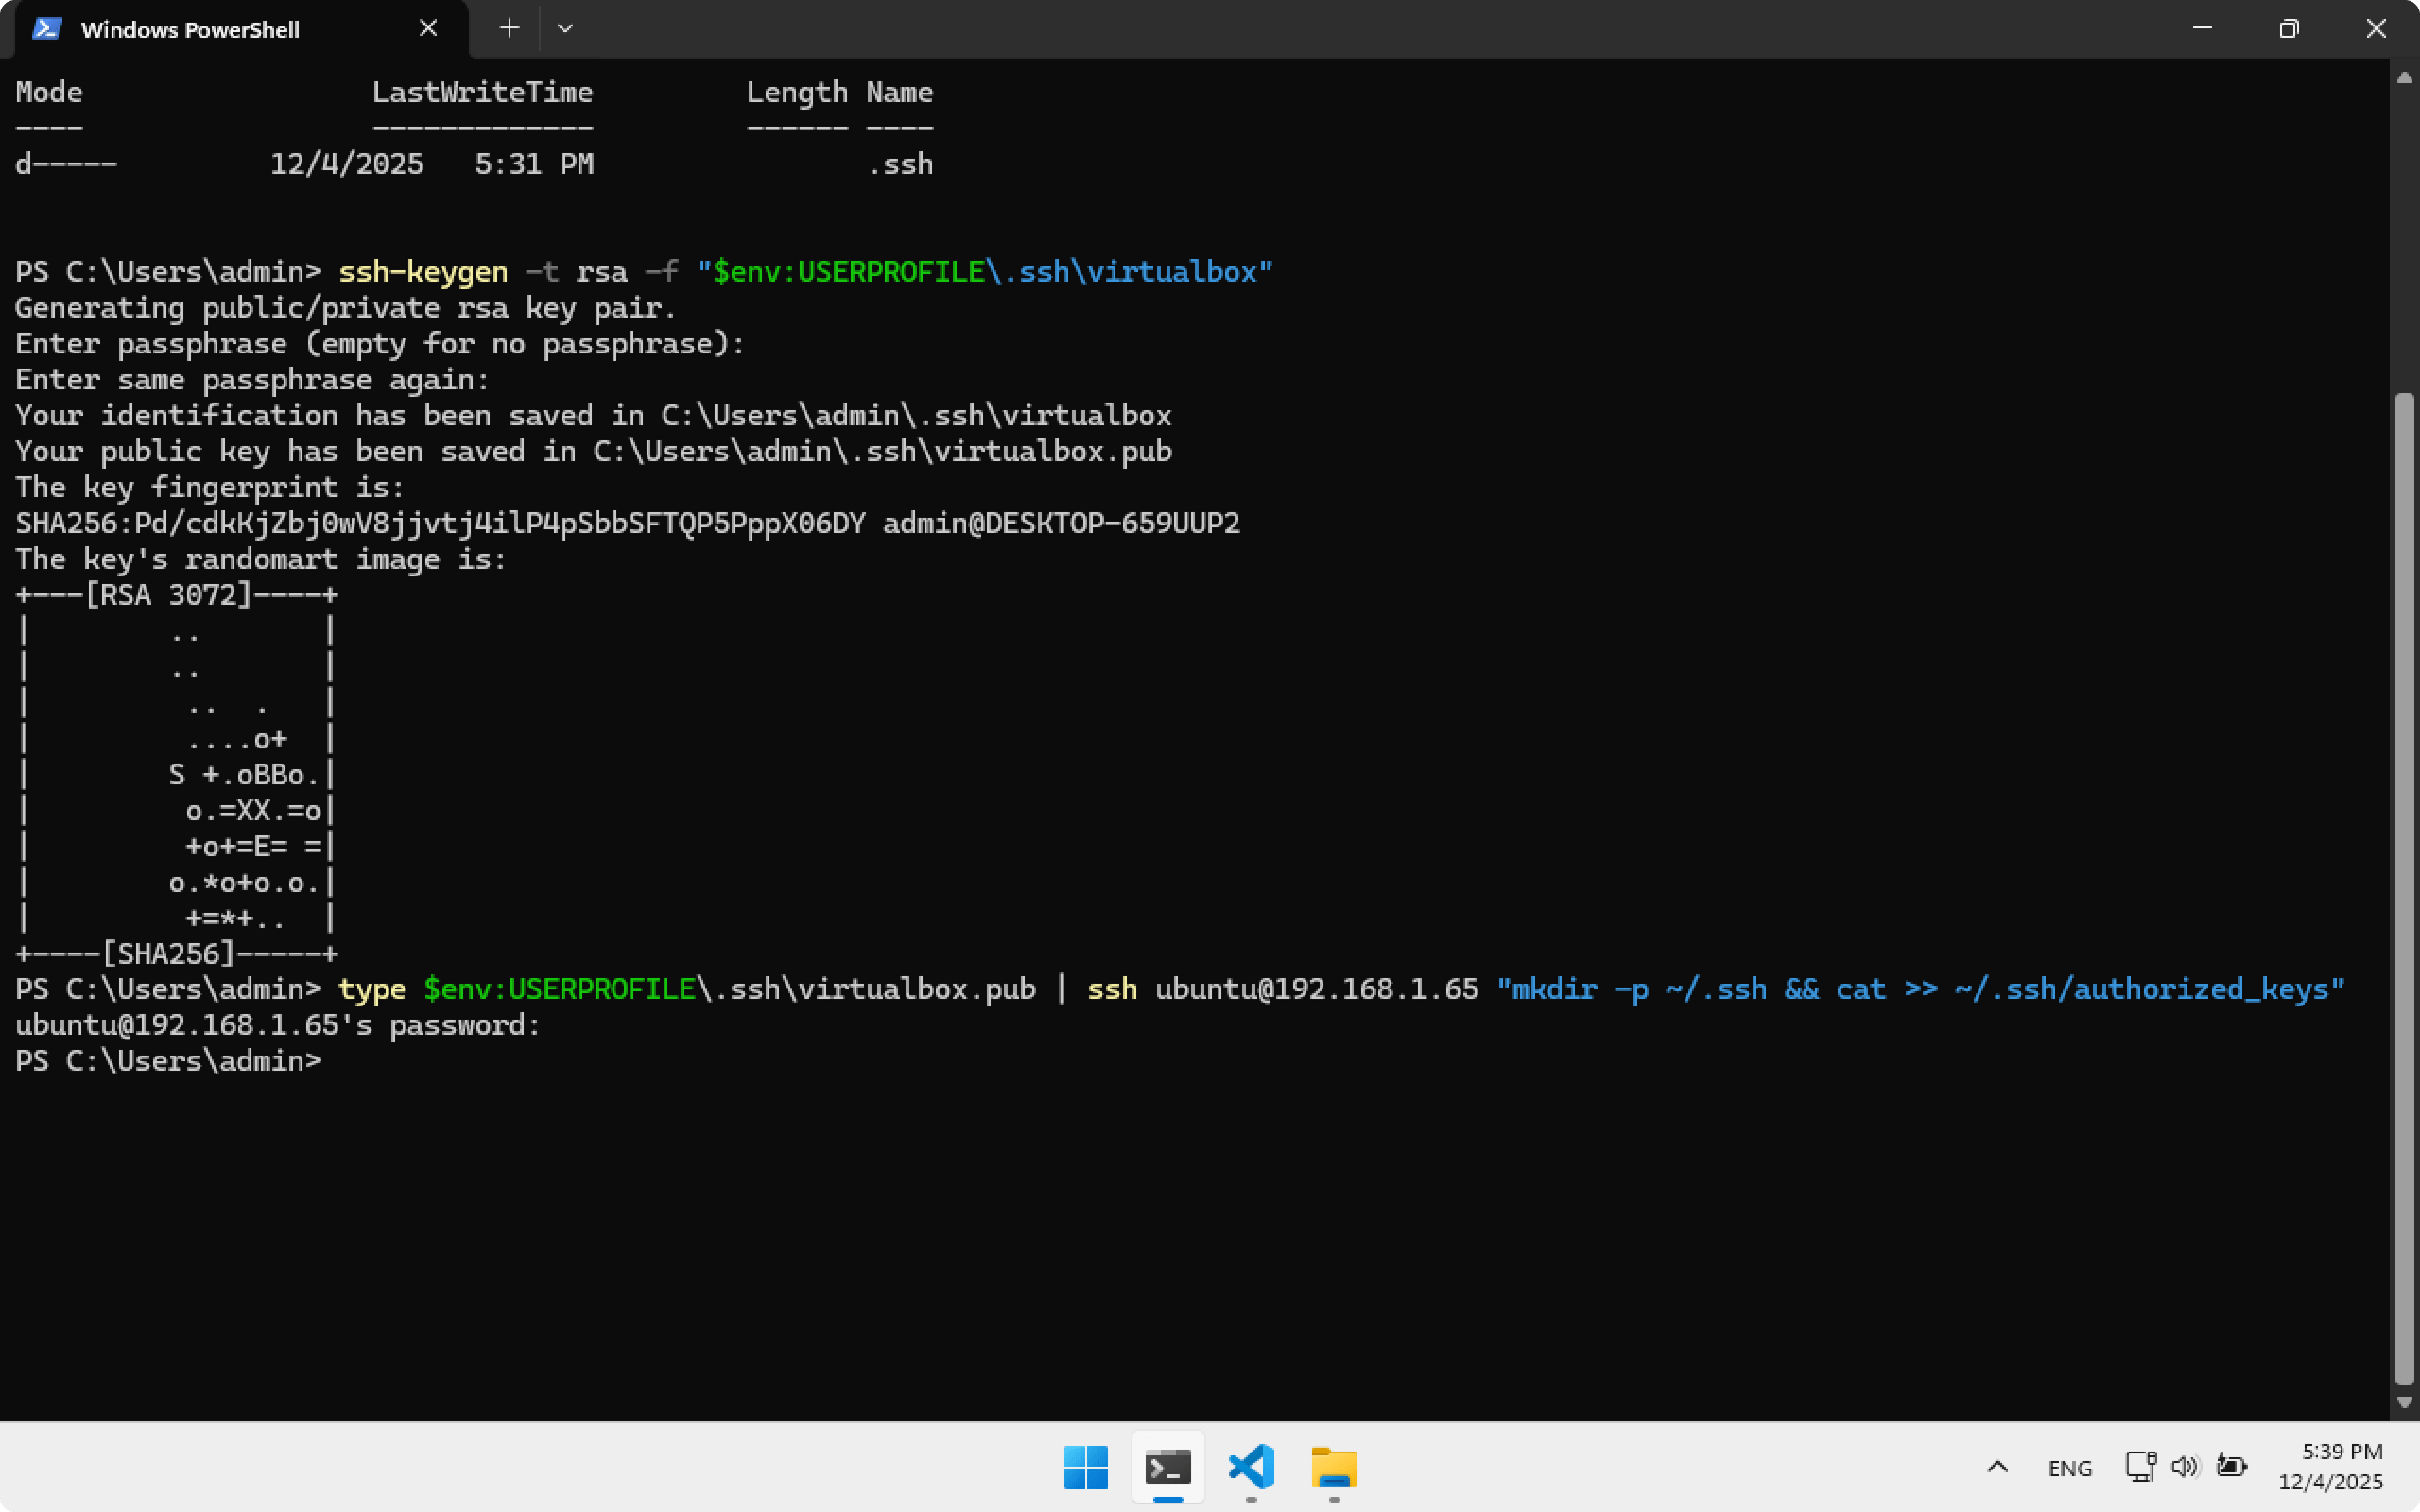
Copy the public key to Ubuntu Server. The command will request password password for user ubuntu.
type $env:USERPROFILE\.ssh\virtualbox.pub | ssh ubuntu@192.168.1.65 "mkdir -p ~/.ssh && cat >> ~/.ssh/authorized_keys"
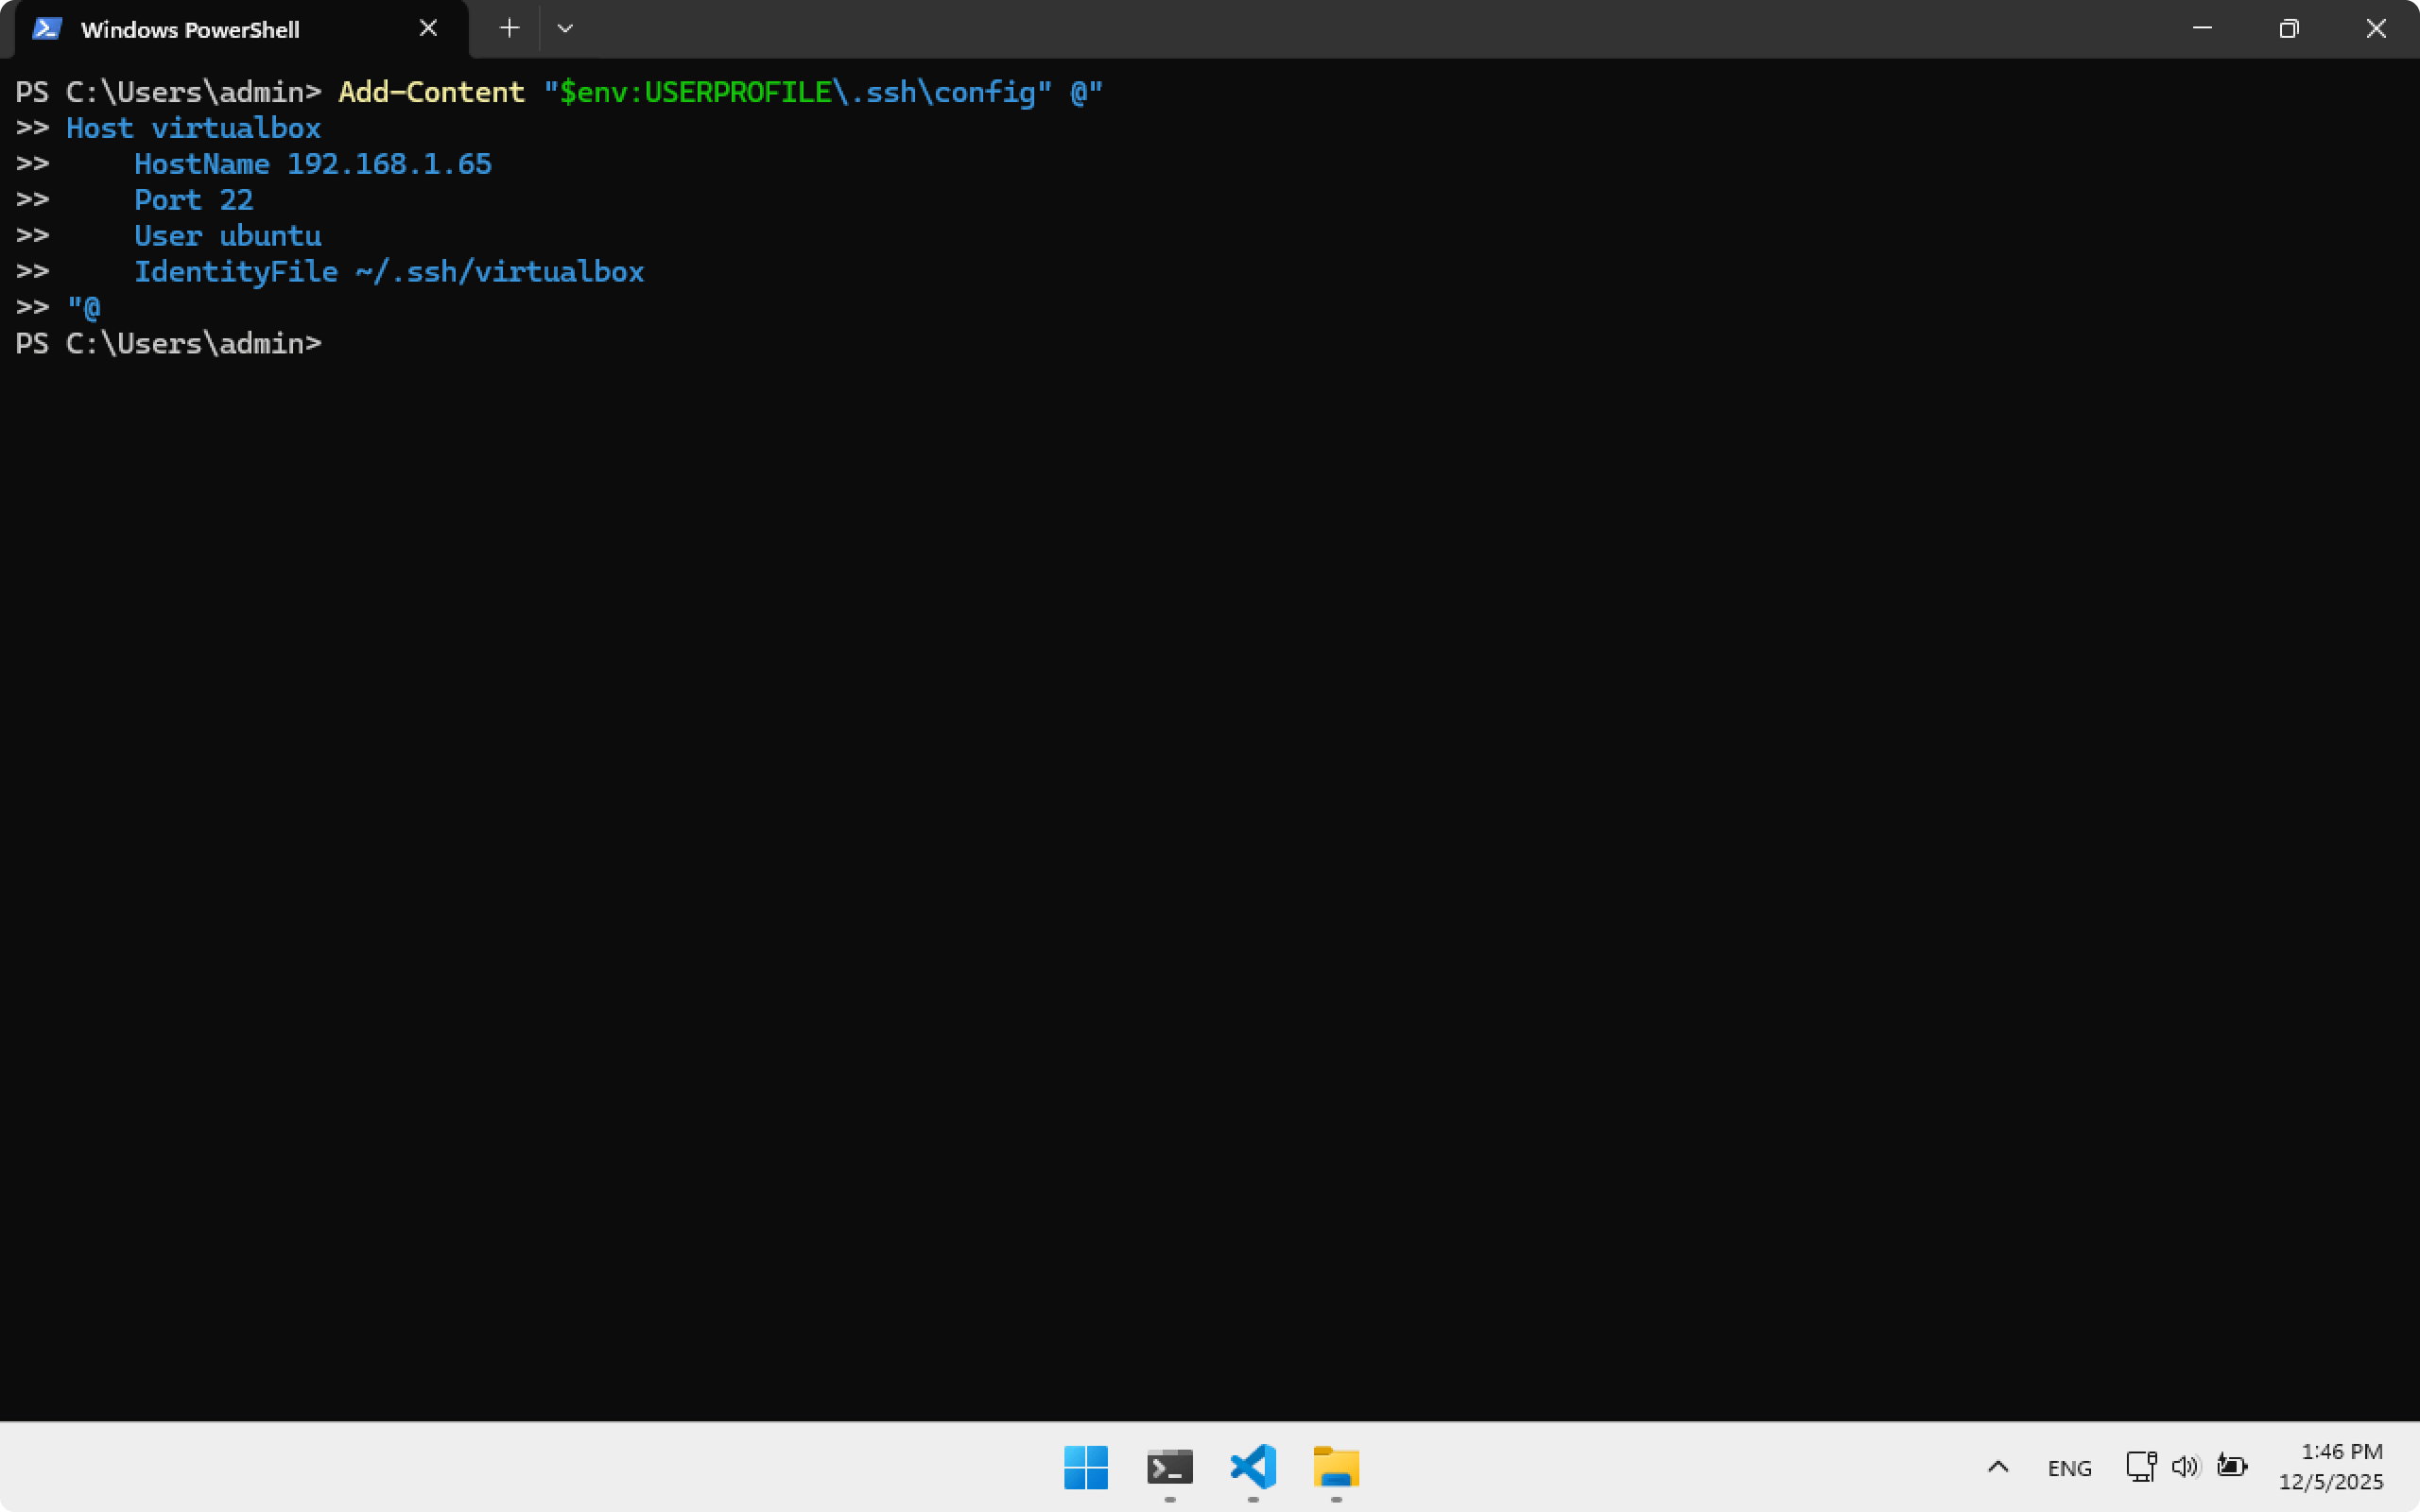
Add SSH configuration for virtualbox:
Add-Content "$env:USERPROFILE\.ssh\config" @"
Host virtualbox
    HostName 192.168.1.65
    Port 22
    User ubuntu
    IdentityFile ~/.ssh/virtualbox
"@
Restart Terminal to apply configuration.
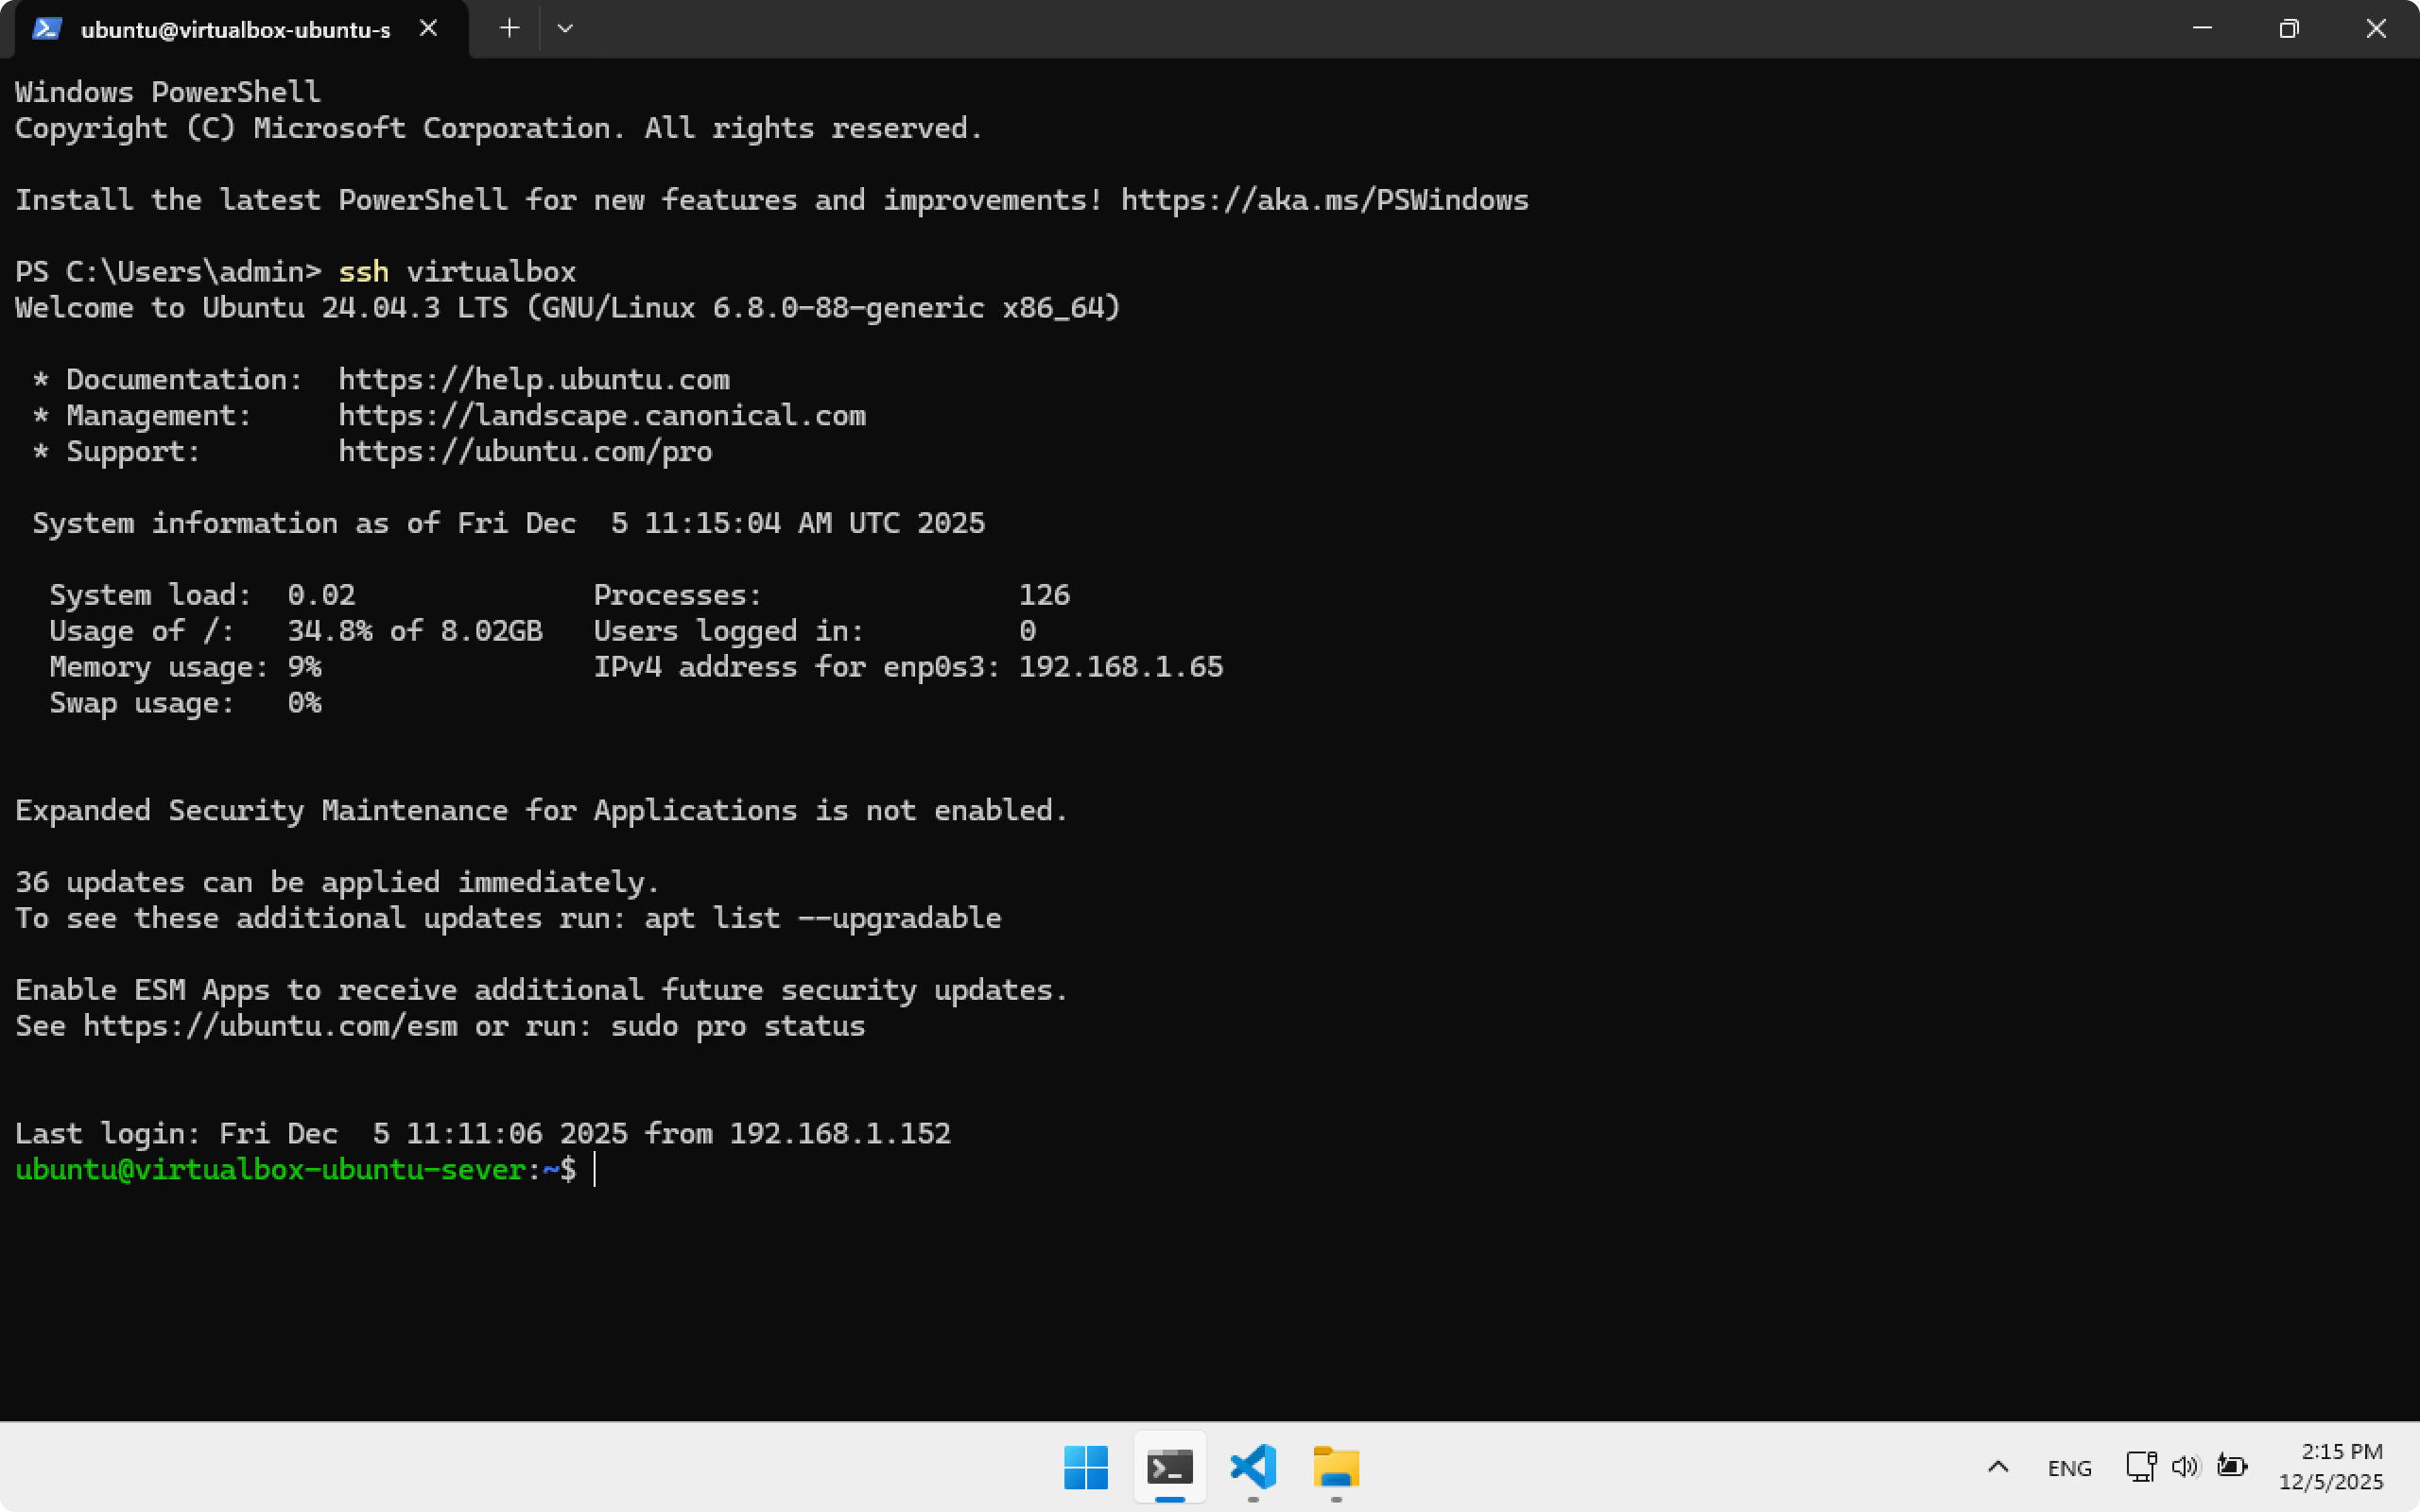
Now to connect to Ubuntu Server use:
ssh virtualbox
After a successful login you may close Terminal.
Configuring SSH on Steam Deck
Similarly, we will configure SSH access so that Ubuntu Server can connect to Steam Deck. This allows installing plugins directly from Ubuntu Server without manually copying files.
Switch Steam Deck to Desktop Mode. The default username on Steam Deck is deck.
Open Konsole on Steam Deck and set password deckpassword (skip if already set):
passwd

Enable SSHD — the SSH service name on Steam Deck. Enter password deckpassword.
sudo systemctl enable sshd
Check SSHD status:
sudo systemctl status sshd
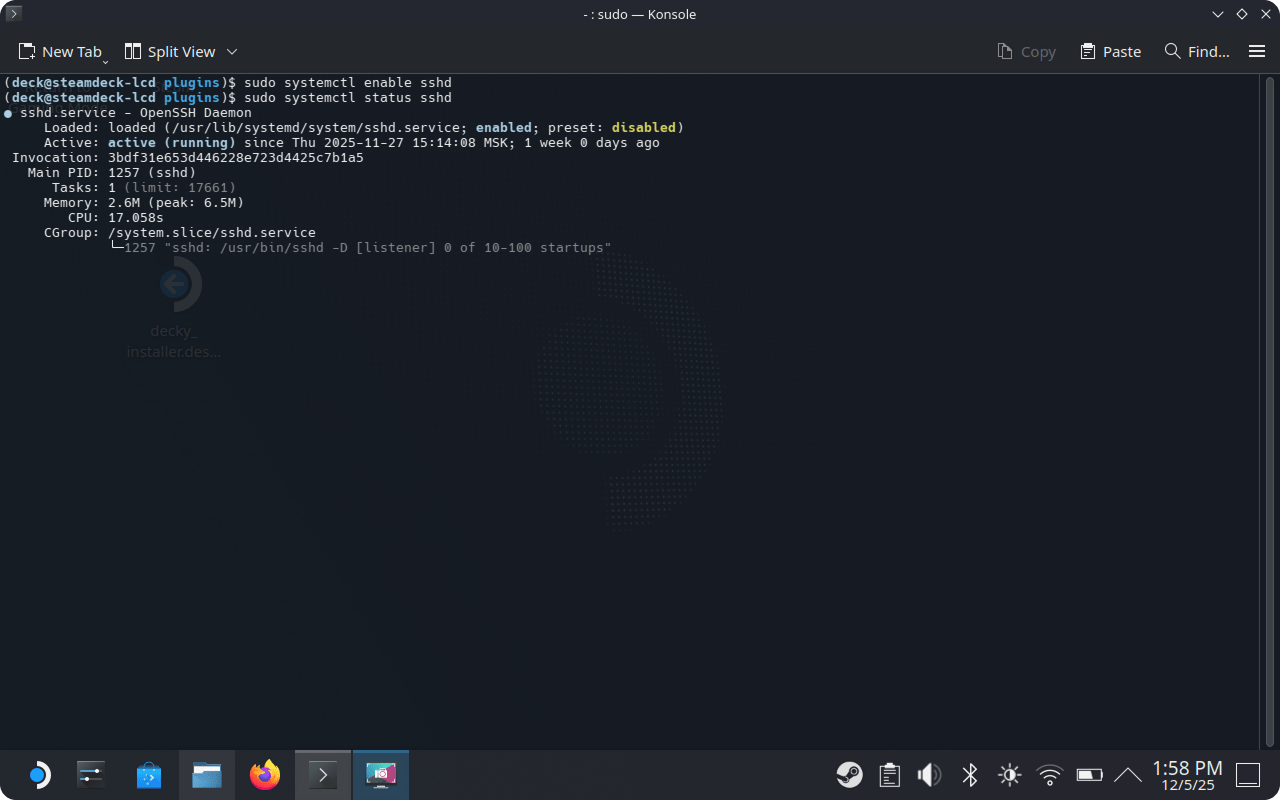
Status enabled means SSH is running.
To connect by SSH we need the Steam Deck IP address:
ip a
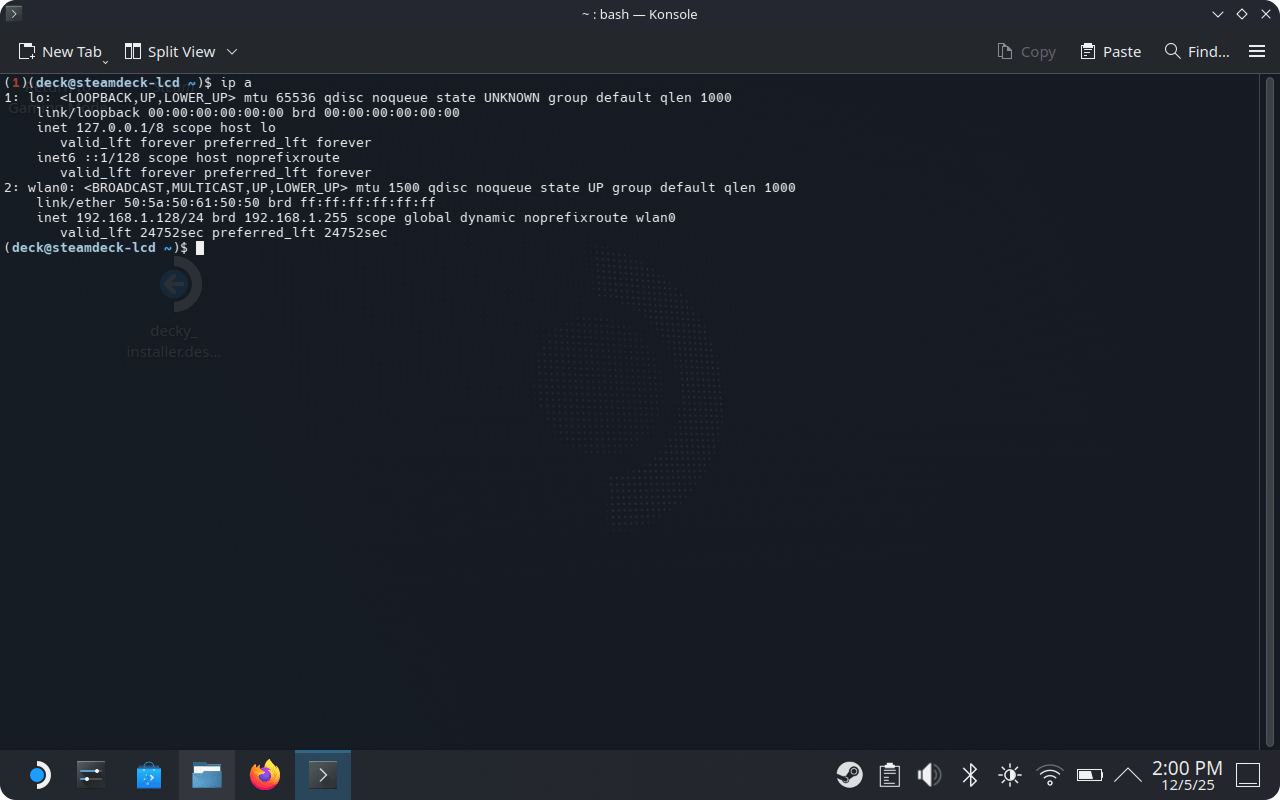
We are looking for:
inet 192.168.1.128/24
Our IP: 192.168.1.128 — we will use it for connection from Ubuntu Server.
I recommend assigning a static IP for Steam Deck in router settings.
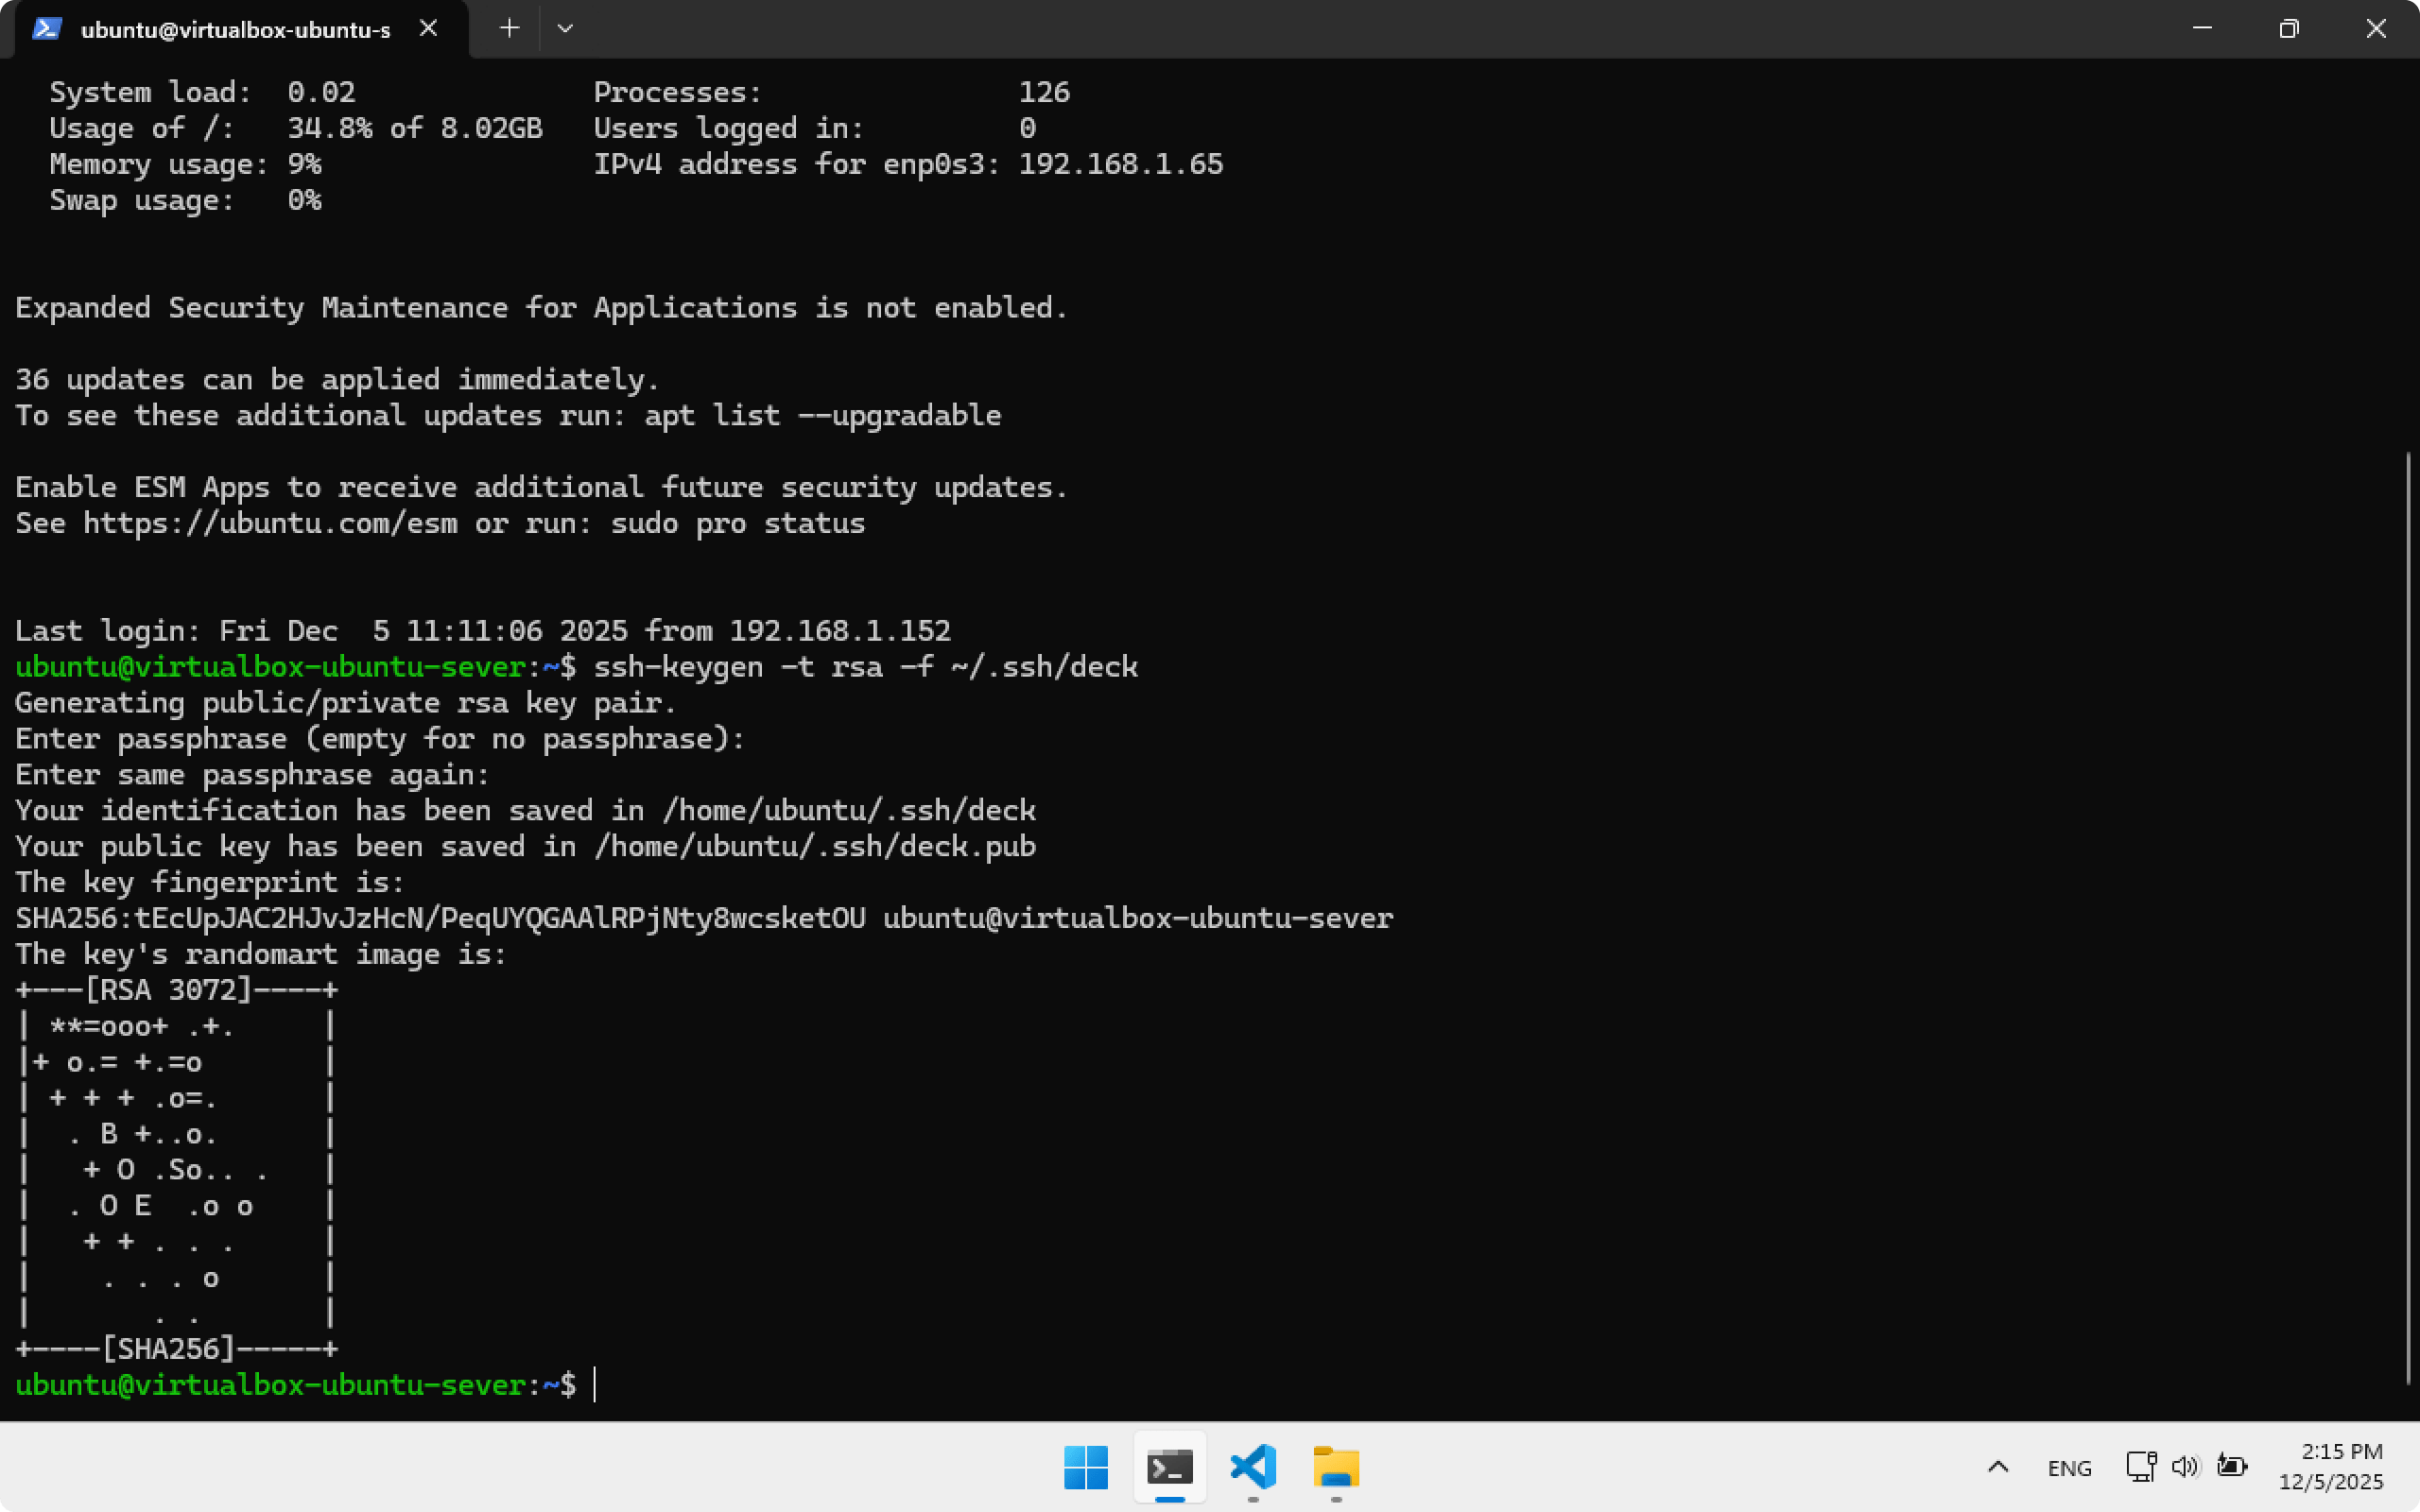
Create an SSH key on Ubuntu Server and add its public key to Steam Deck. Open Terminal in Windows and run:
Connect to Ubuntu Server:
ssh virtualbox
Create an SSH key in ~/.ssh/deck. Remember this path — we will need it later.
ssh-keygen -t rsa -f ~/.ssh/deck
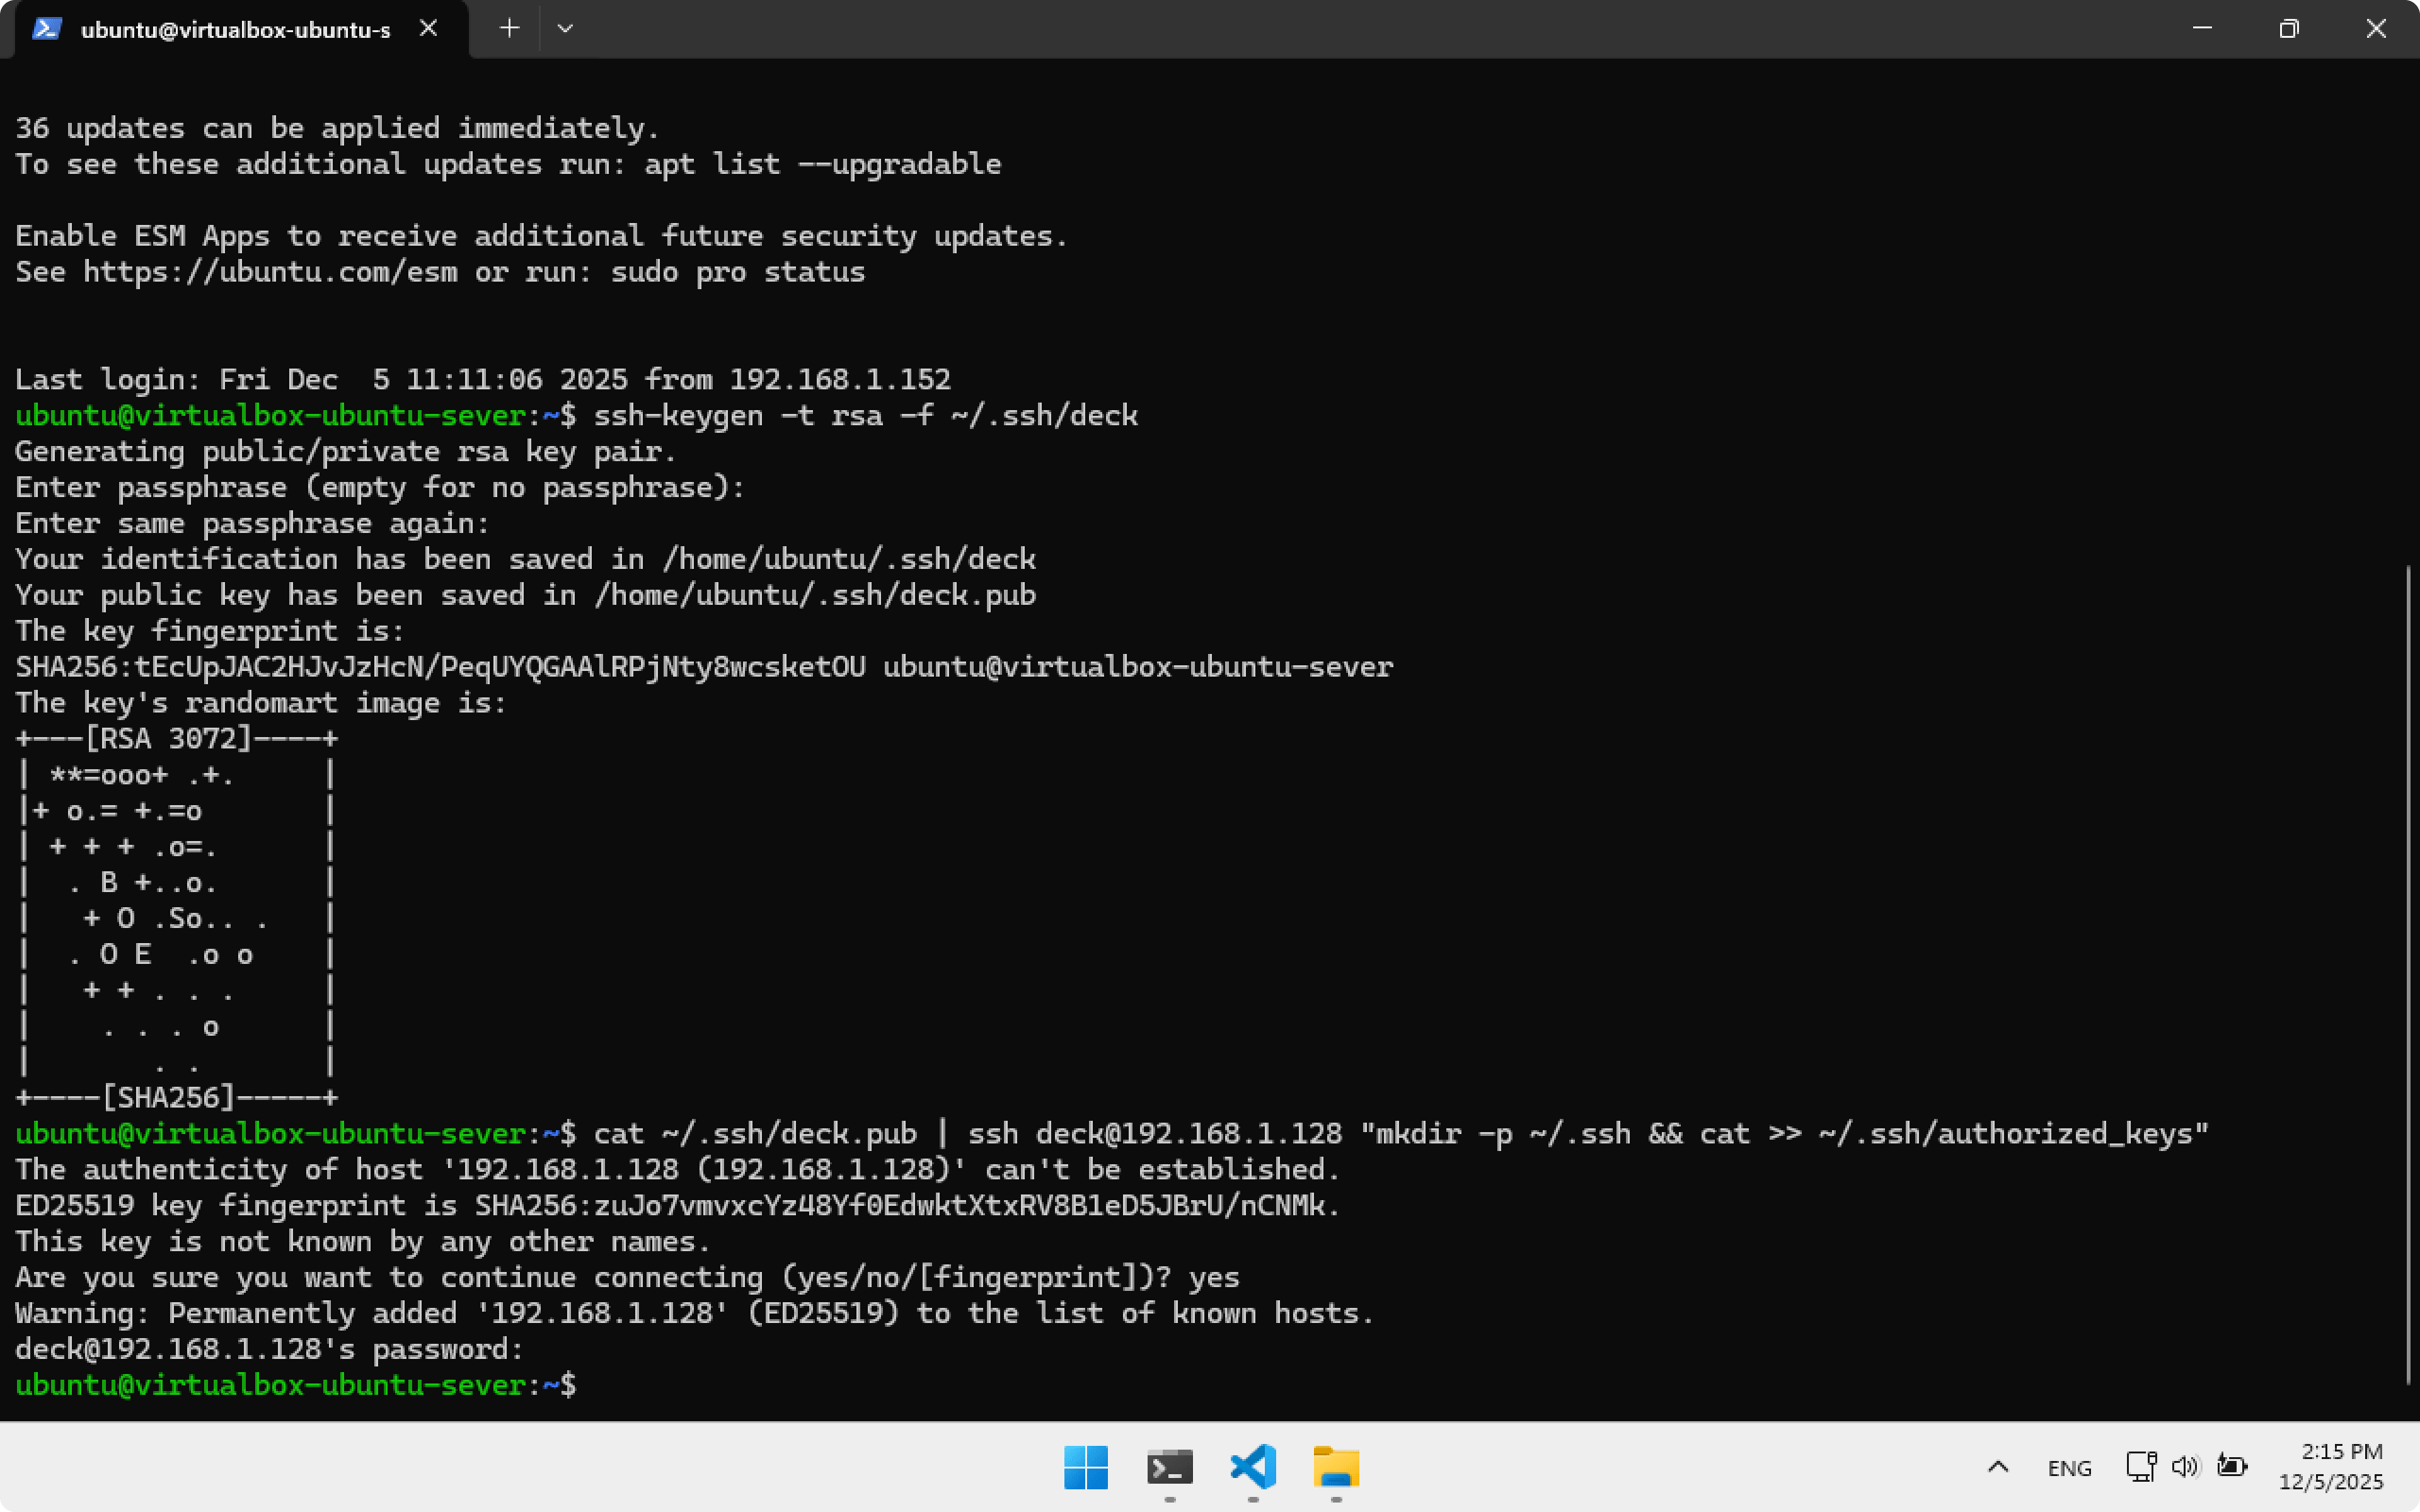
Copy the key to Steam Deck. Type yes, then enter password deckpassword.
cat ~/.ssh/deck.pub | ssh deck@192.168.1.128 "mkdir -p ~/.ssh && cat >> ~/.ssh/authorized_keys"
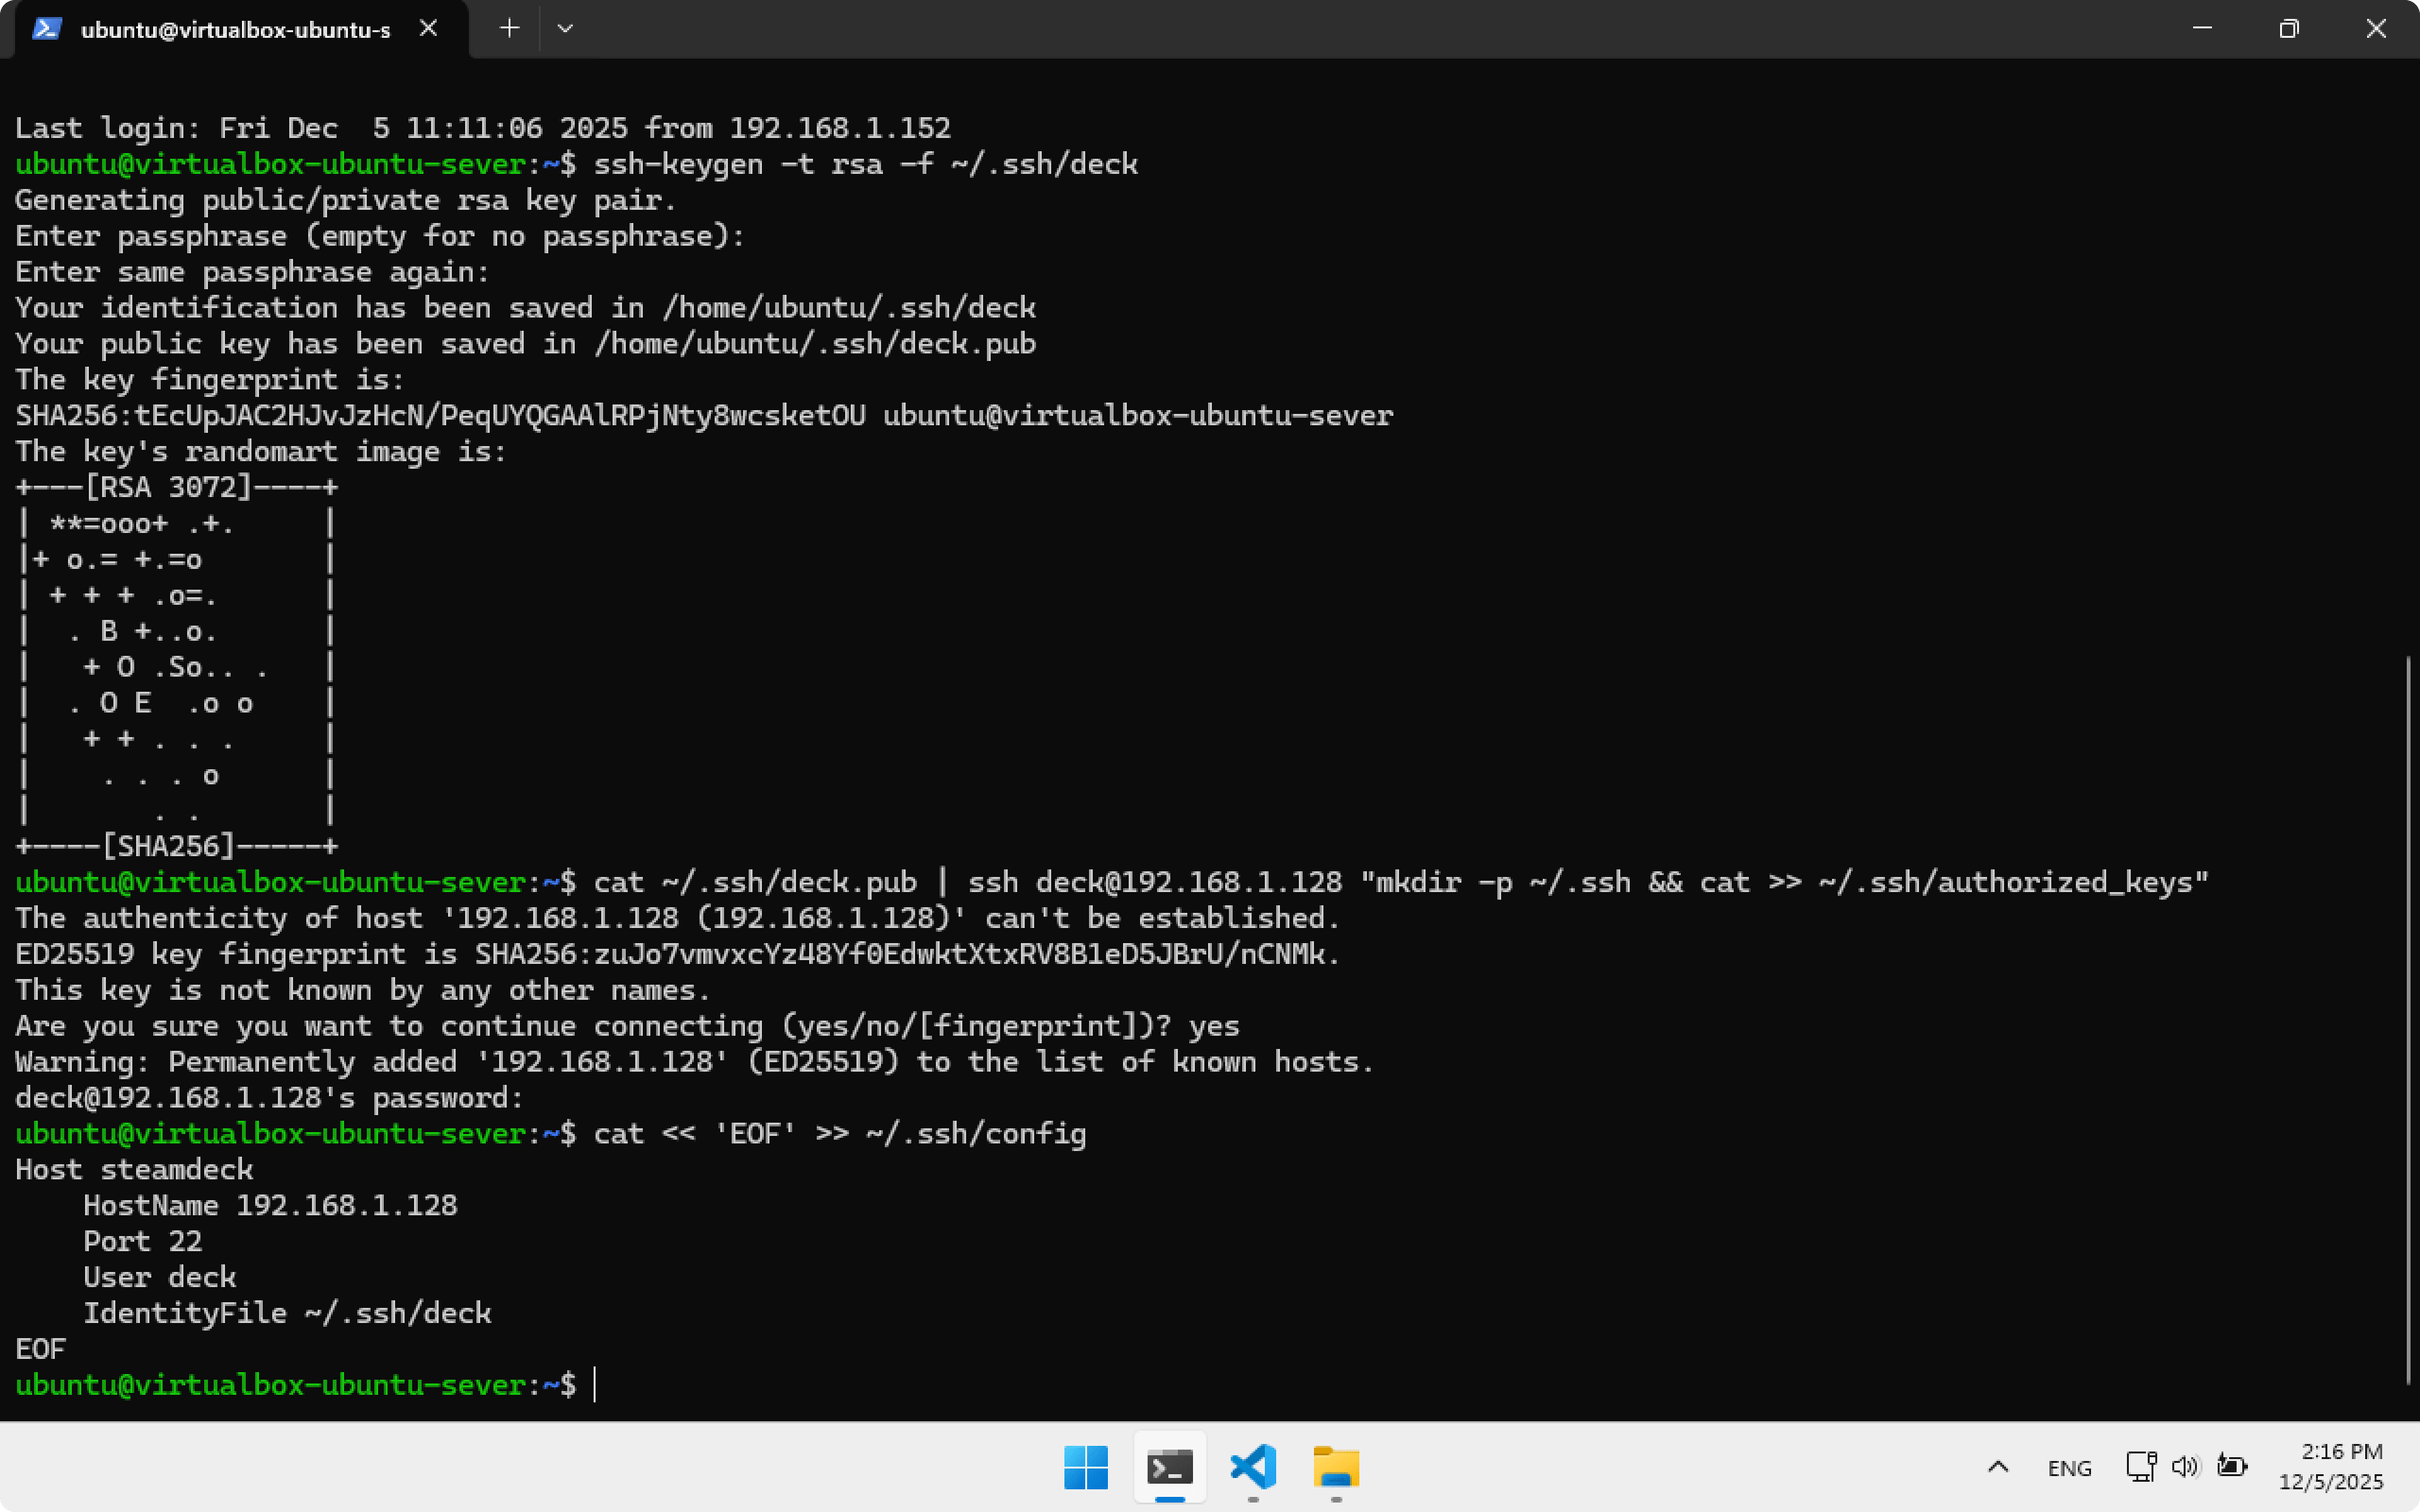
Add SSH configuration steamdeck:
cat << 'EOF' >> ~/.ssh/config
Host steamdeck
    HostName 192.168.1.128
    Port 22
    User deck
    IdentityFile ~/.ssh/deck
EOF
Now to connect to Steam Deck from Ubuntu Server use:
ssh steamdeck
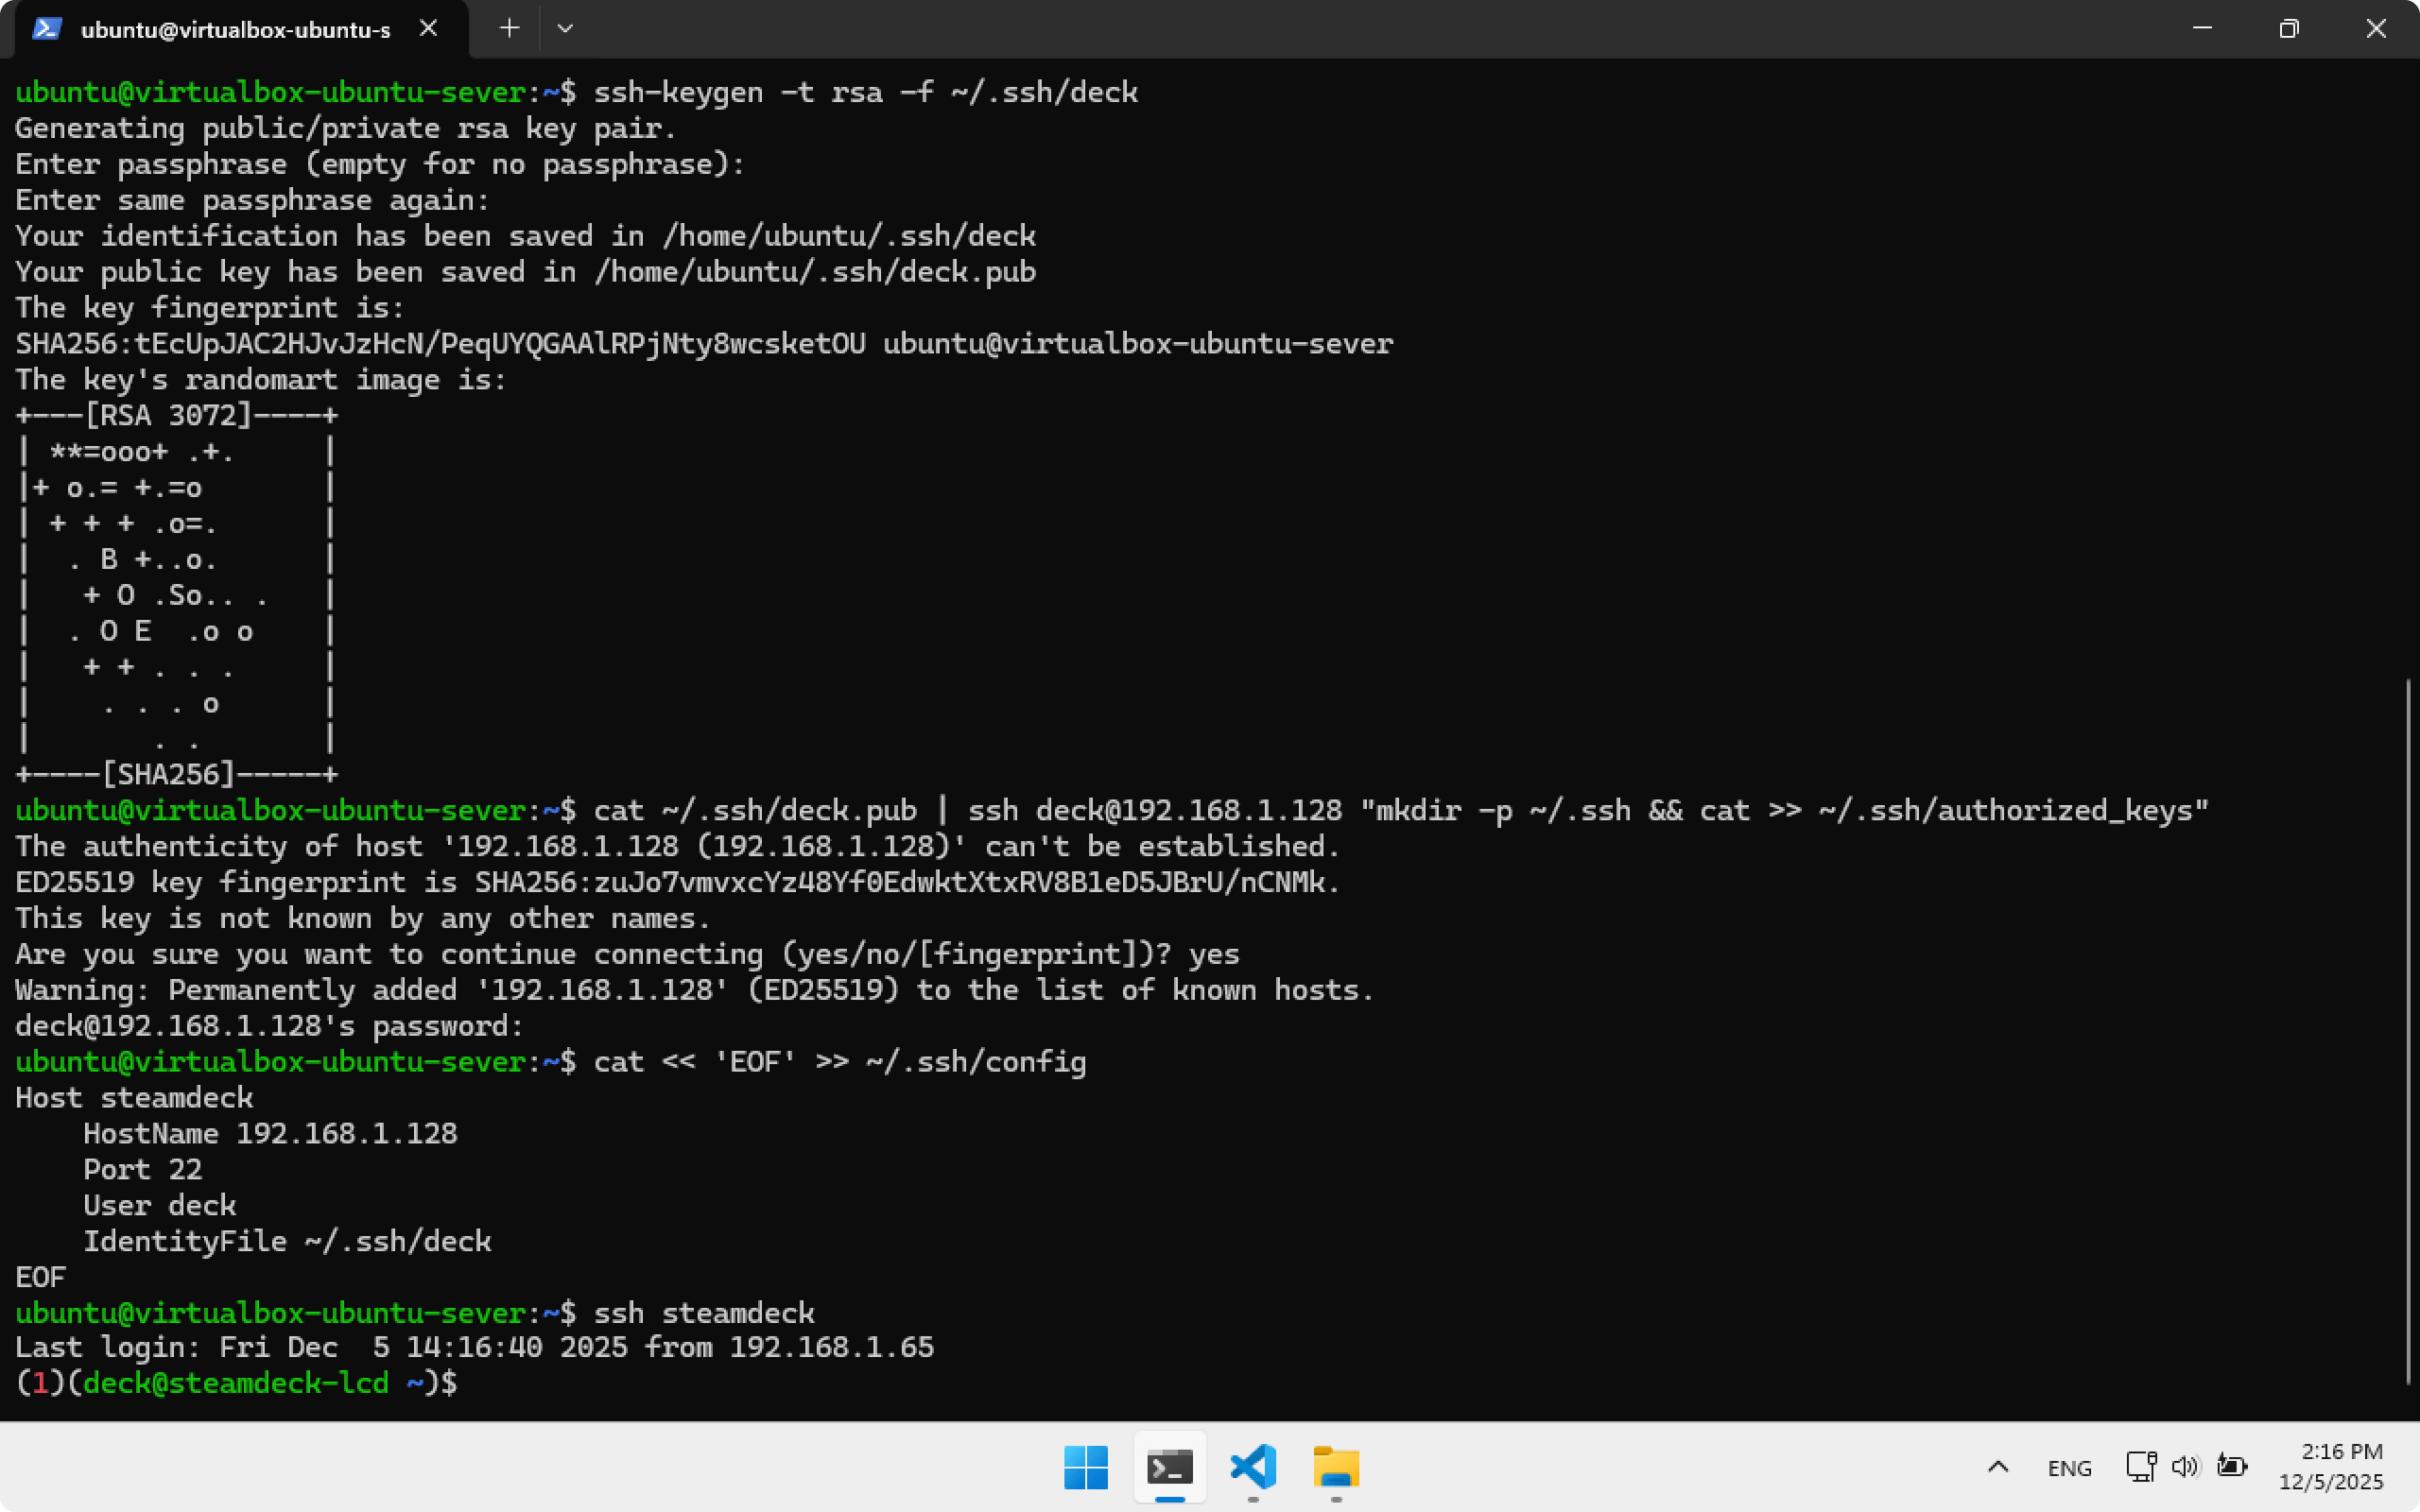
You will see:
(1)(deck@steamdeck-lcd)$
That means we are connected to Steam Deck via SSH. Close Terminal.
How it works
At this point you may be confused how we connected to Steam Deck. Here is the scheme:
Windows → SSH → Ubuntu Server → SSH → Steam Deck
We connect via ssh virtualbox to Ubuntu Server. We will write code in Visual Studio Code and build the plugin there. When we need to install the plugin on Steam Deck, Ubuntu Server will connect via ssh steamdeck and install it.
Sounds complicated, but in practice it’s pretty simple — we will see that soon.
Configuring Visual Studio Code on Windows
Visual Studio Code allows working with files on Ubuntu Server as if they were local.
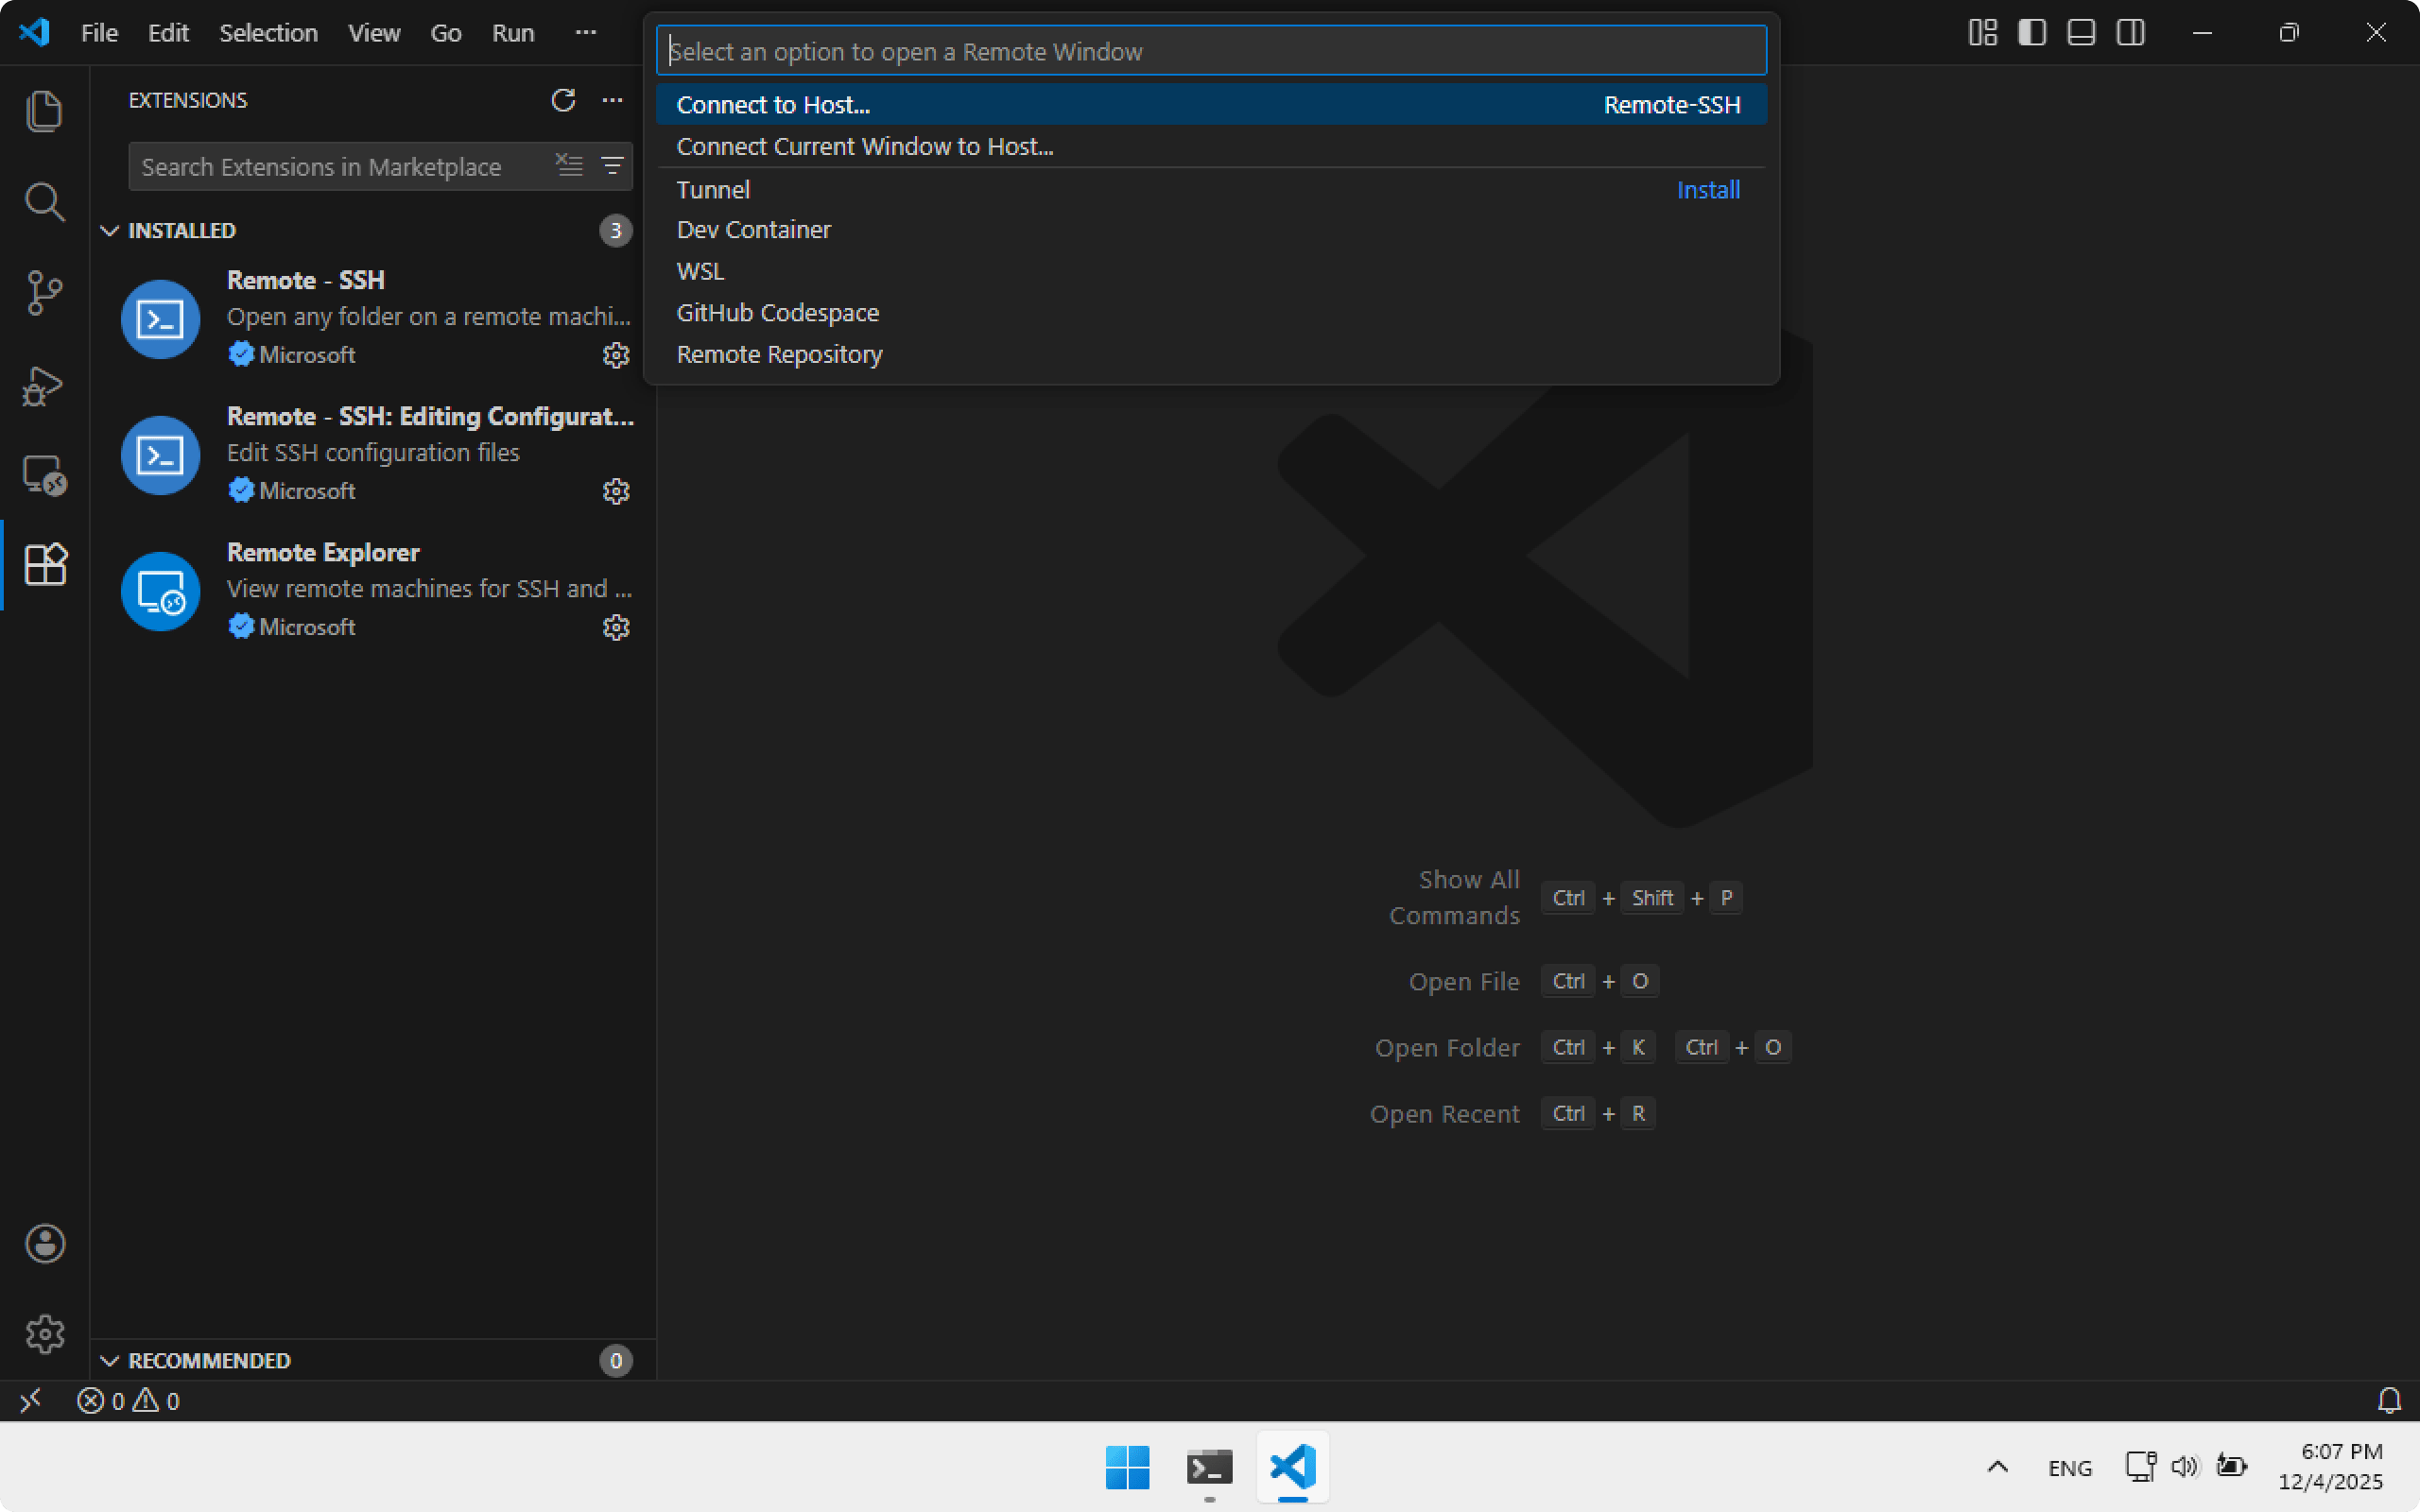
Install the following extensions:
- Remote Explorer
- Remote — SSH
- Remote — SSH: Editing Configuration Files
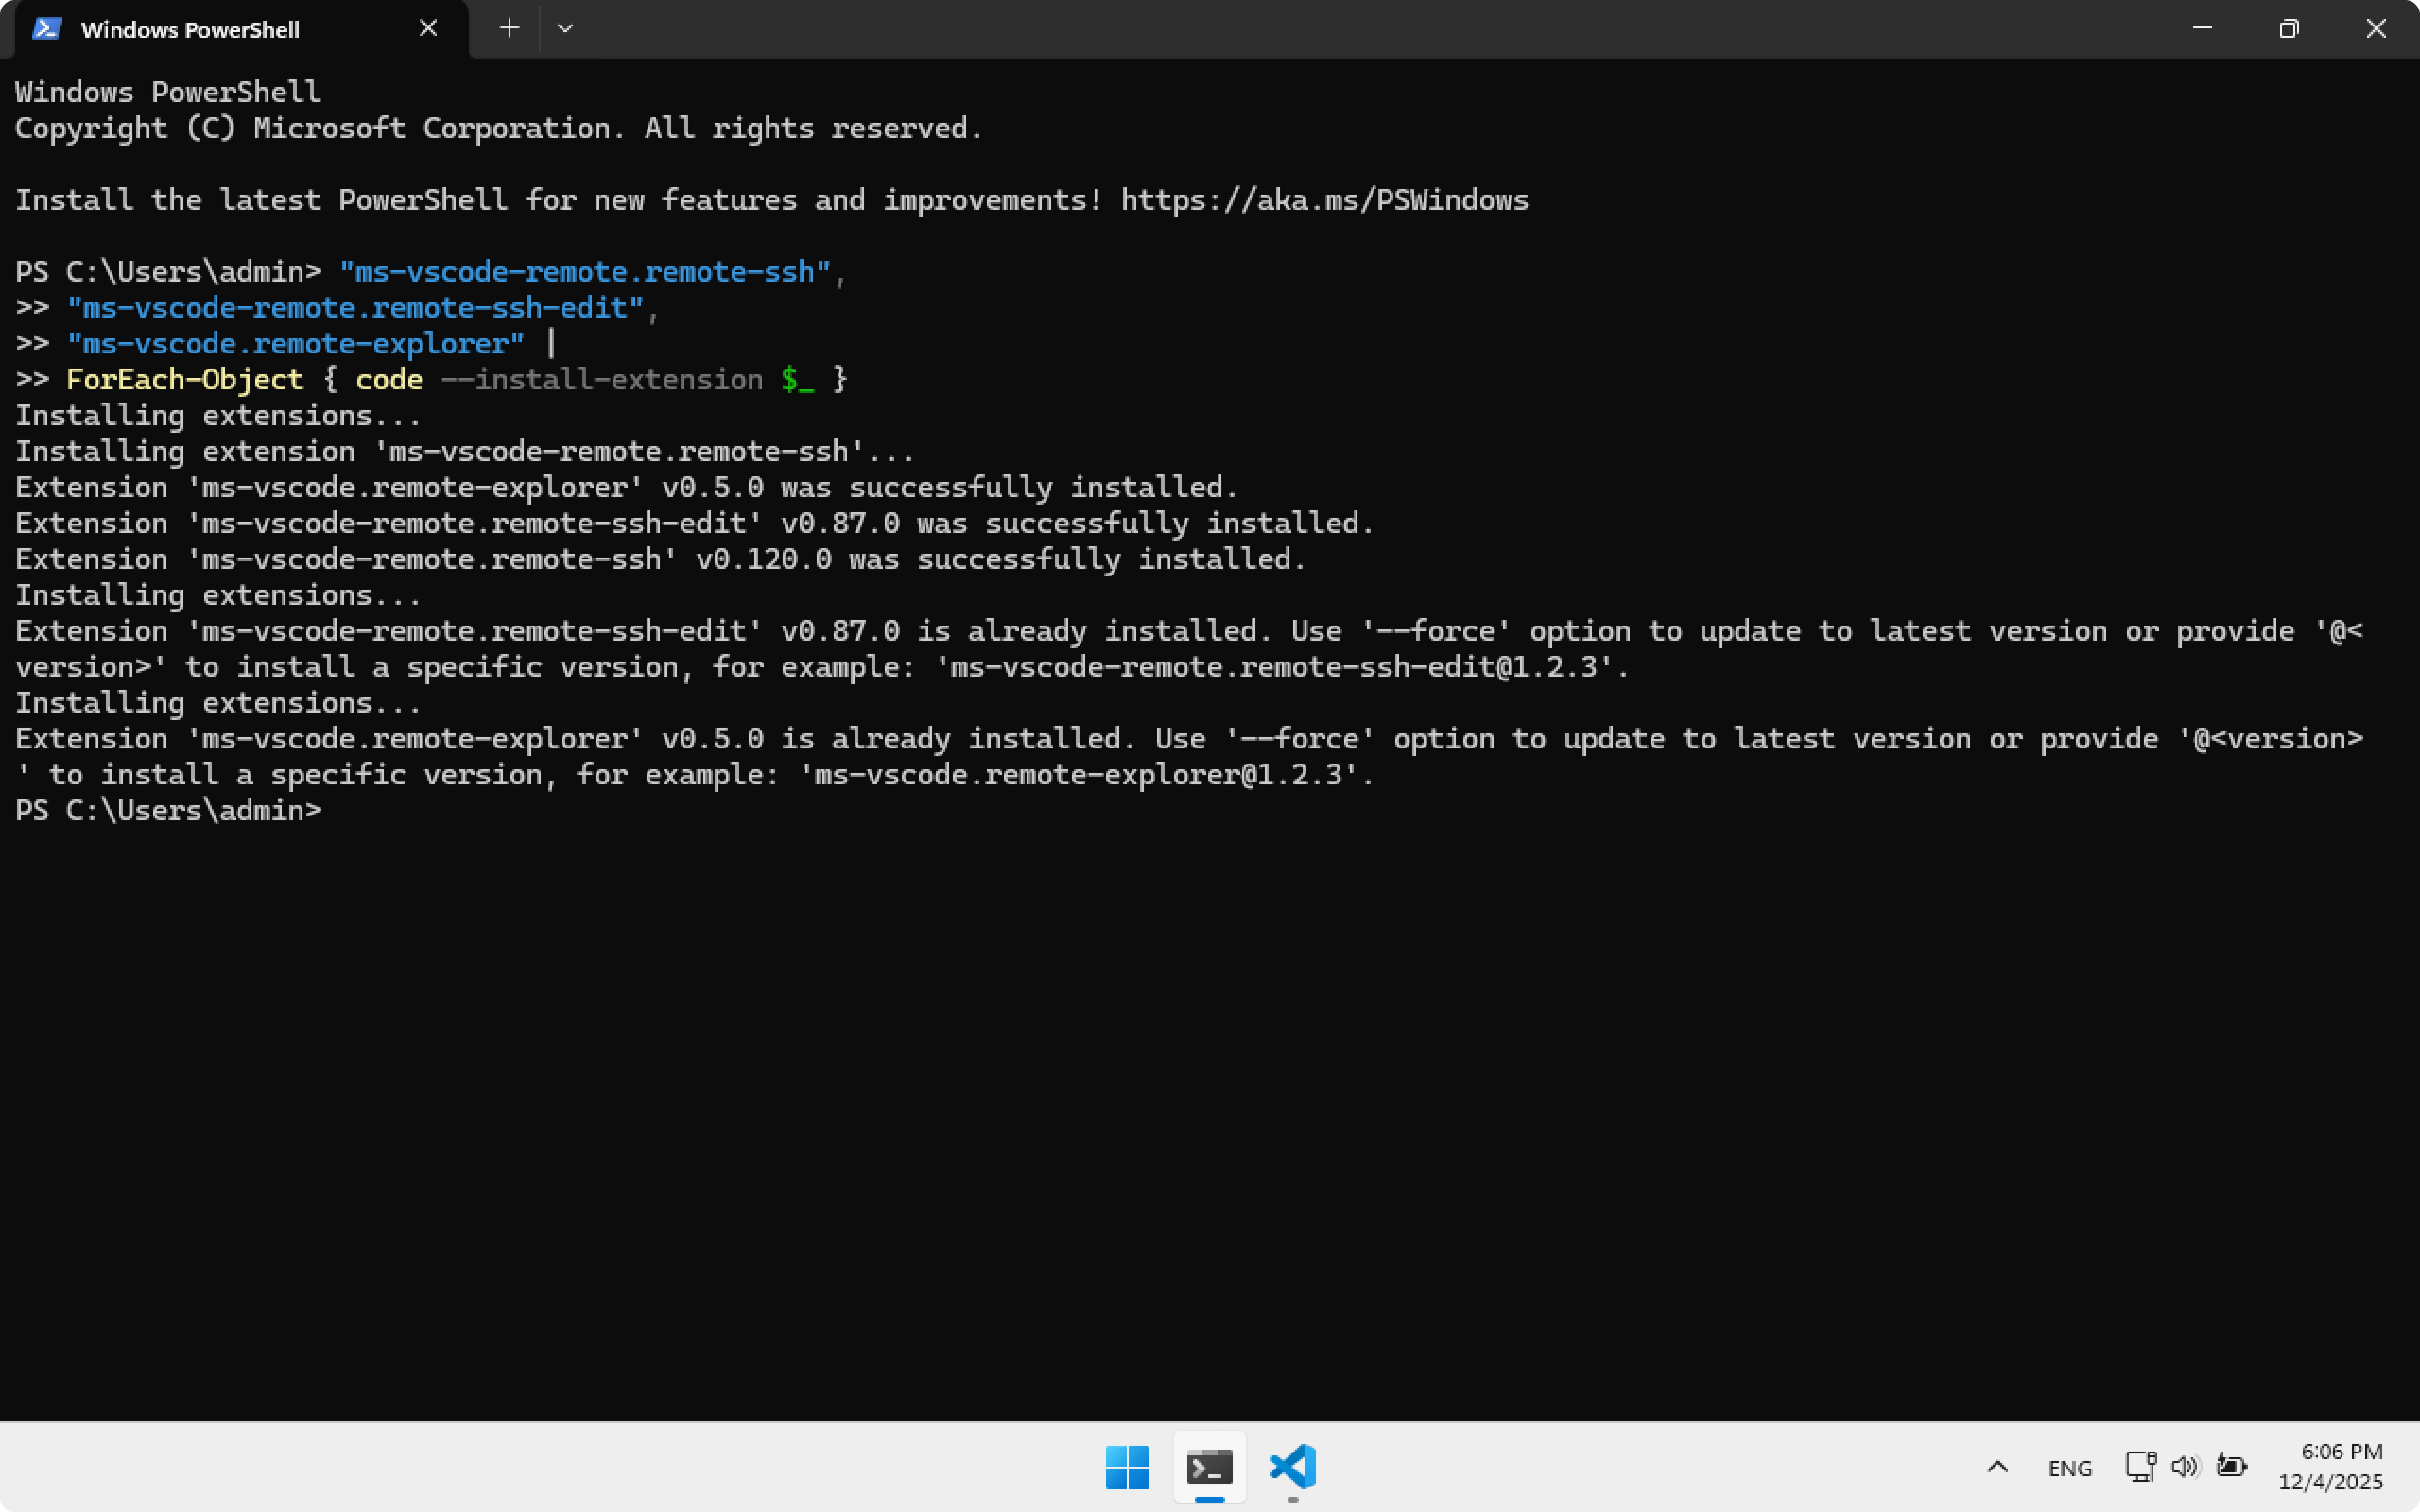
Or install them automatically using Terminal:
"ms-vscode-remote.remote-ssh",
"ms-vscode-remote.remote-ssh-edit",
"ms-vscode.remote-explorer" |
ForEach-Object { code --install-extension $_ }
After installation, open Visual Studio Code. In the bottom left corner click the >< arrows, choose Connect to Host..
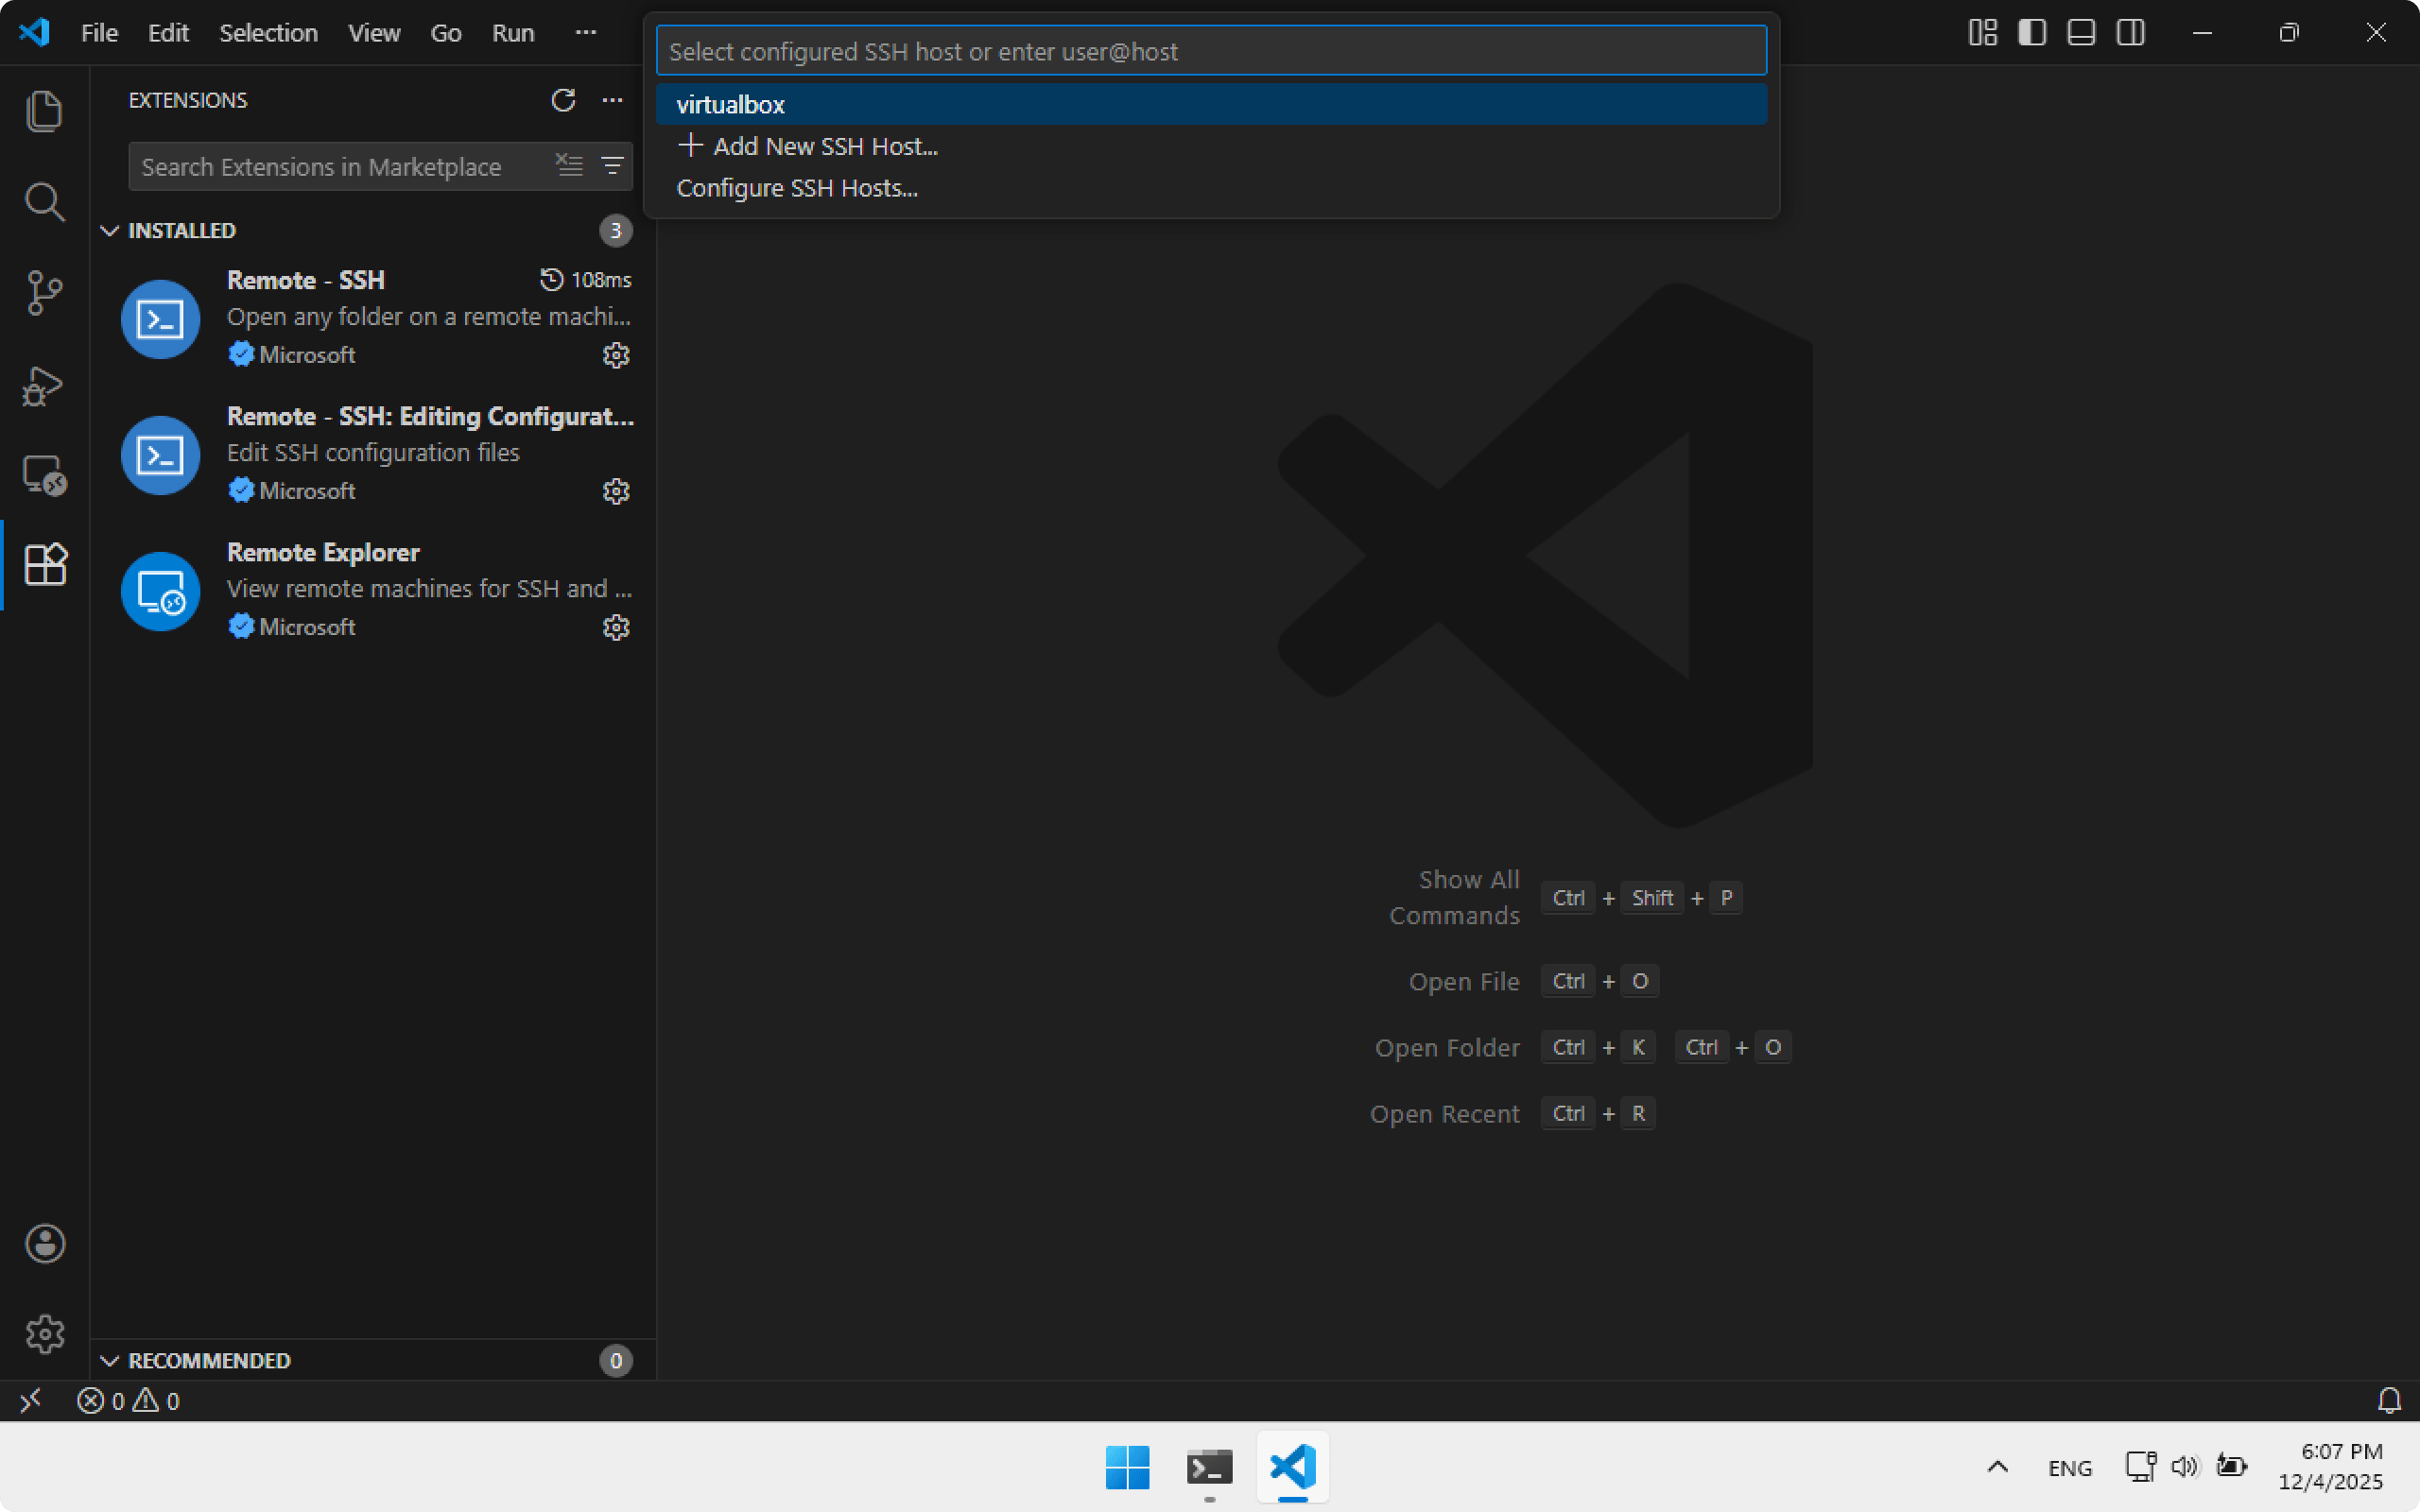
Then select the virtualbox SSH connection created earlier.
Choose Linux platform because the machine is running Linux.
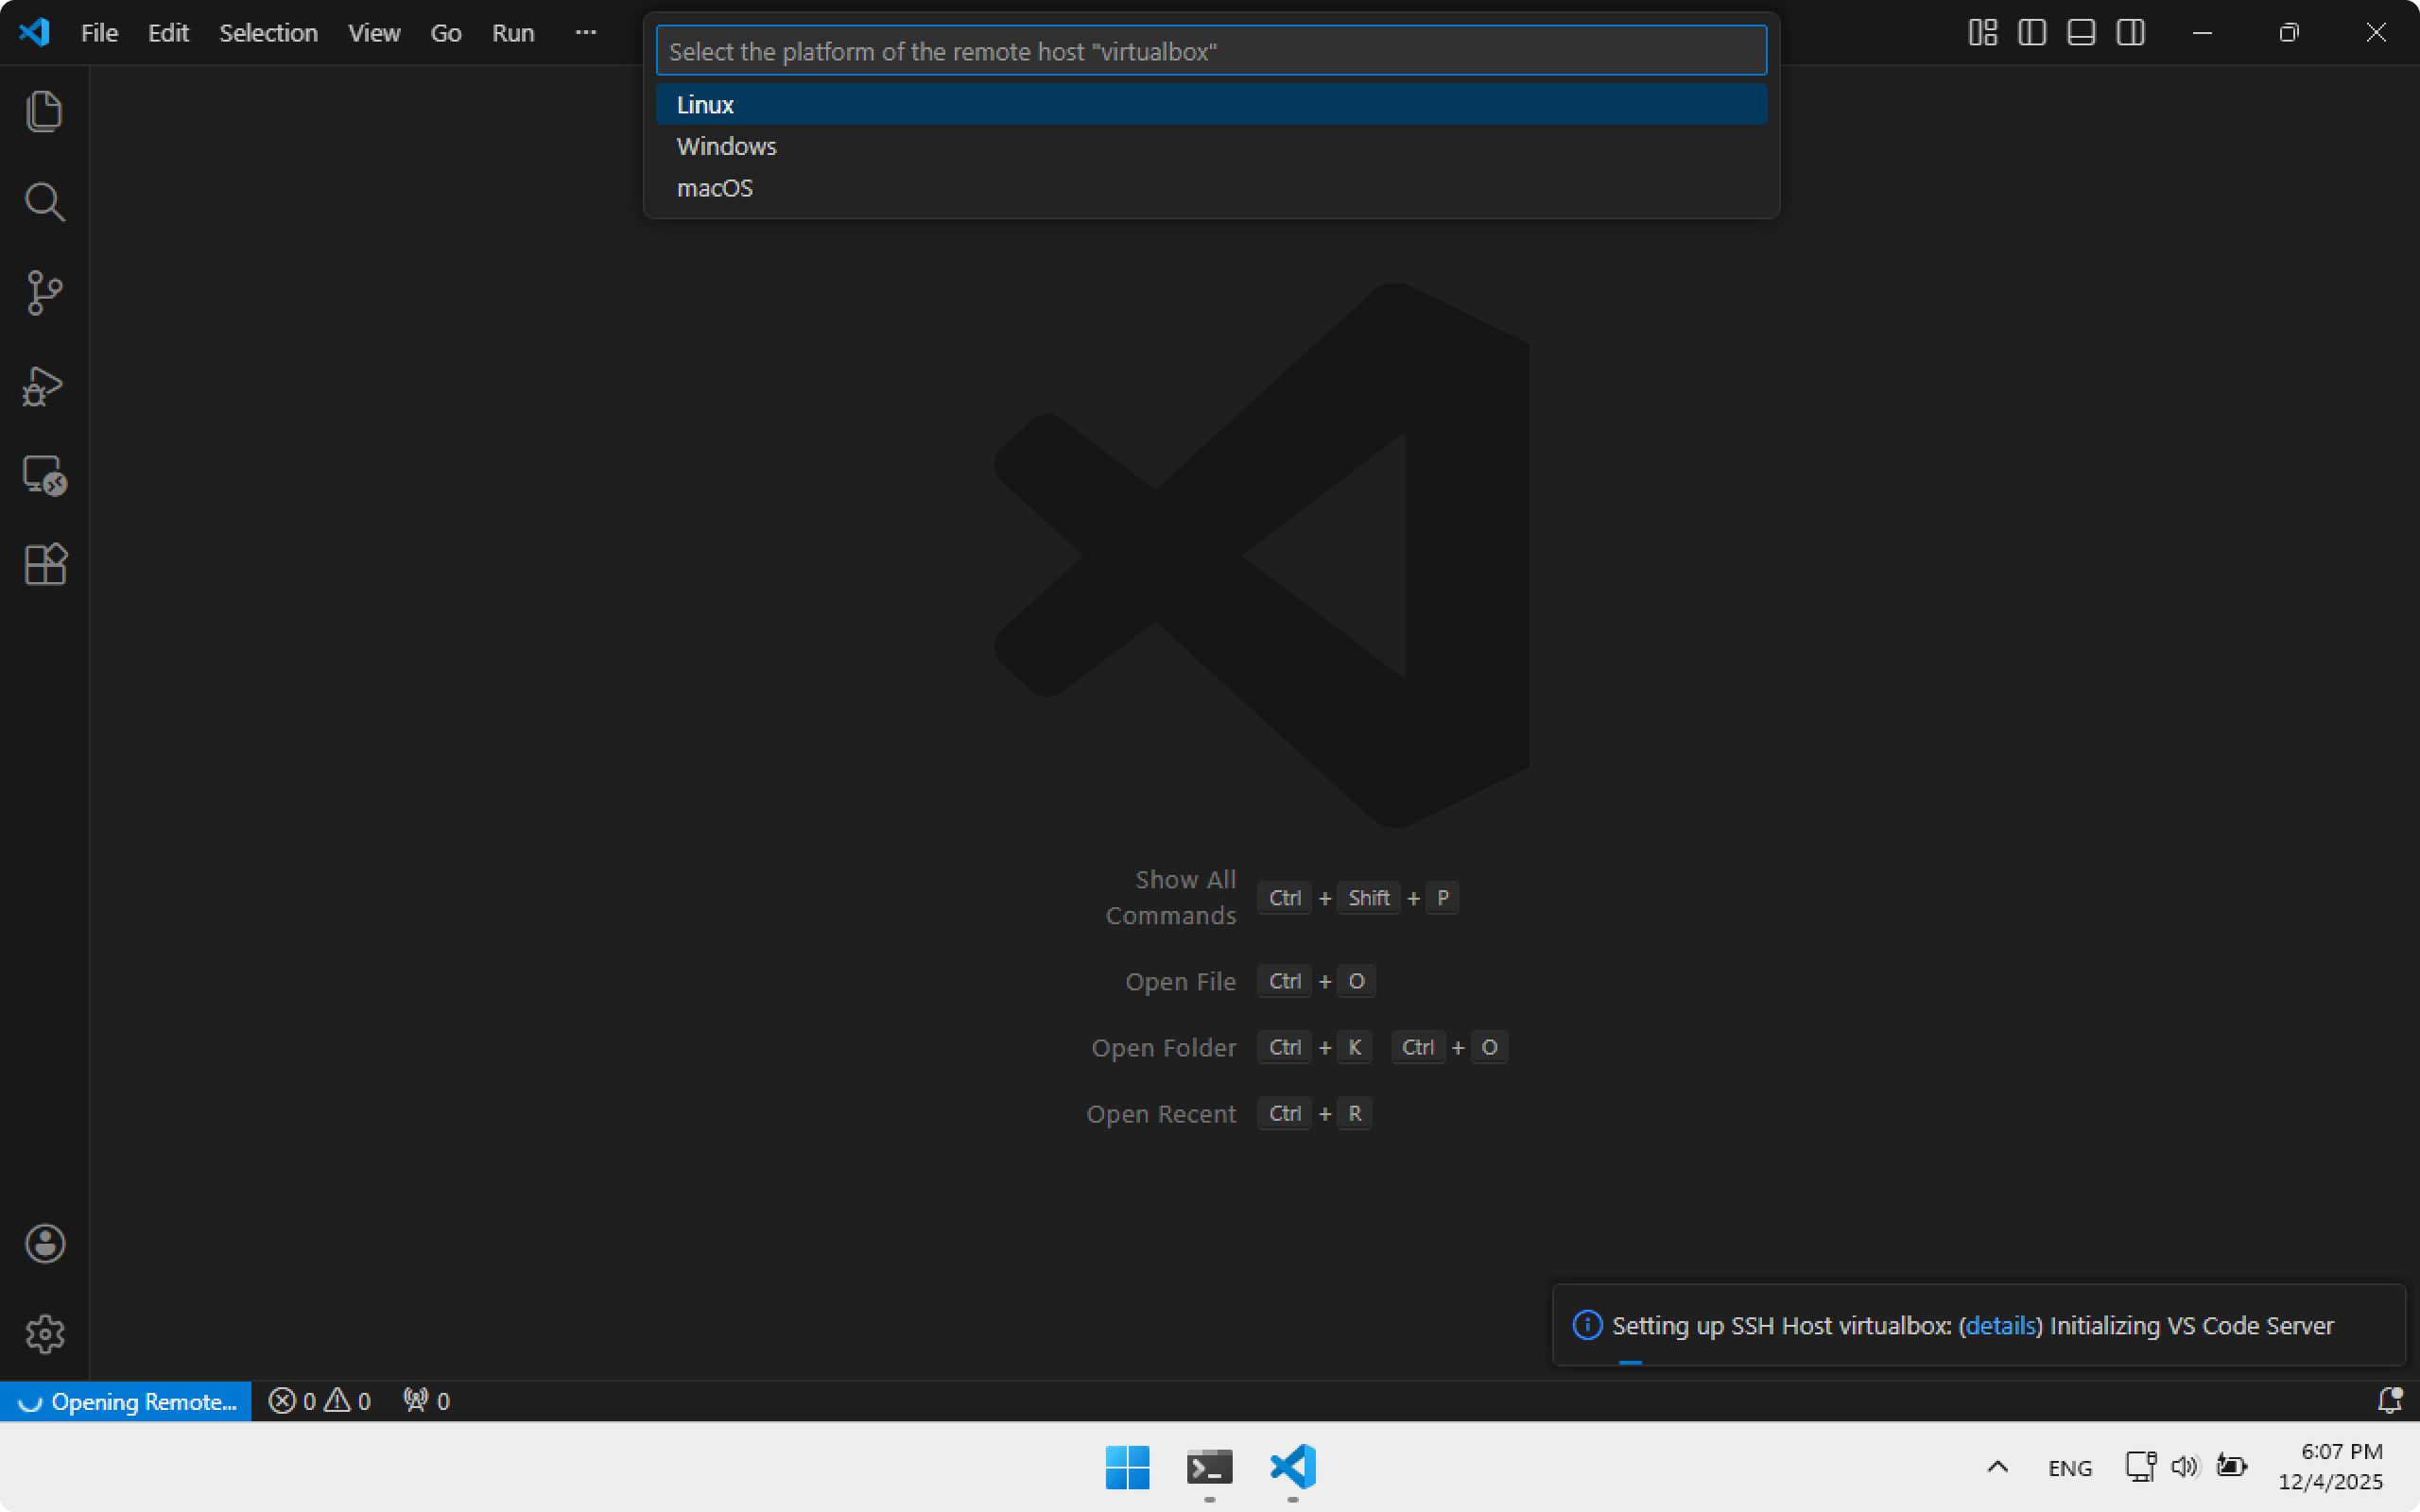
After a few seconds Visual Studio Code will connect to Ubuntu Server. In the bottom-left corner you will see virtualbox — that means we are working remotely.
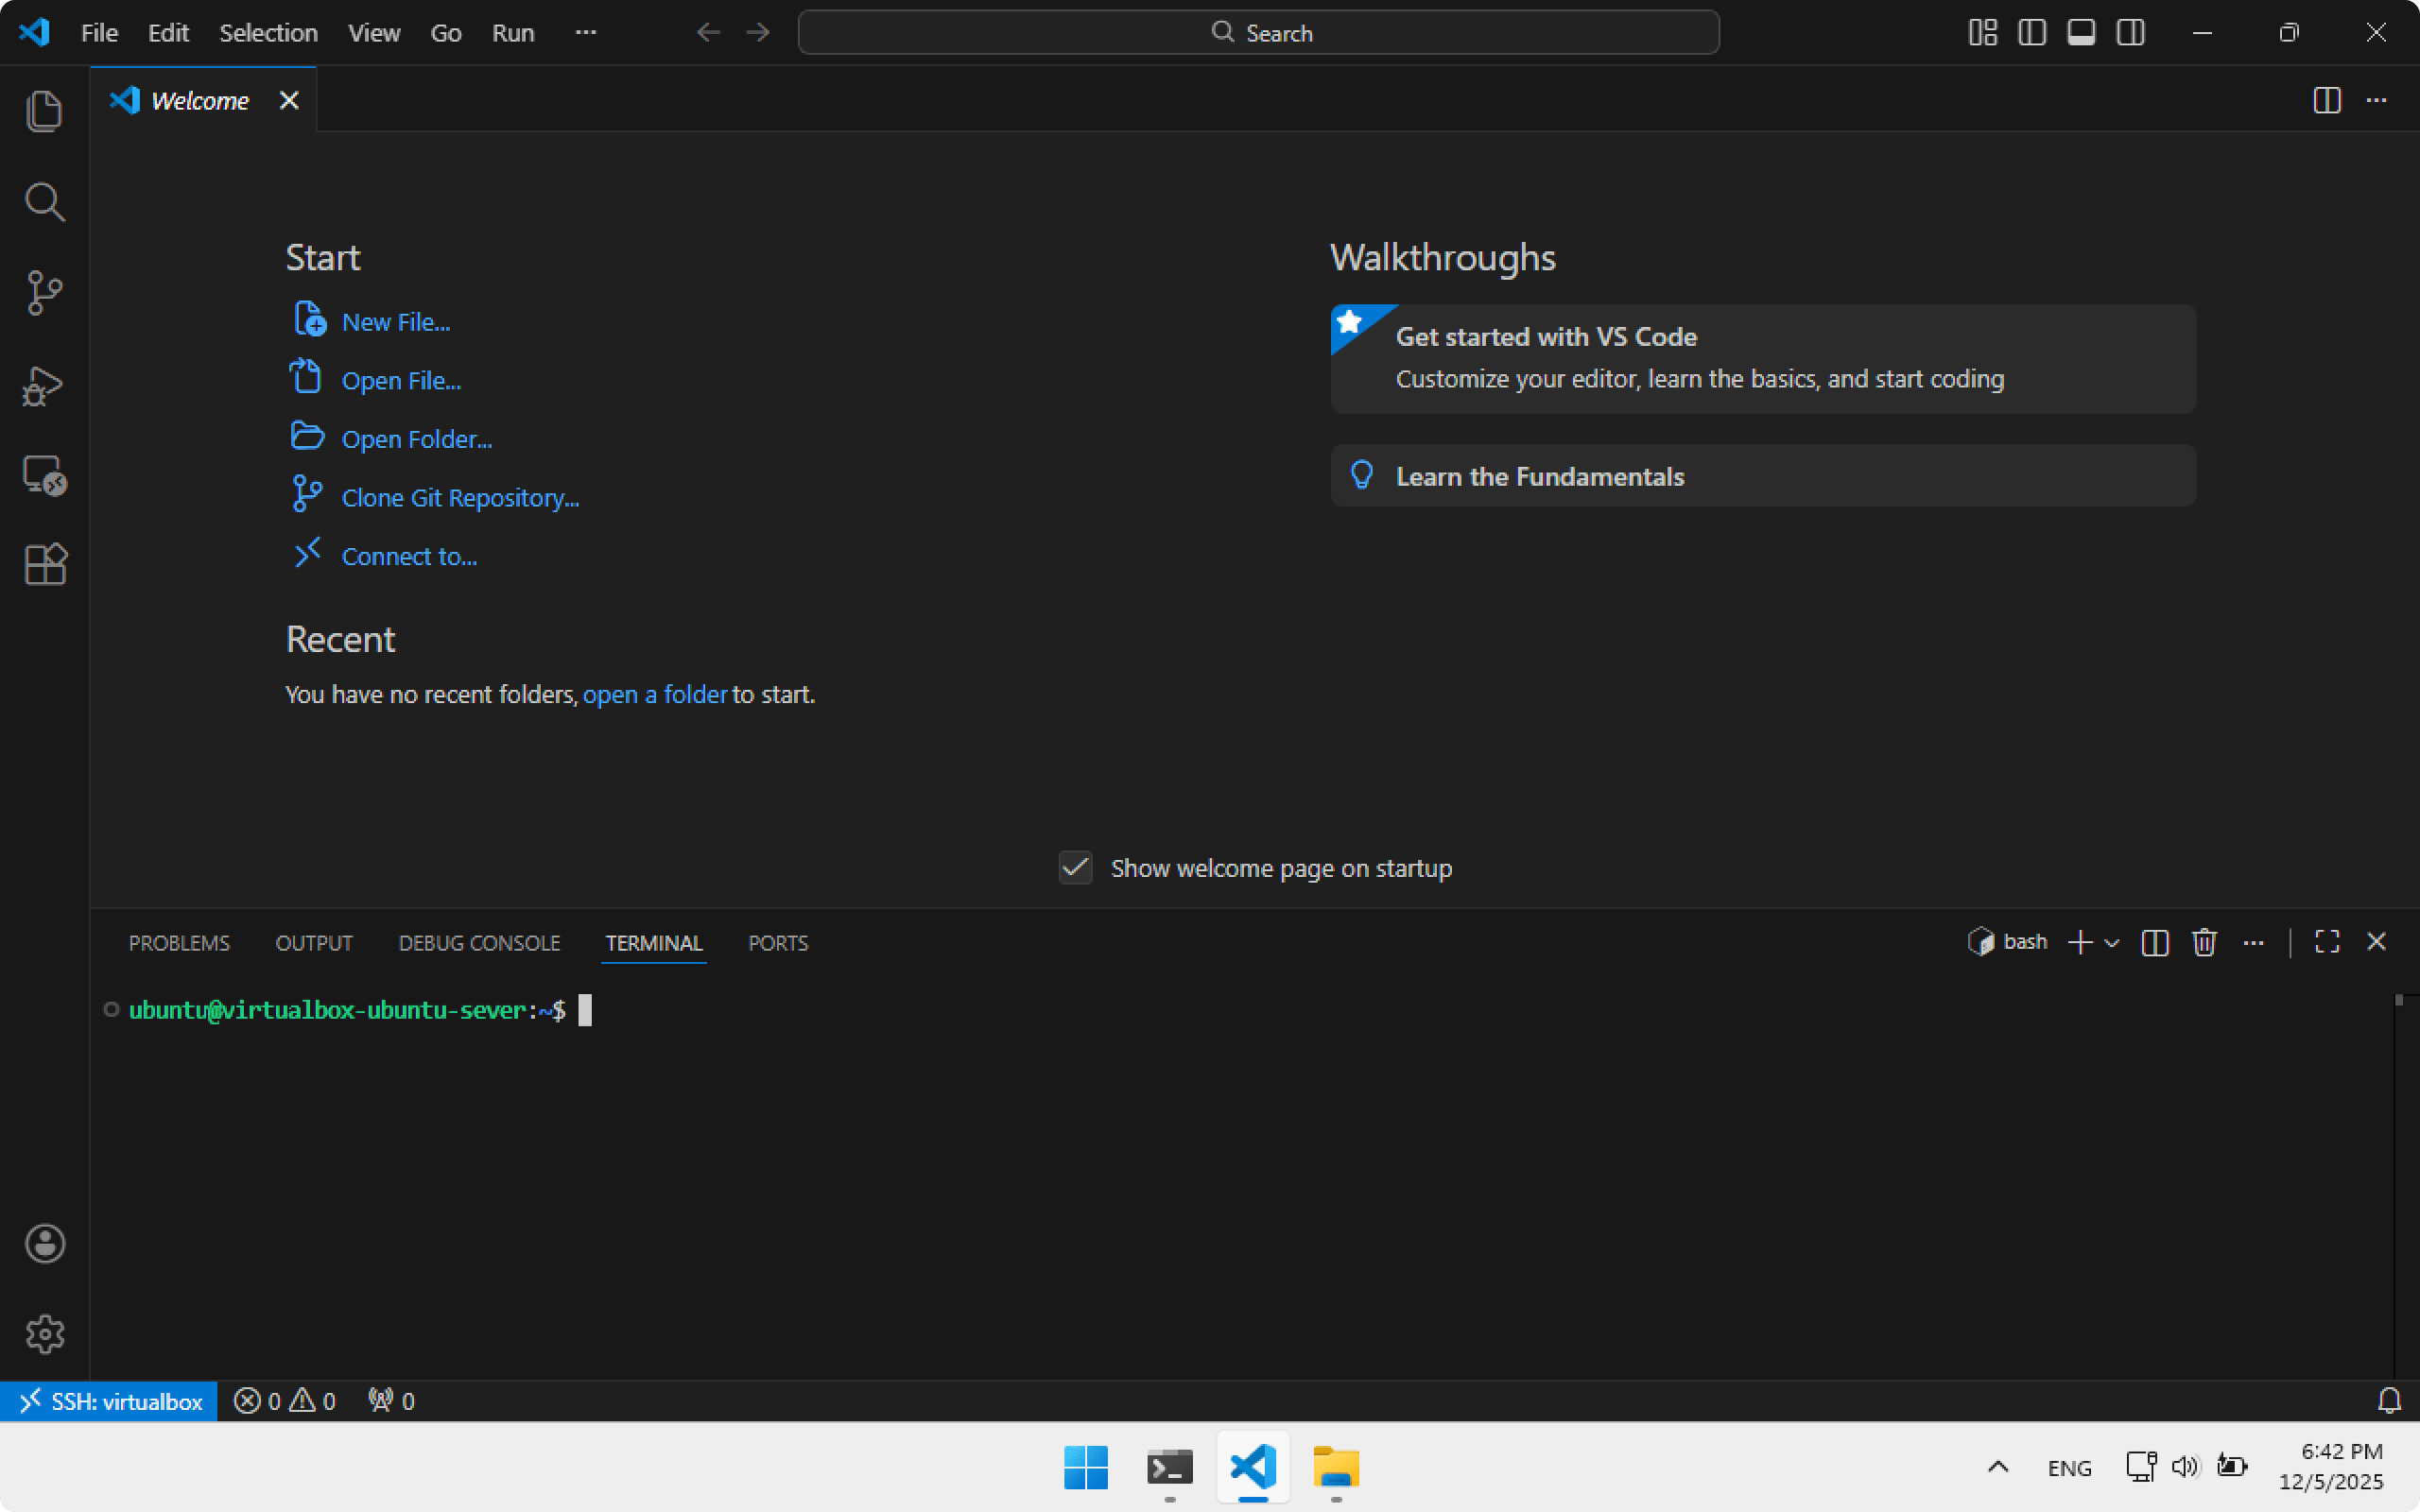
Setting up Ubuntu Server for Decky plugin development
Development workflow: Visual Studio Code on Windows connects to Ubuntu Server. Everything you do: file creation, command execution, software installation — happens on Ubuntu Server. It’s like a remote workspace.
Open a terminal inside Visual Studio Code with Ctrl+J. Note the prompt:
ubuntu@virtualbox-ubuntu-server:~$
We are connected directly to Ubuntu Server.
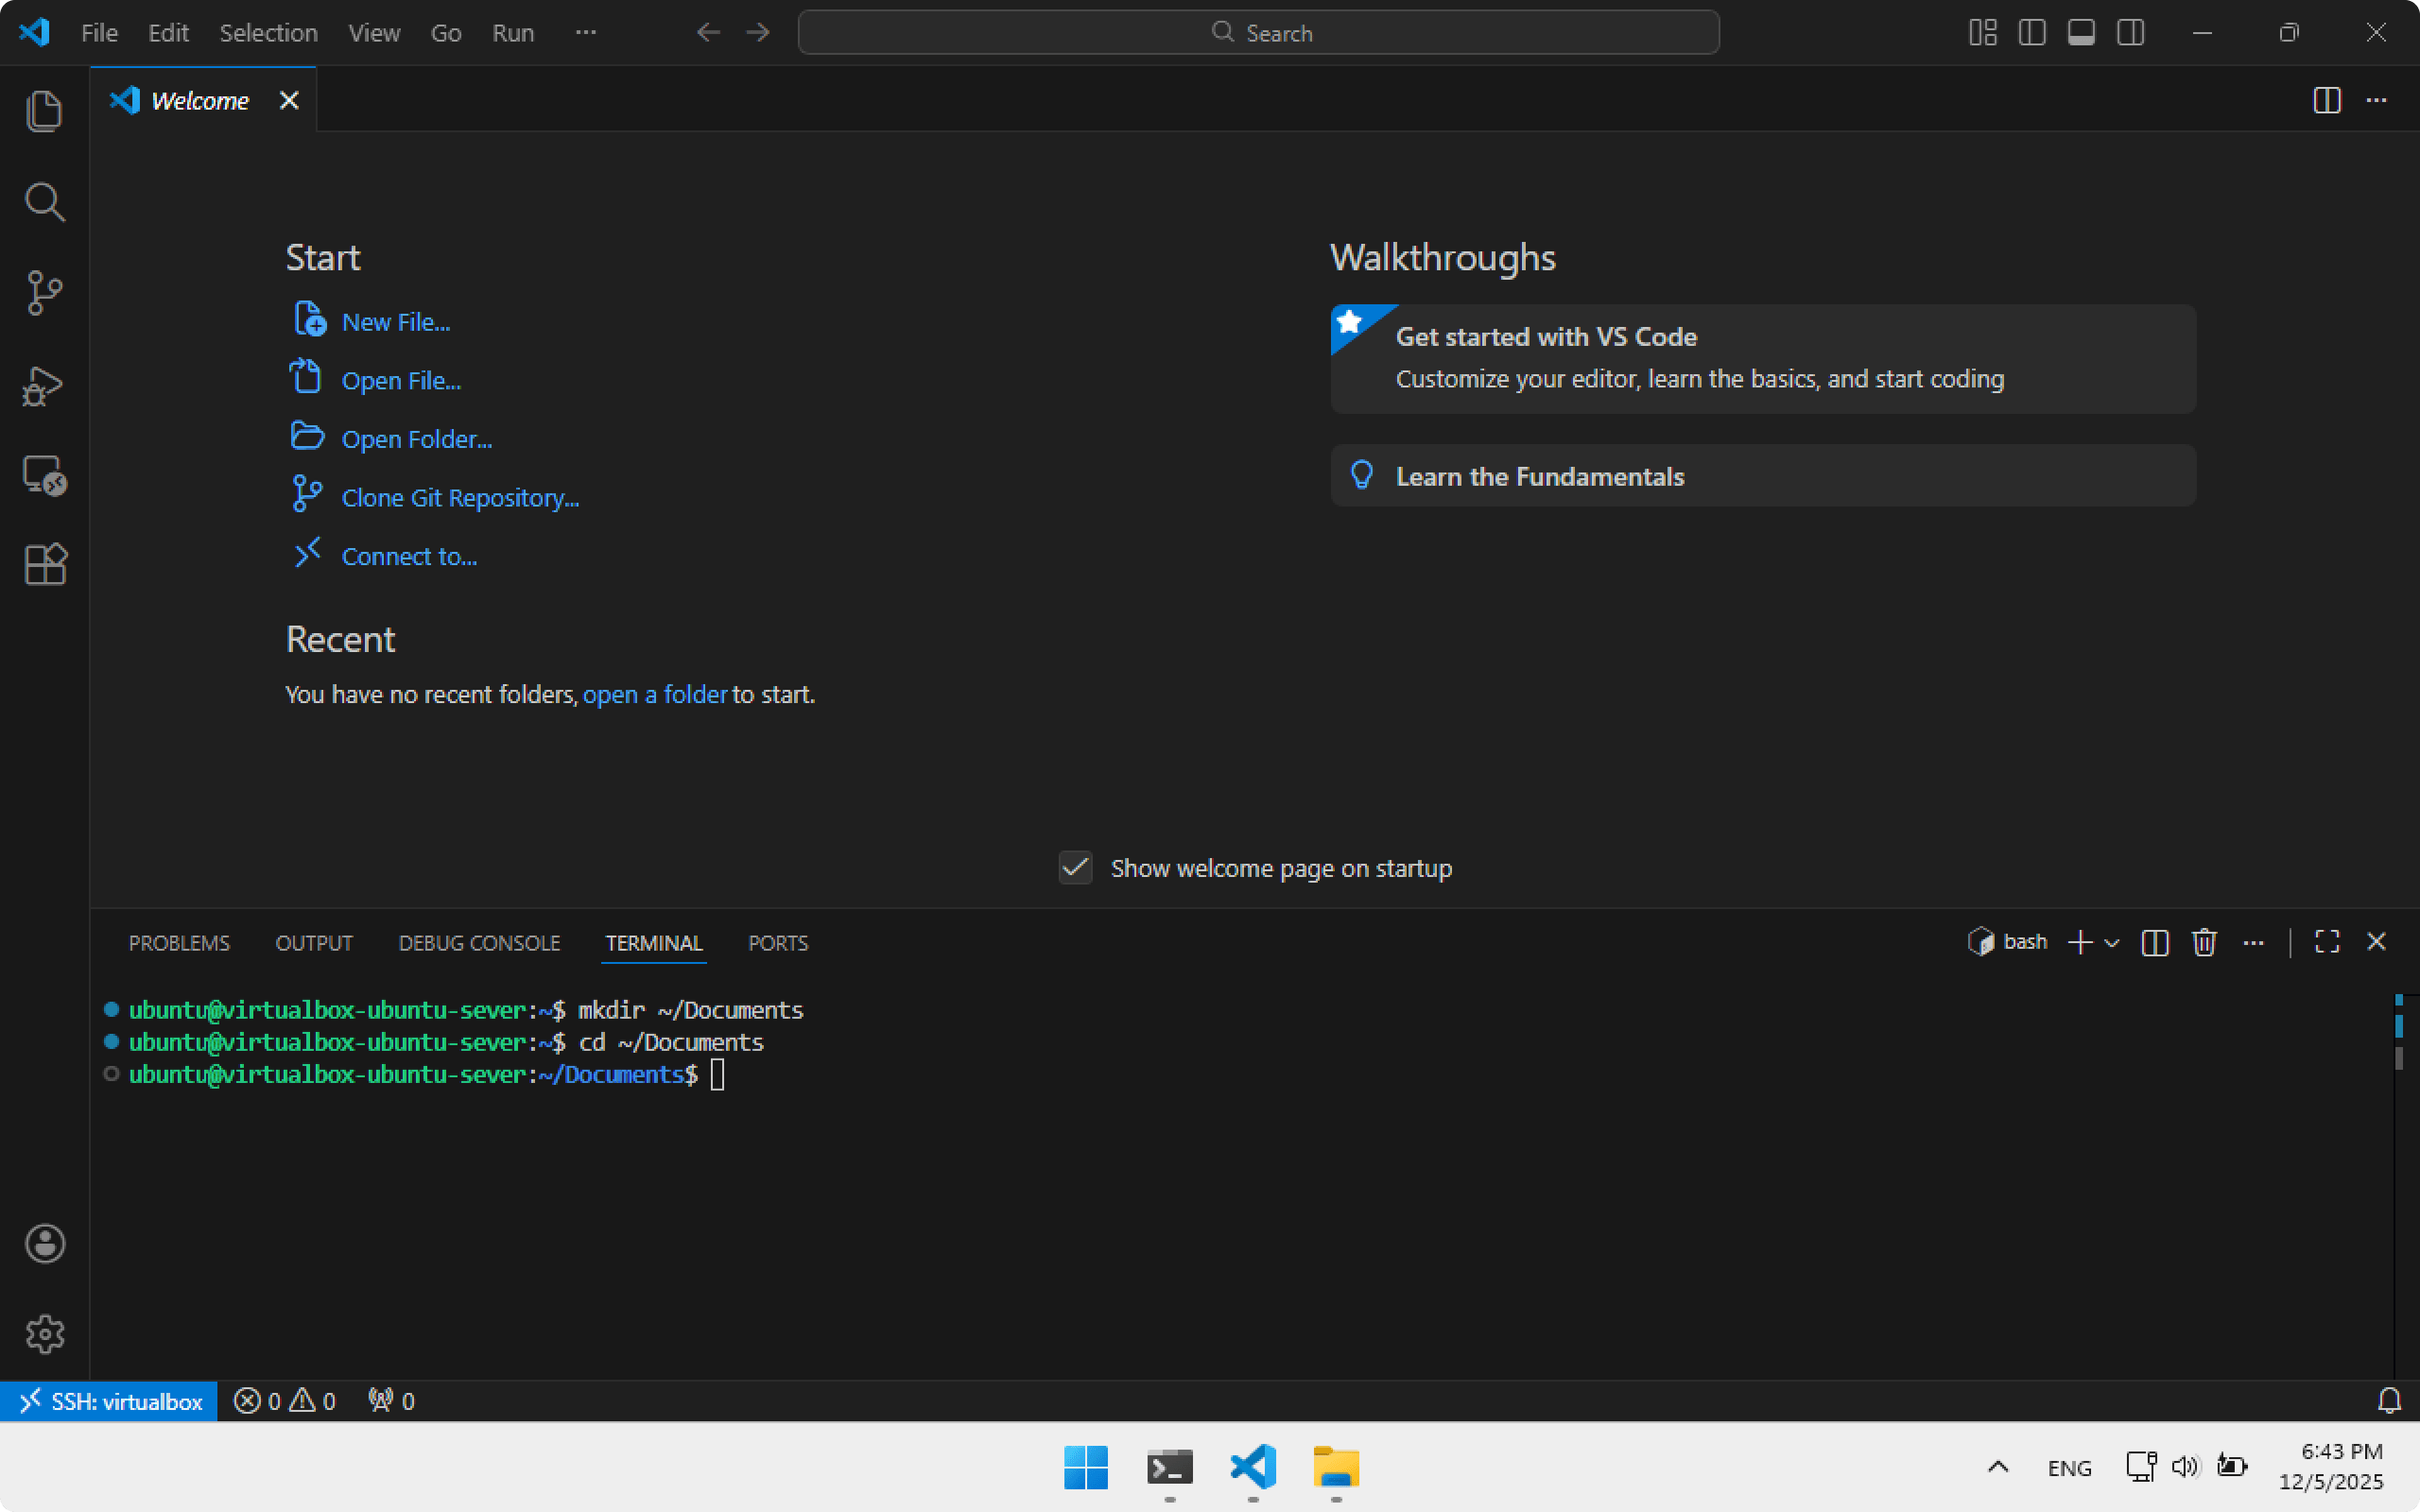
Create a Documents folder for projects:
mkdir ~/Documents
Go to Documents:
cd ~/Documents
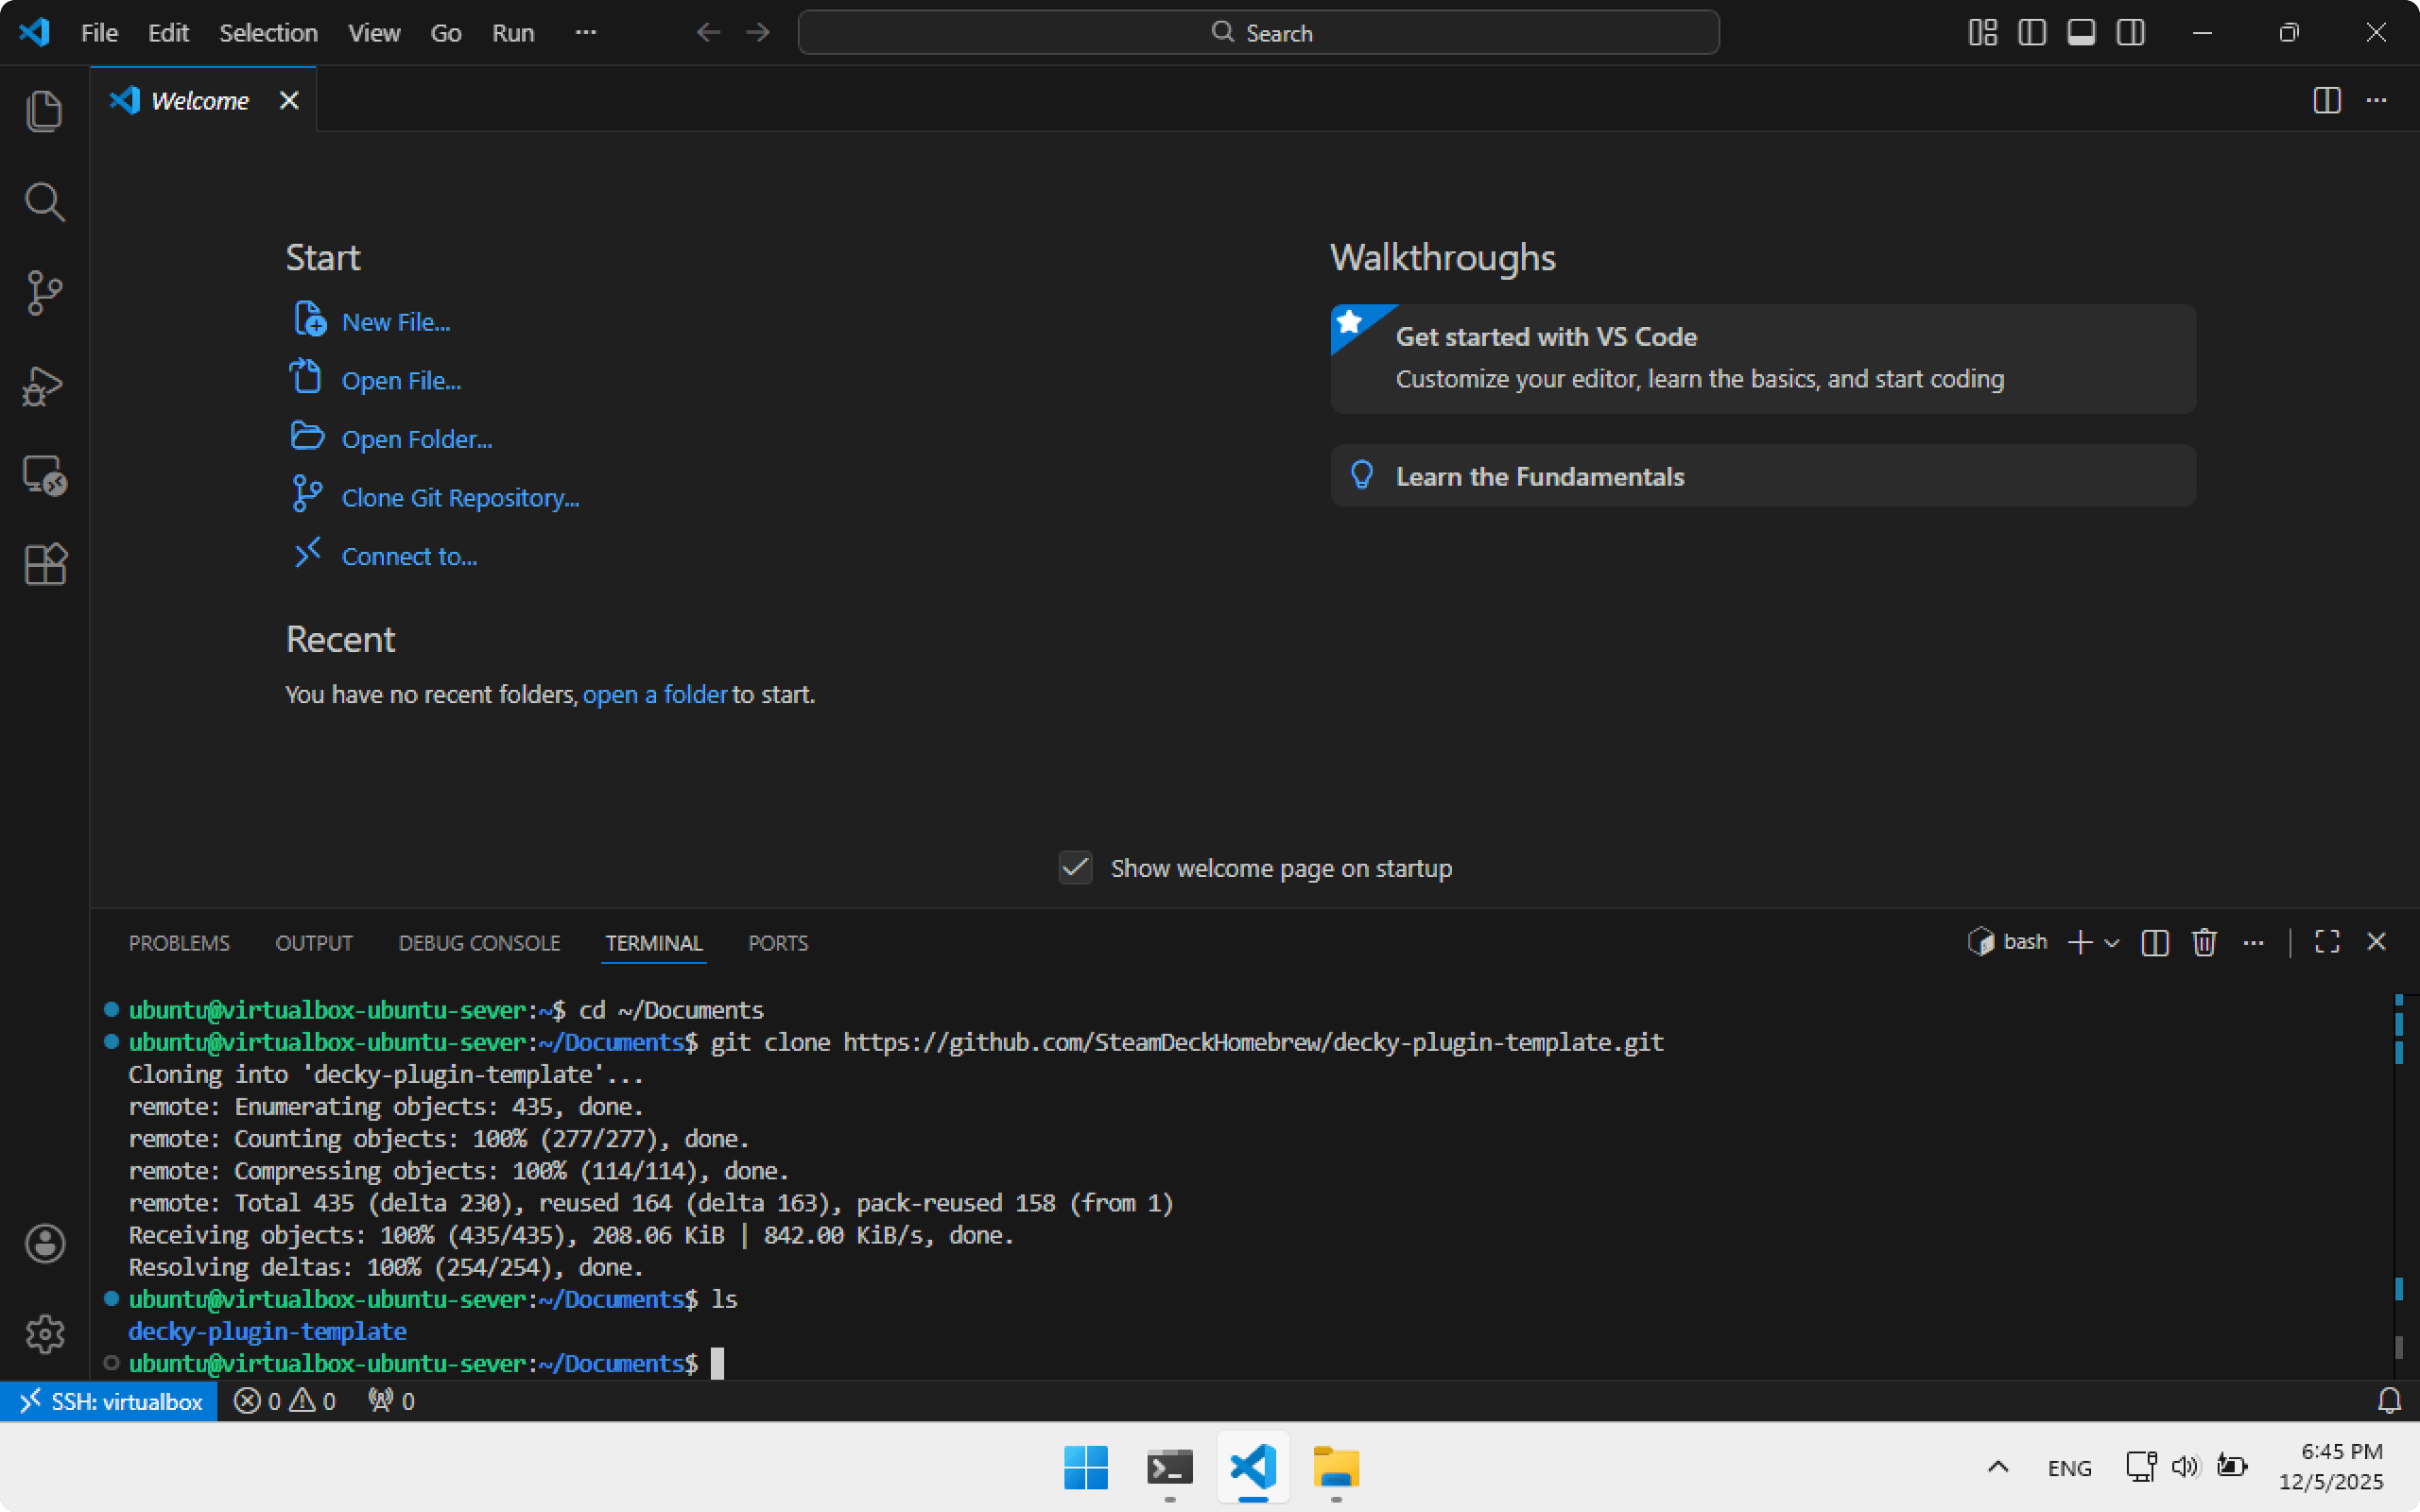
As an example, we will use the official Decky Plugin Template.
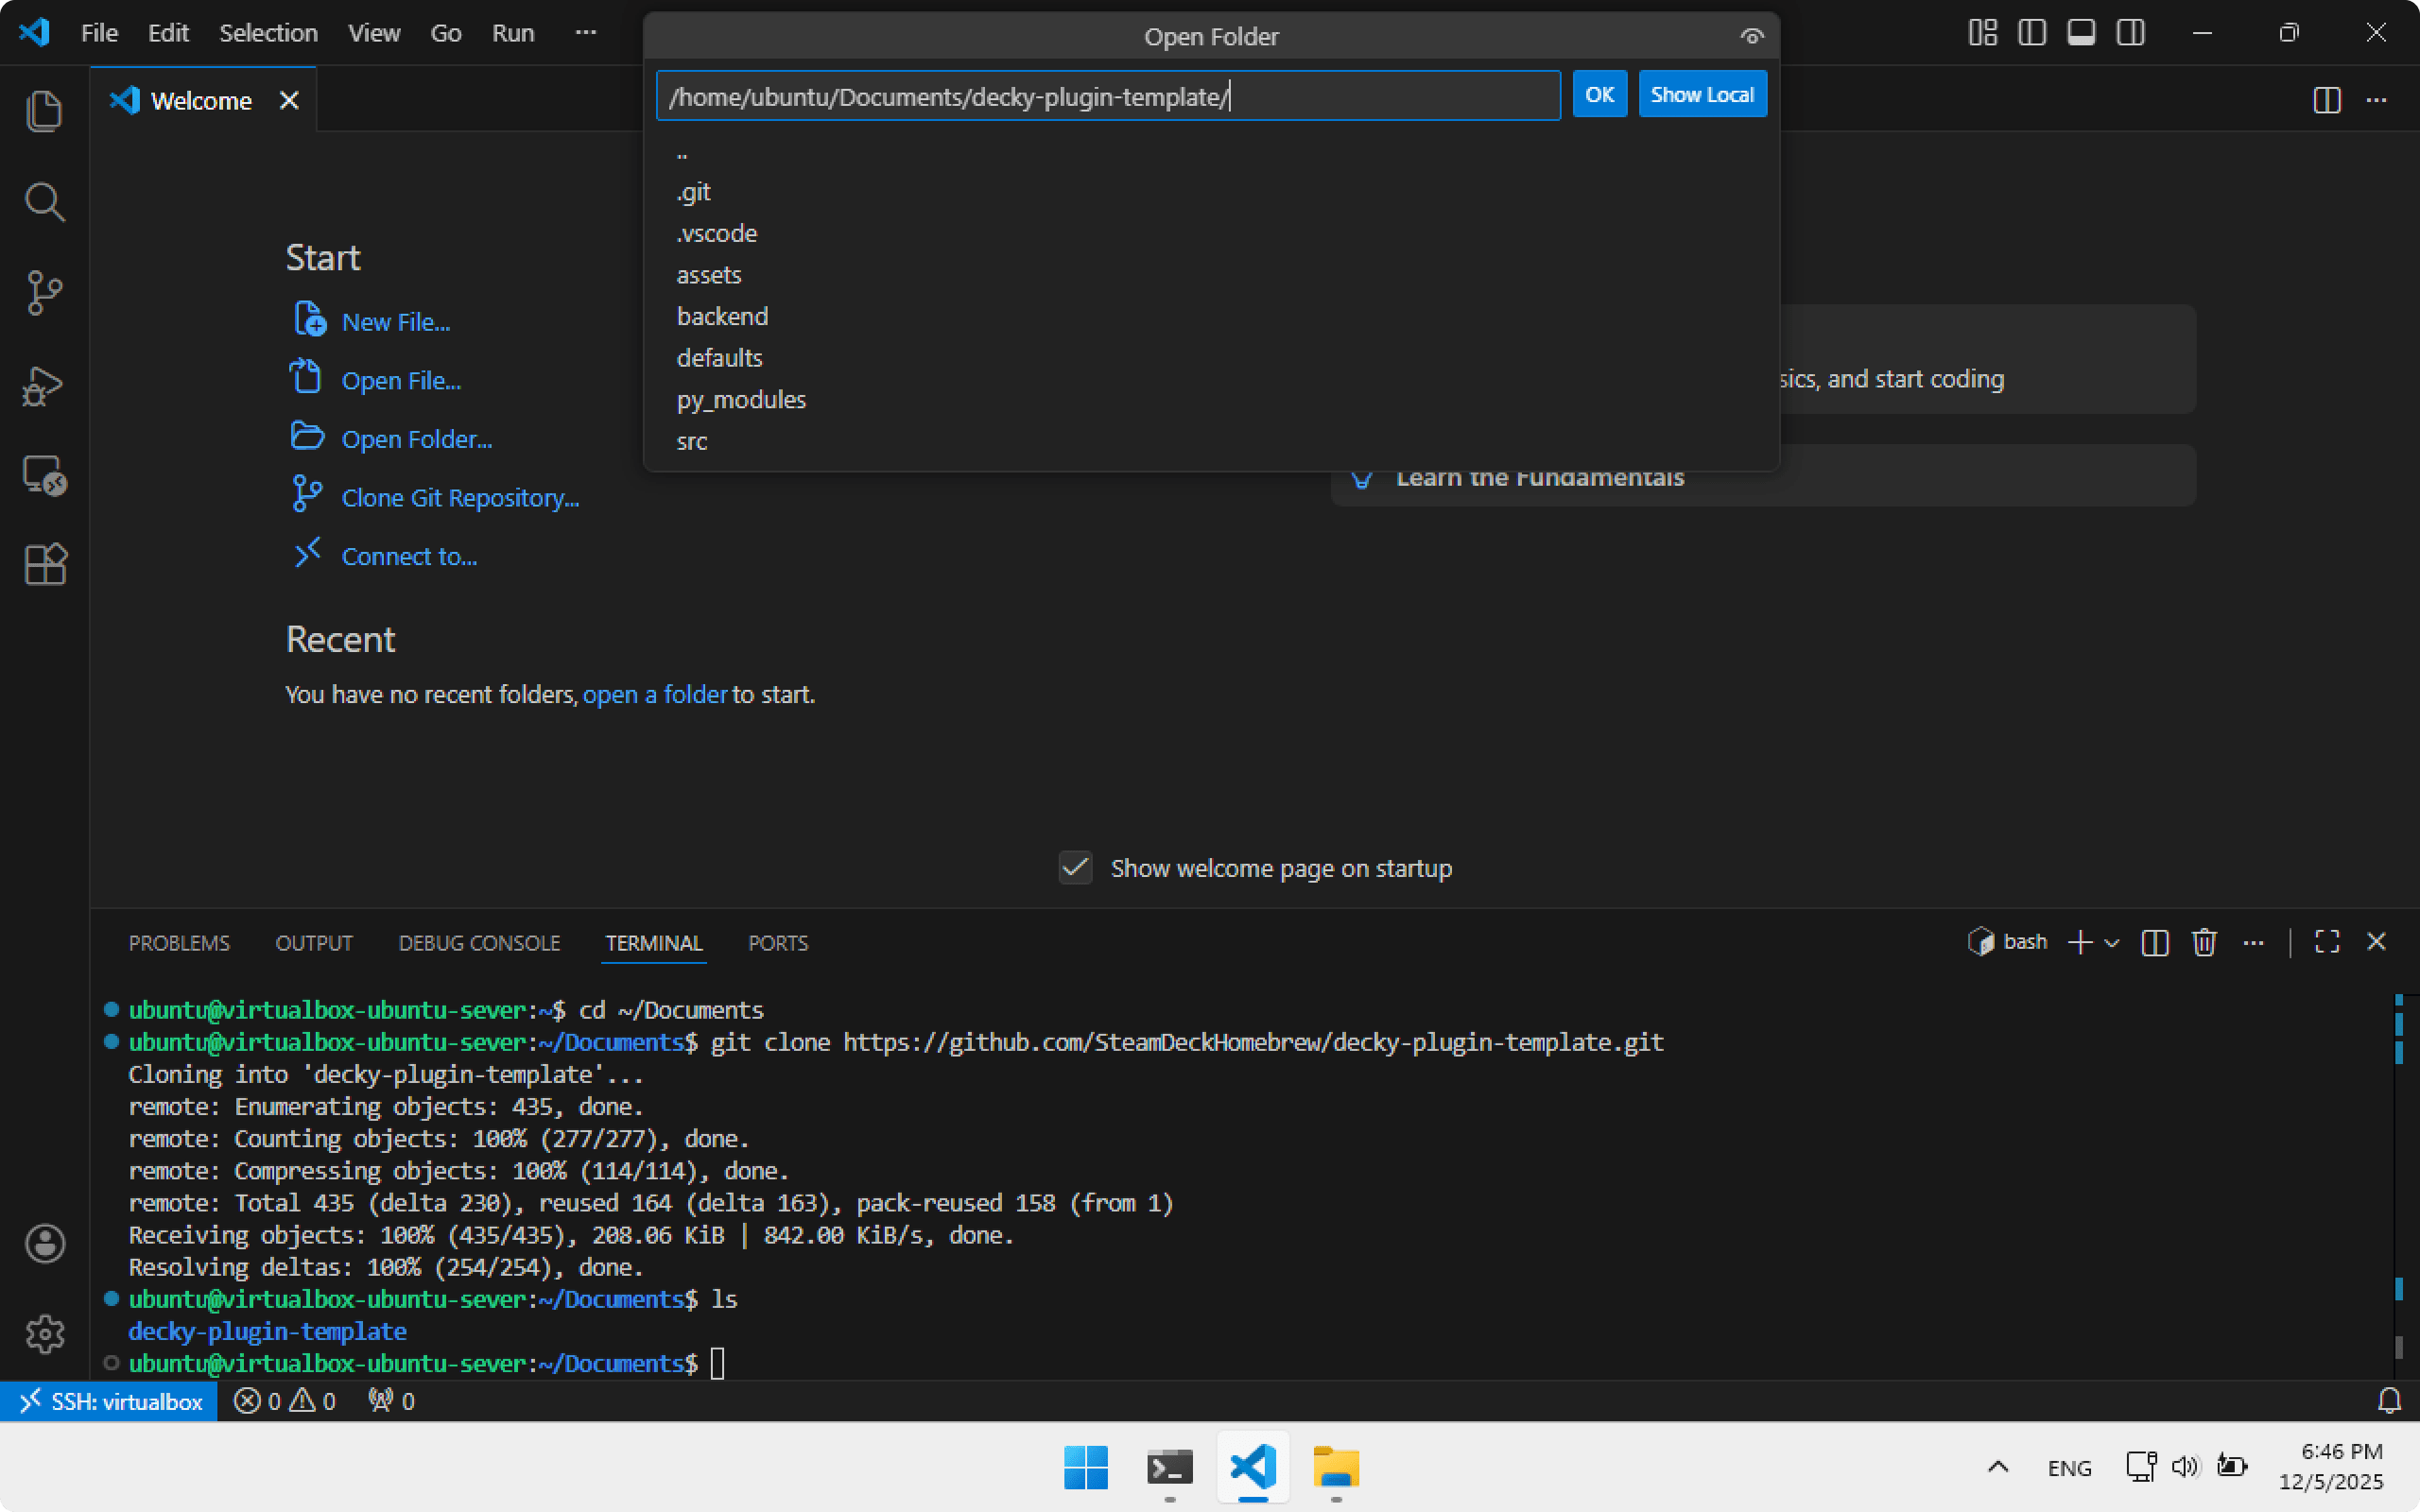
Clone it into the Documents folder:
git clone https://github.com/SteamDeckHomebrew/decky-plugin-template.git
Check that the decky-plugin-template folder exists:
ls
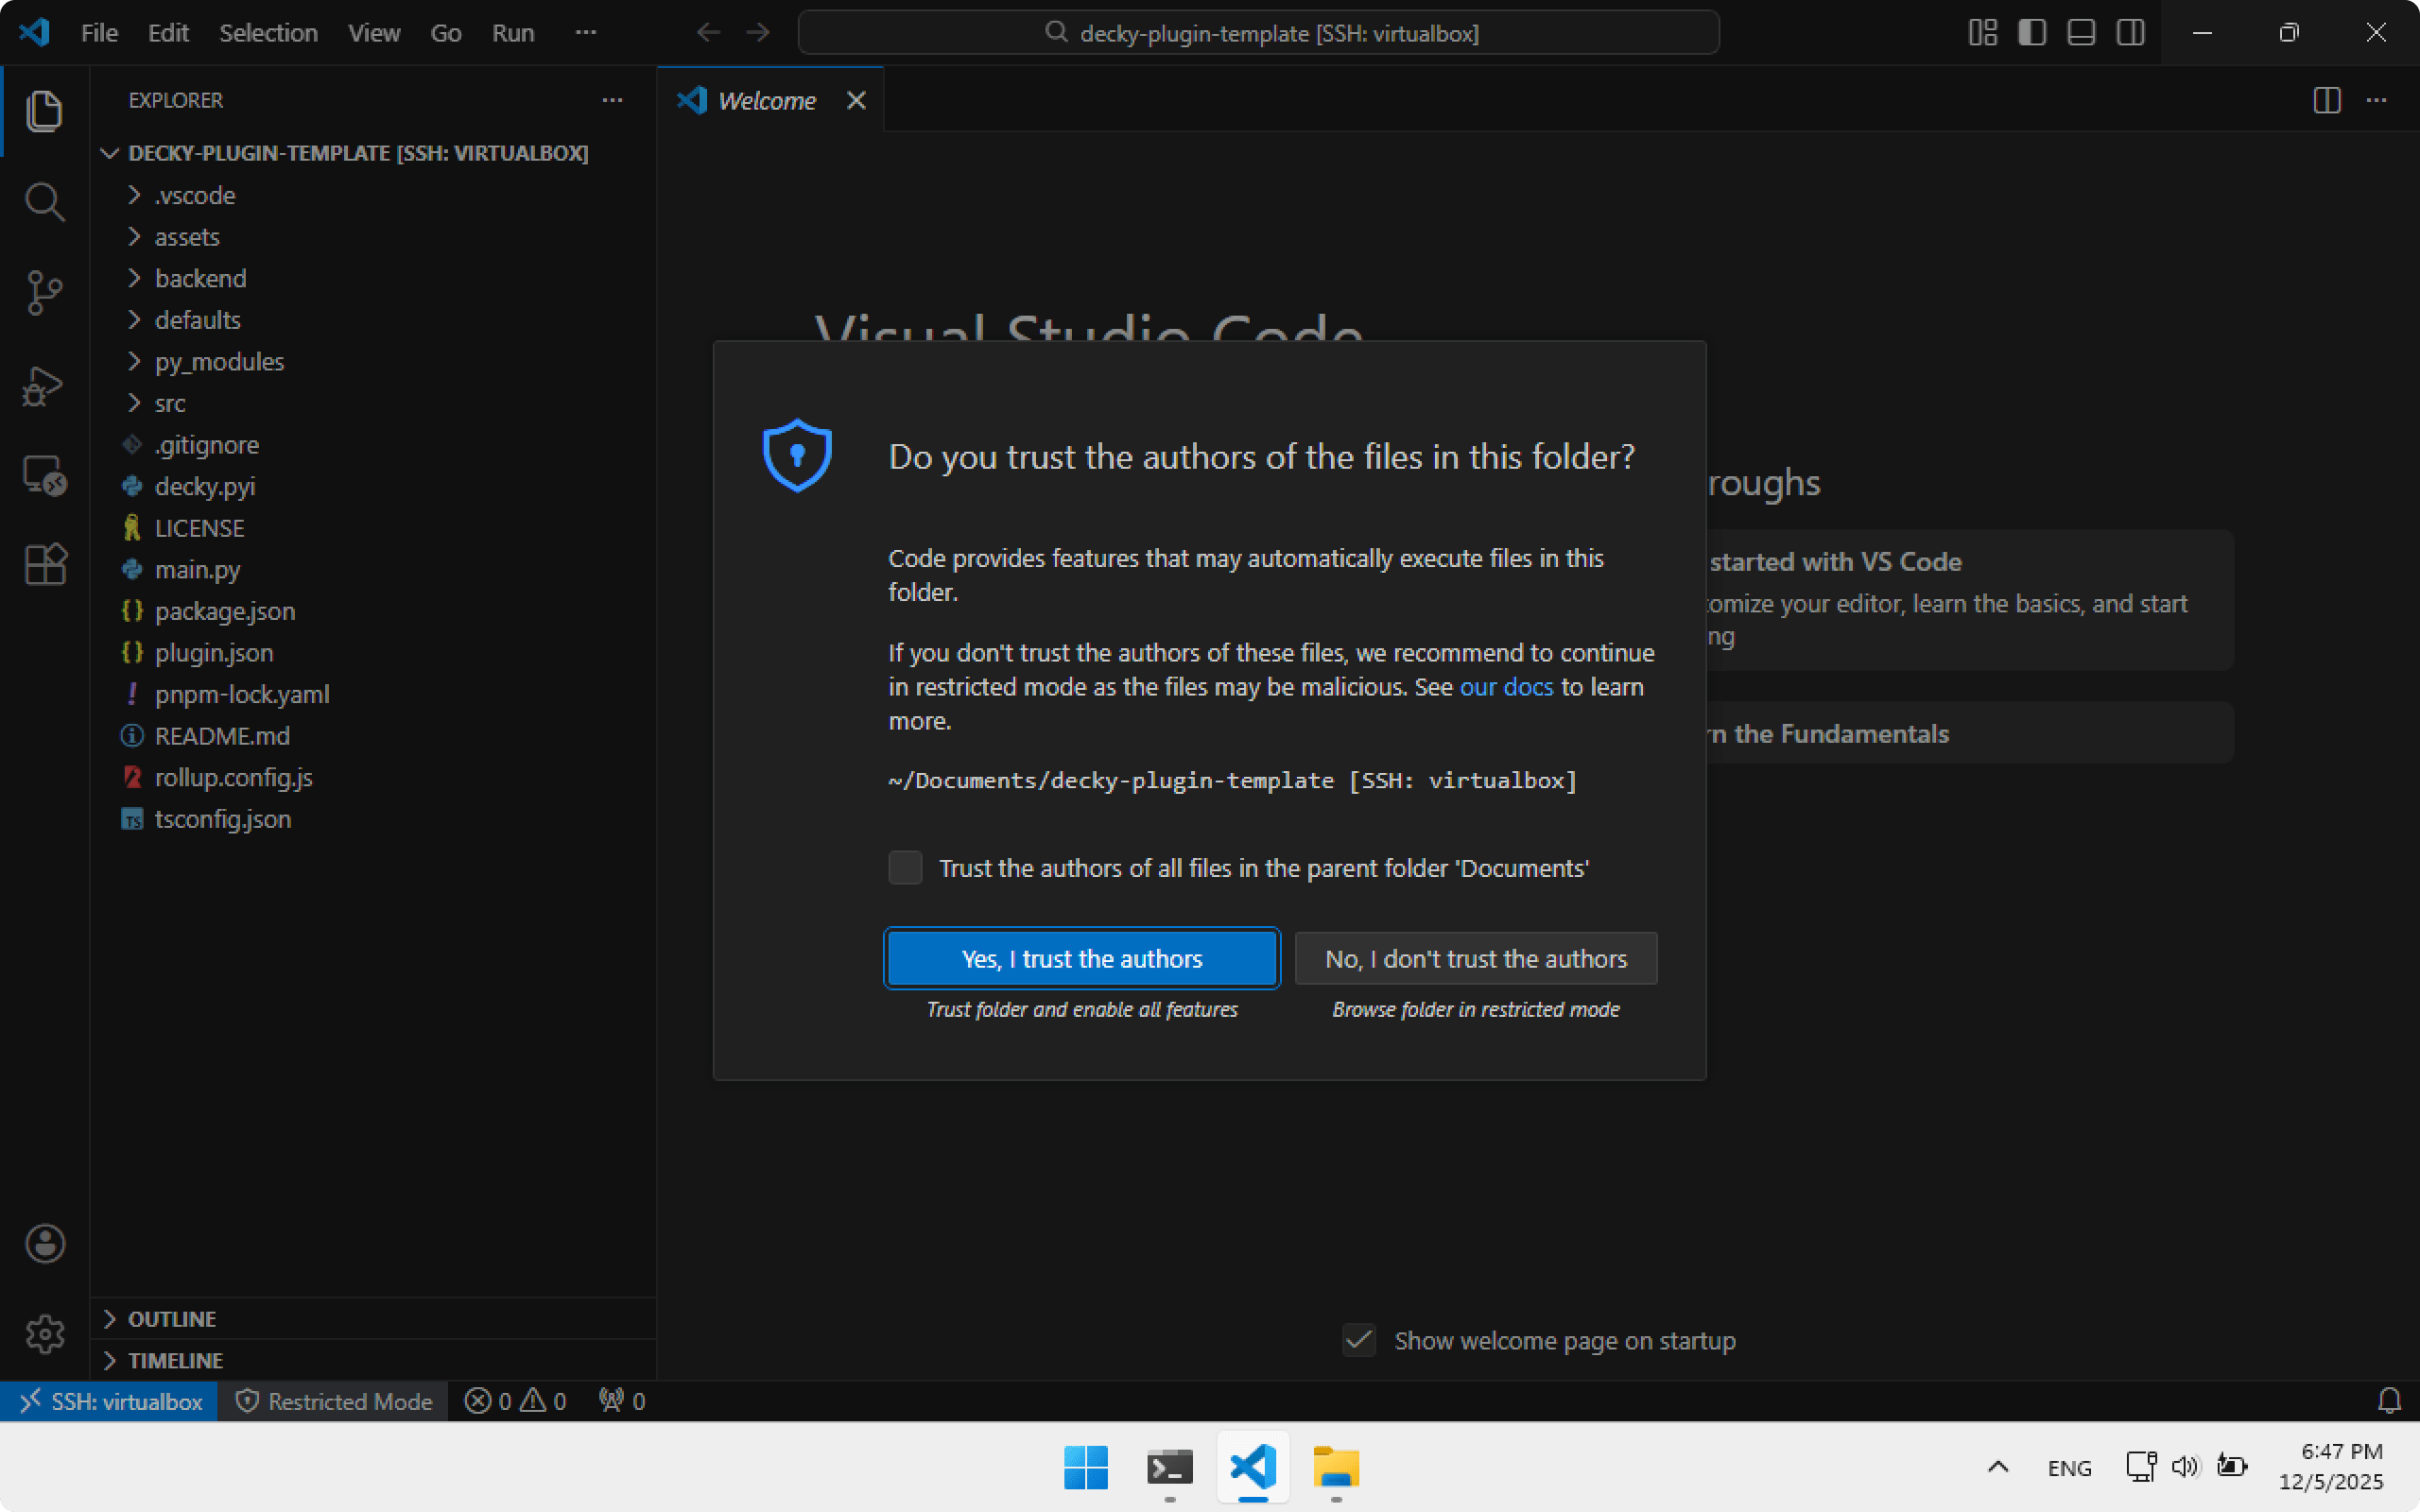
Open the decky-plugin-template folder in Visual Studio Code. Click Open folder, select Documents, then decky-plugin-template, then OK.
The project opened. Click Yes, I trust the authors. Now you can explore the project structure, edit files, etc.
To build the plugin you will need packages:
- curl
- wget
- nodejs npm
- pnpm
- docker
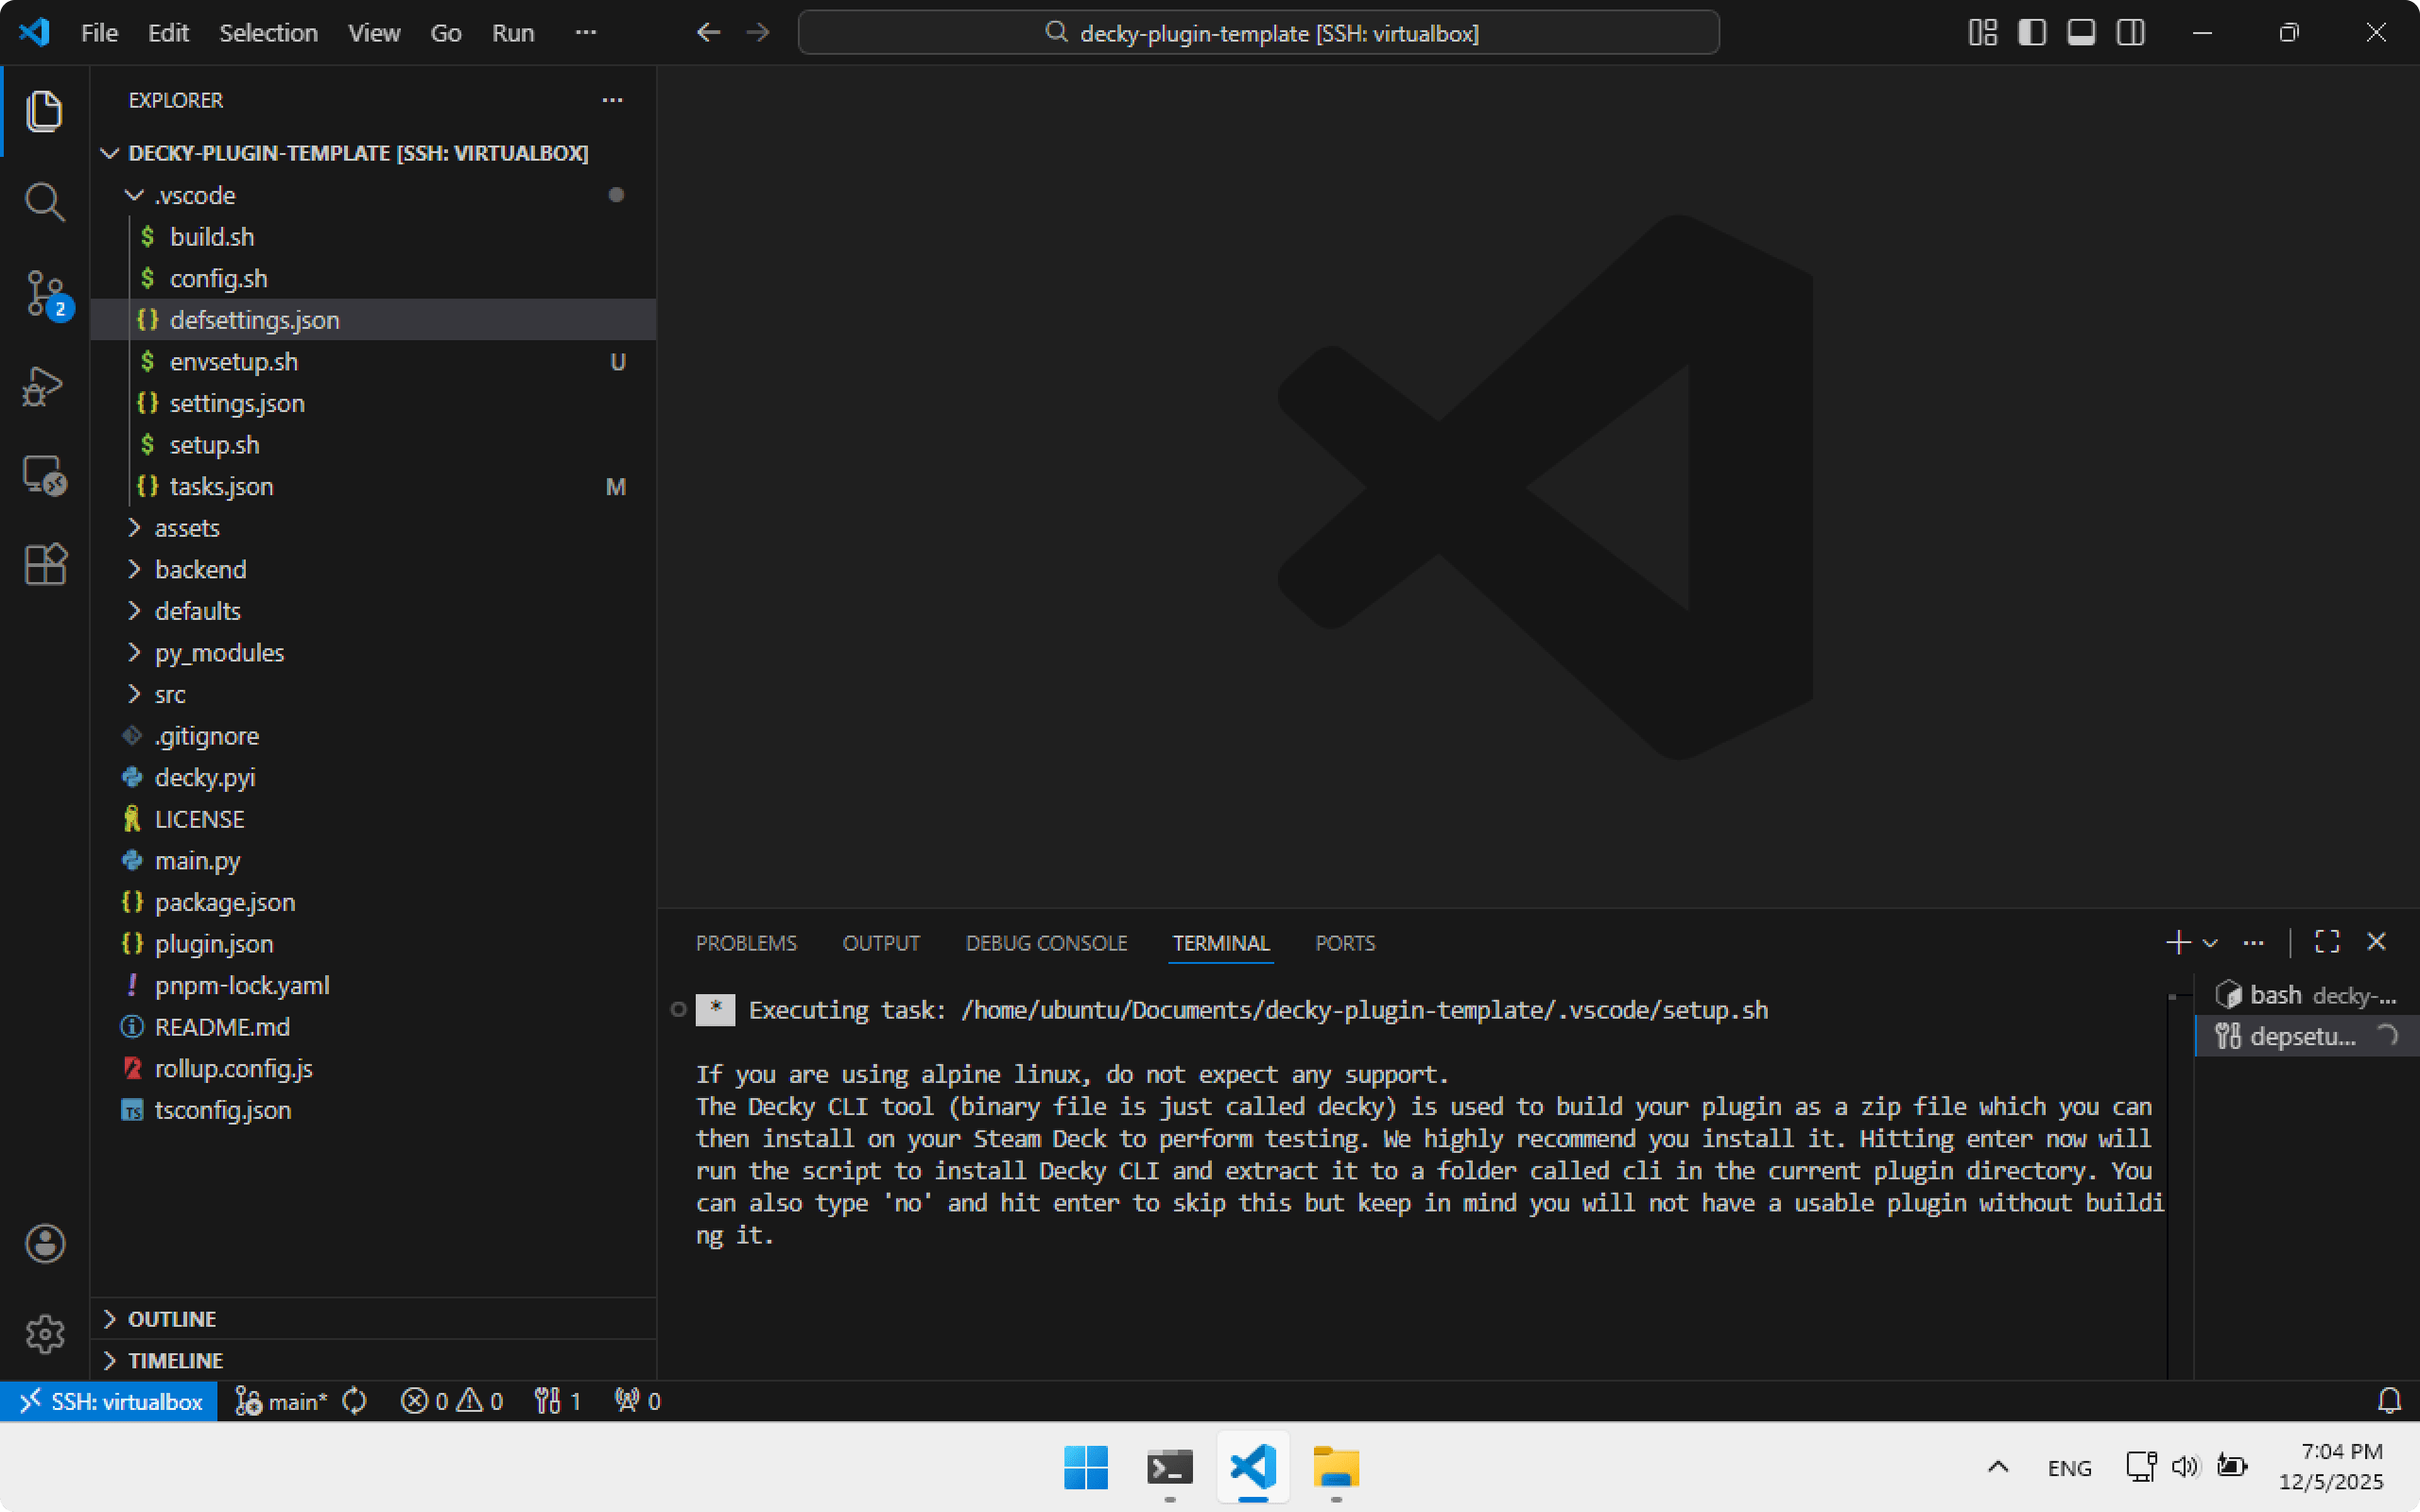
We’ll use my script to quickly install everything. Download the install script from MagicPodsDecky.
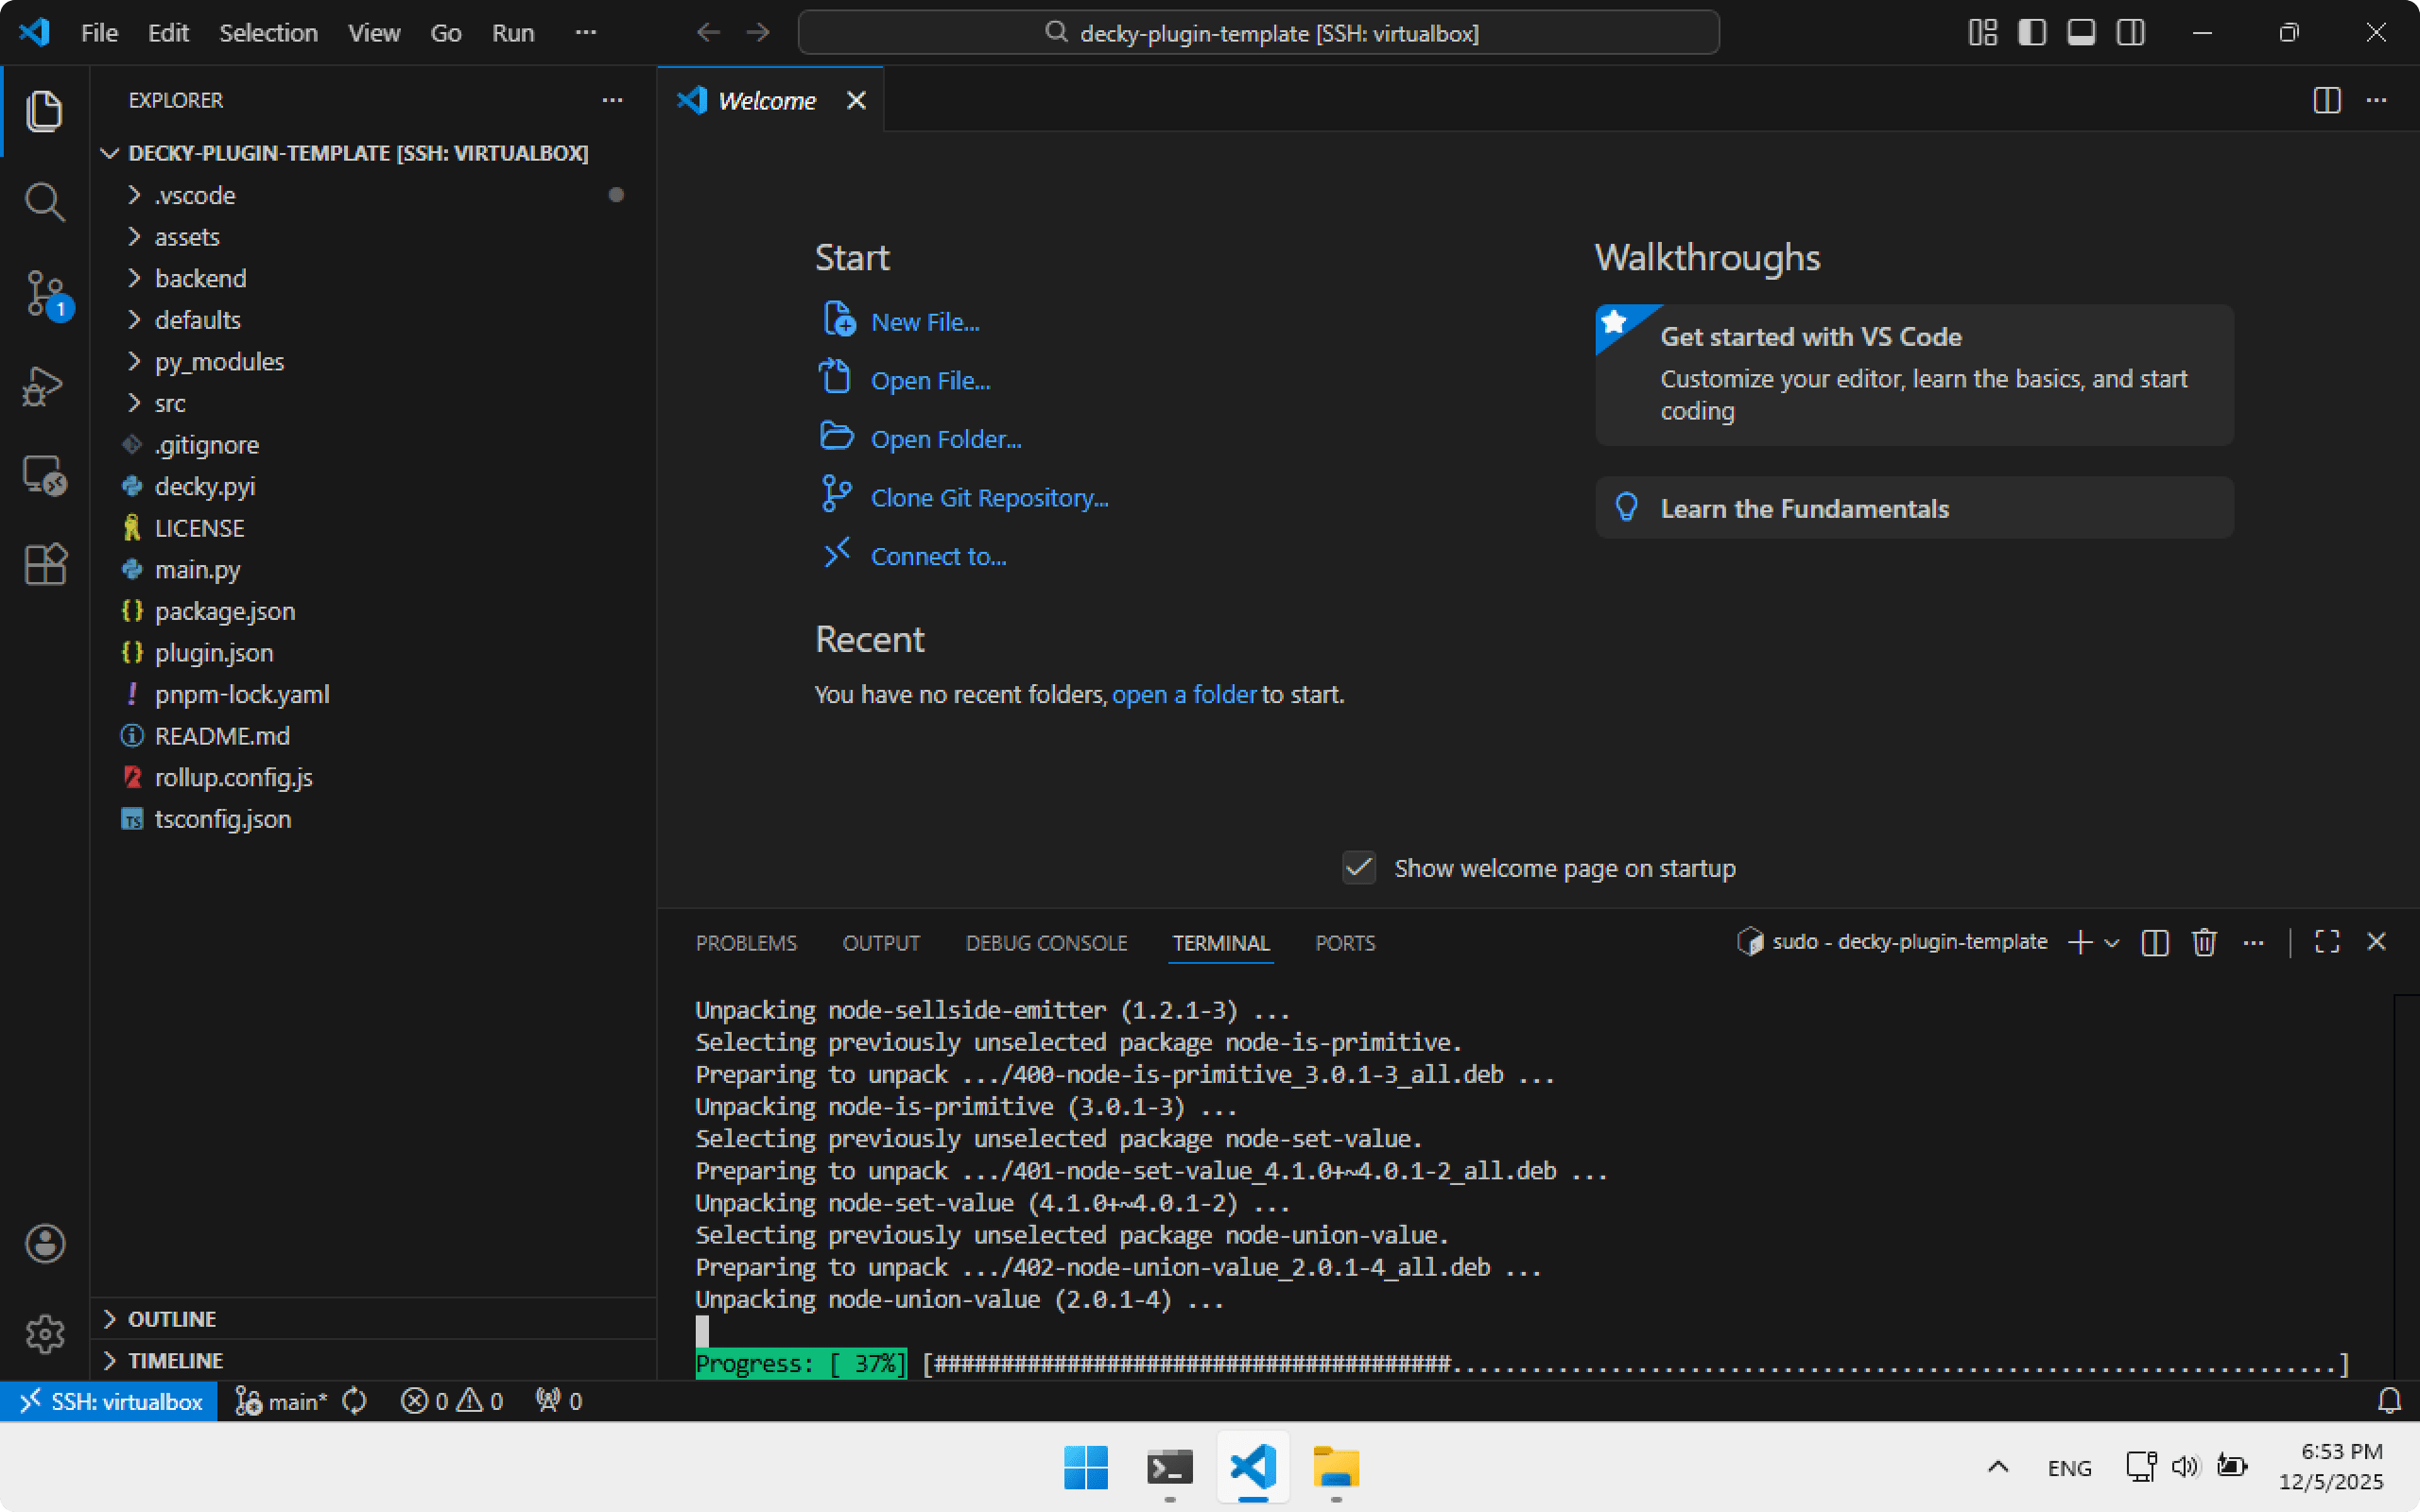
Open the terminal in Visual Studio Code (Ctrl+J) and run. It will ask for password password.
curl -L https://github.com/steam3d/MagicPodsDecky/raw/refs/heads/master/.vscode/envsetup.sh -o .vscode/envsetup.sh \
&& chmod +x .vscode/envsetup.sh \
&& sudo .vscode/envsetup.sh
Wait for installation to finish — it may take some time.
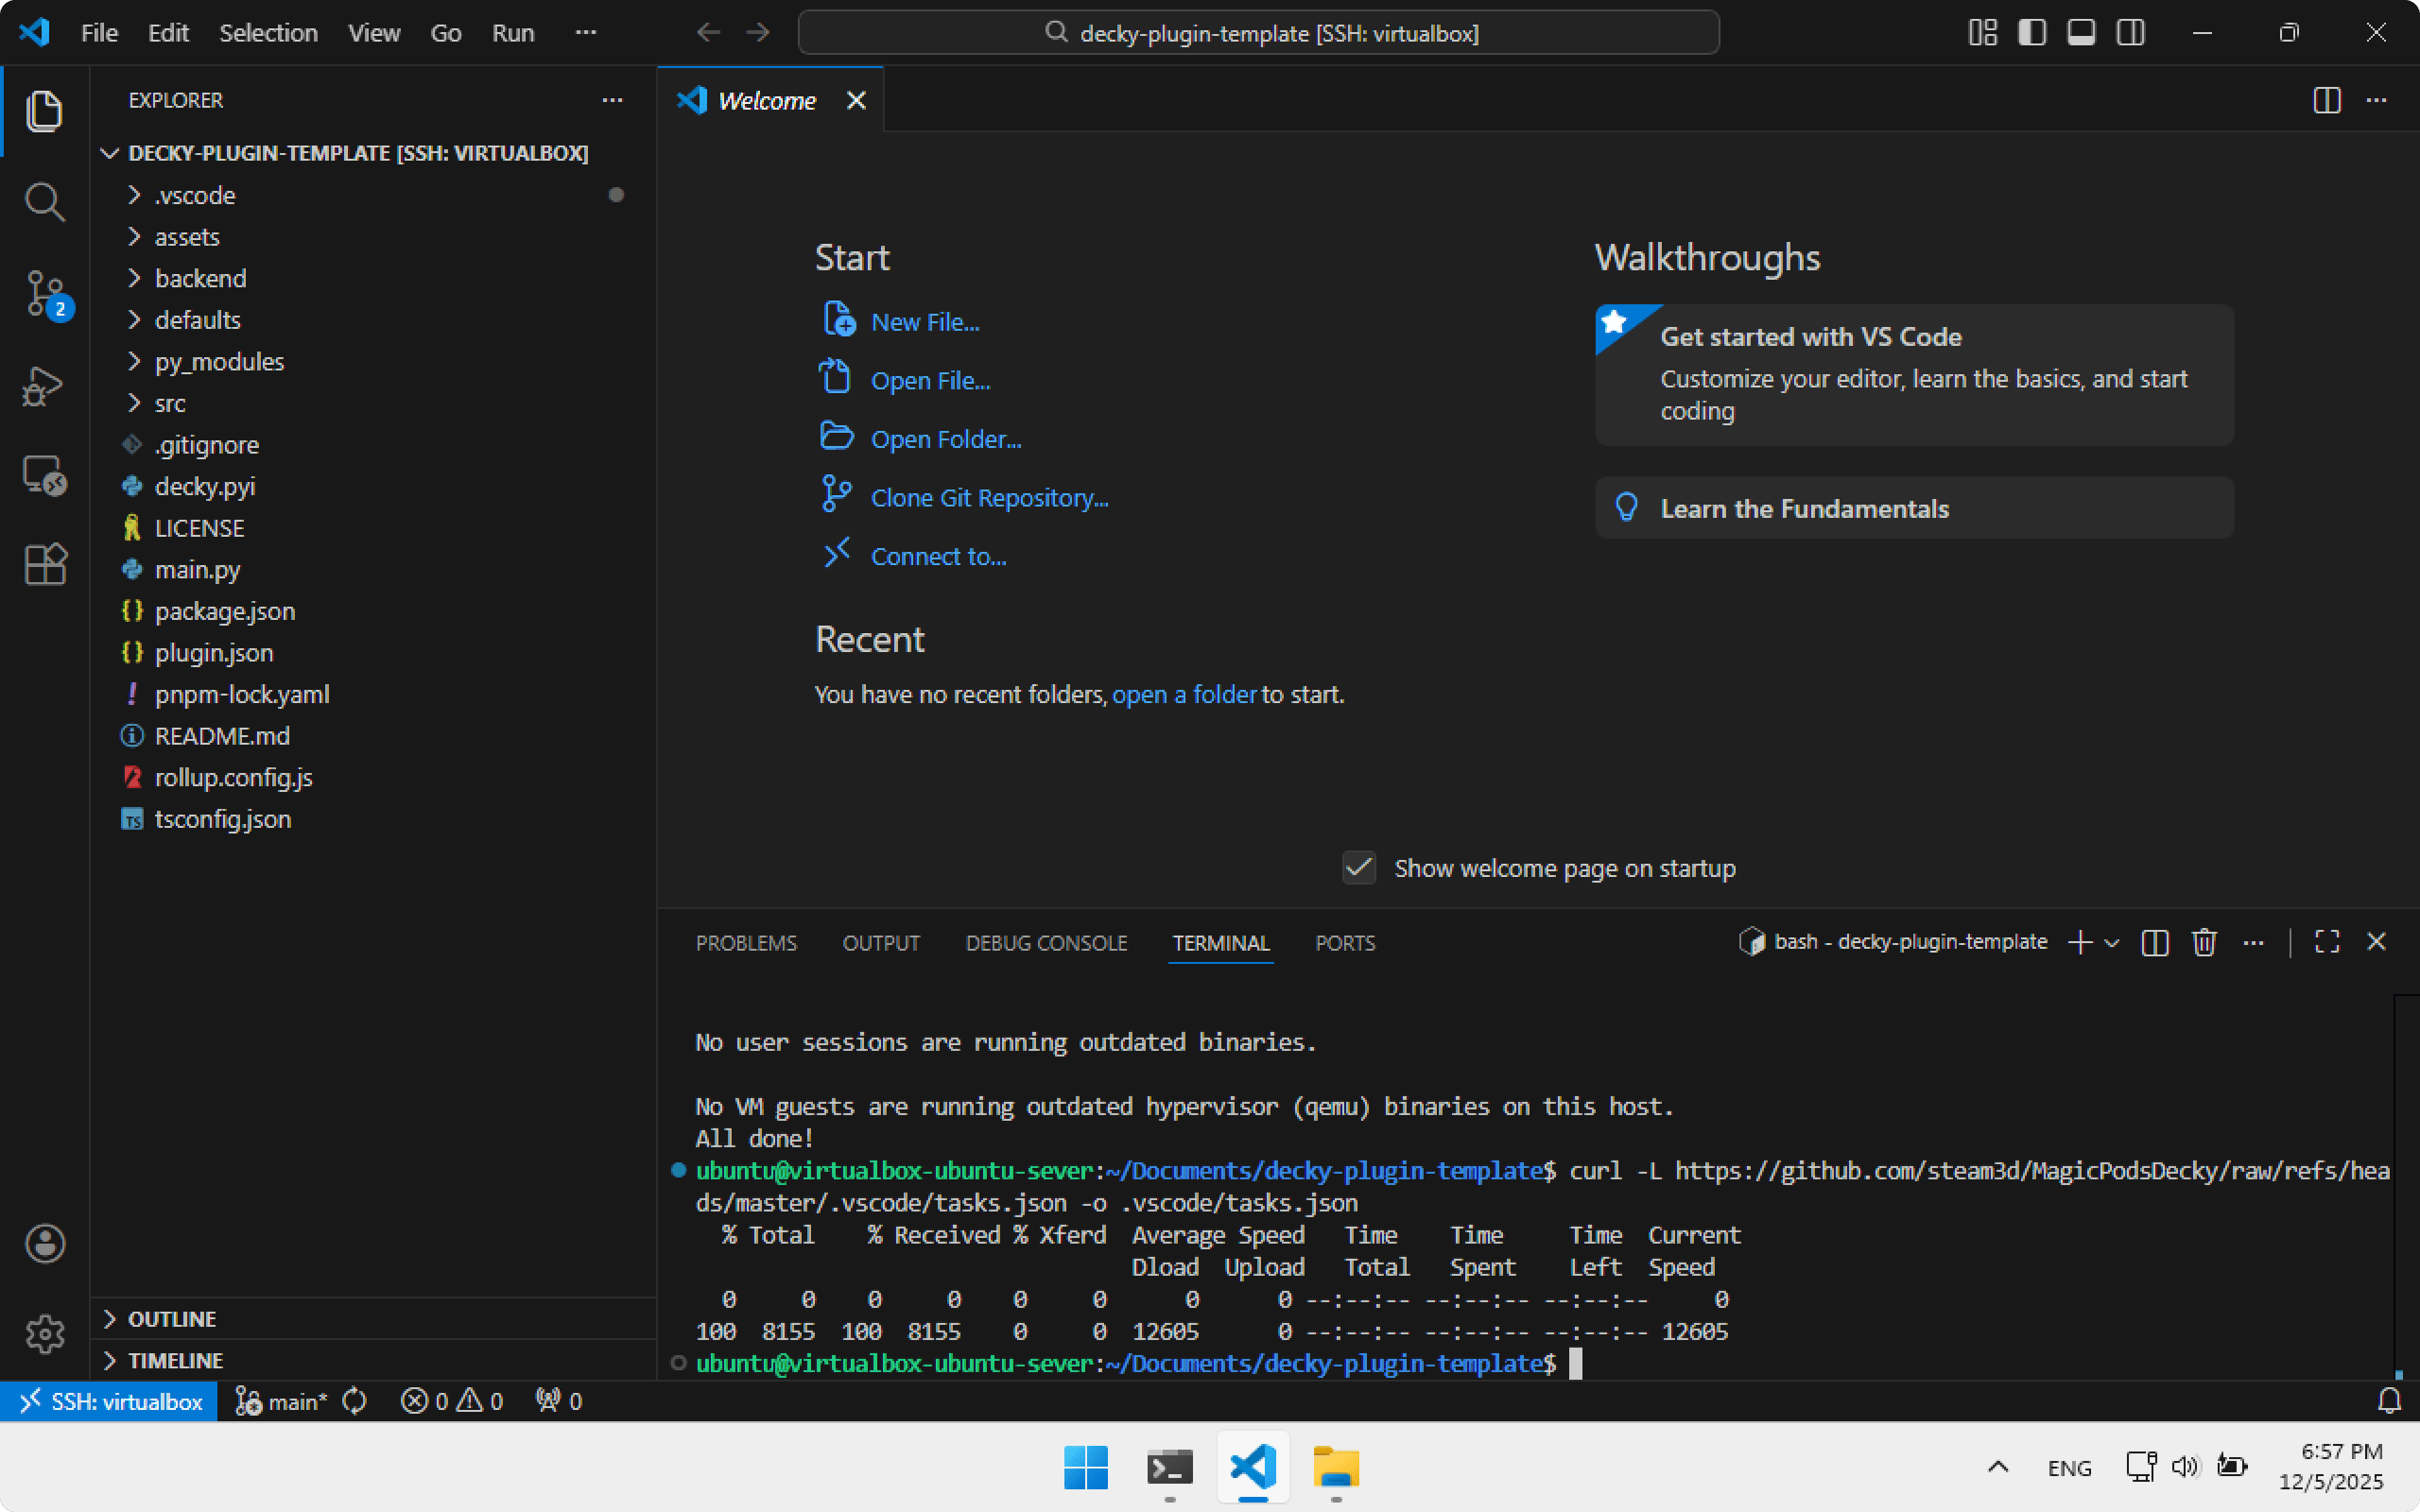
Add additional tasks for Visual Studio Code from MagicPodsDecky. We will see what they do later.
curl -L https://github.com/steam3d/MagicPodsDecky/raw/refs/heads/master/.vscode/tasks.json -o .vscode/tasks.json
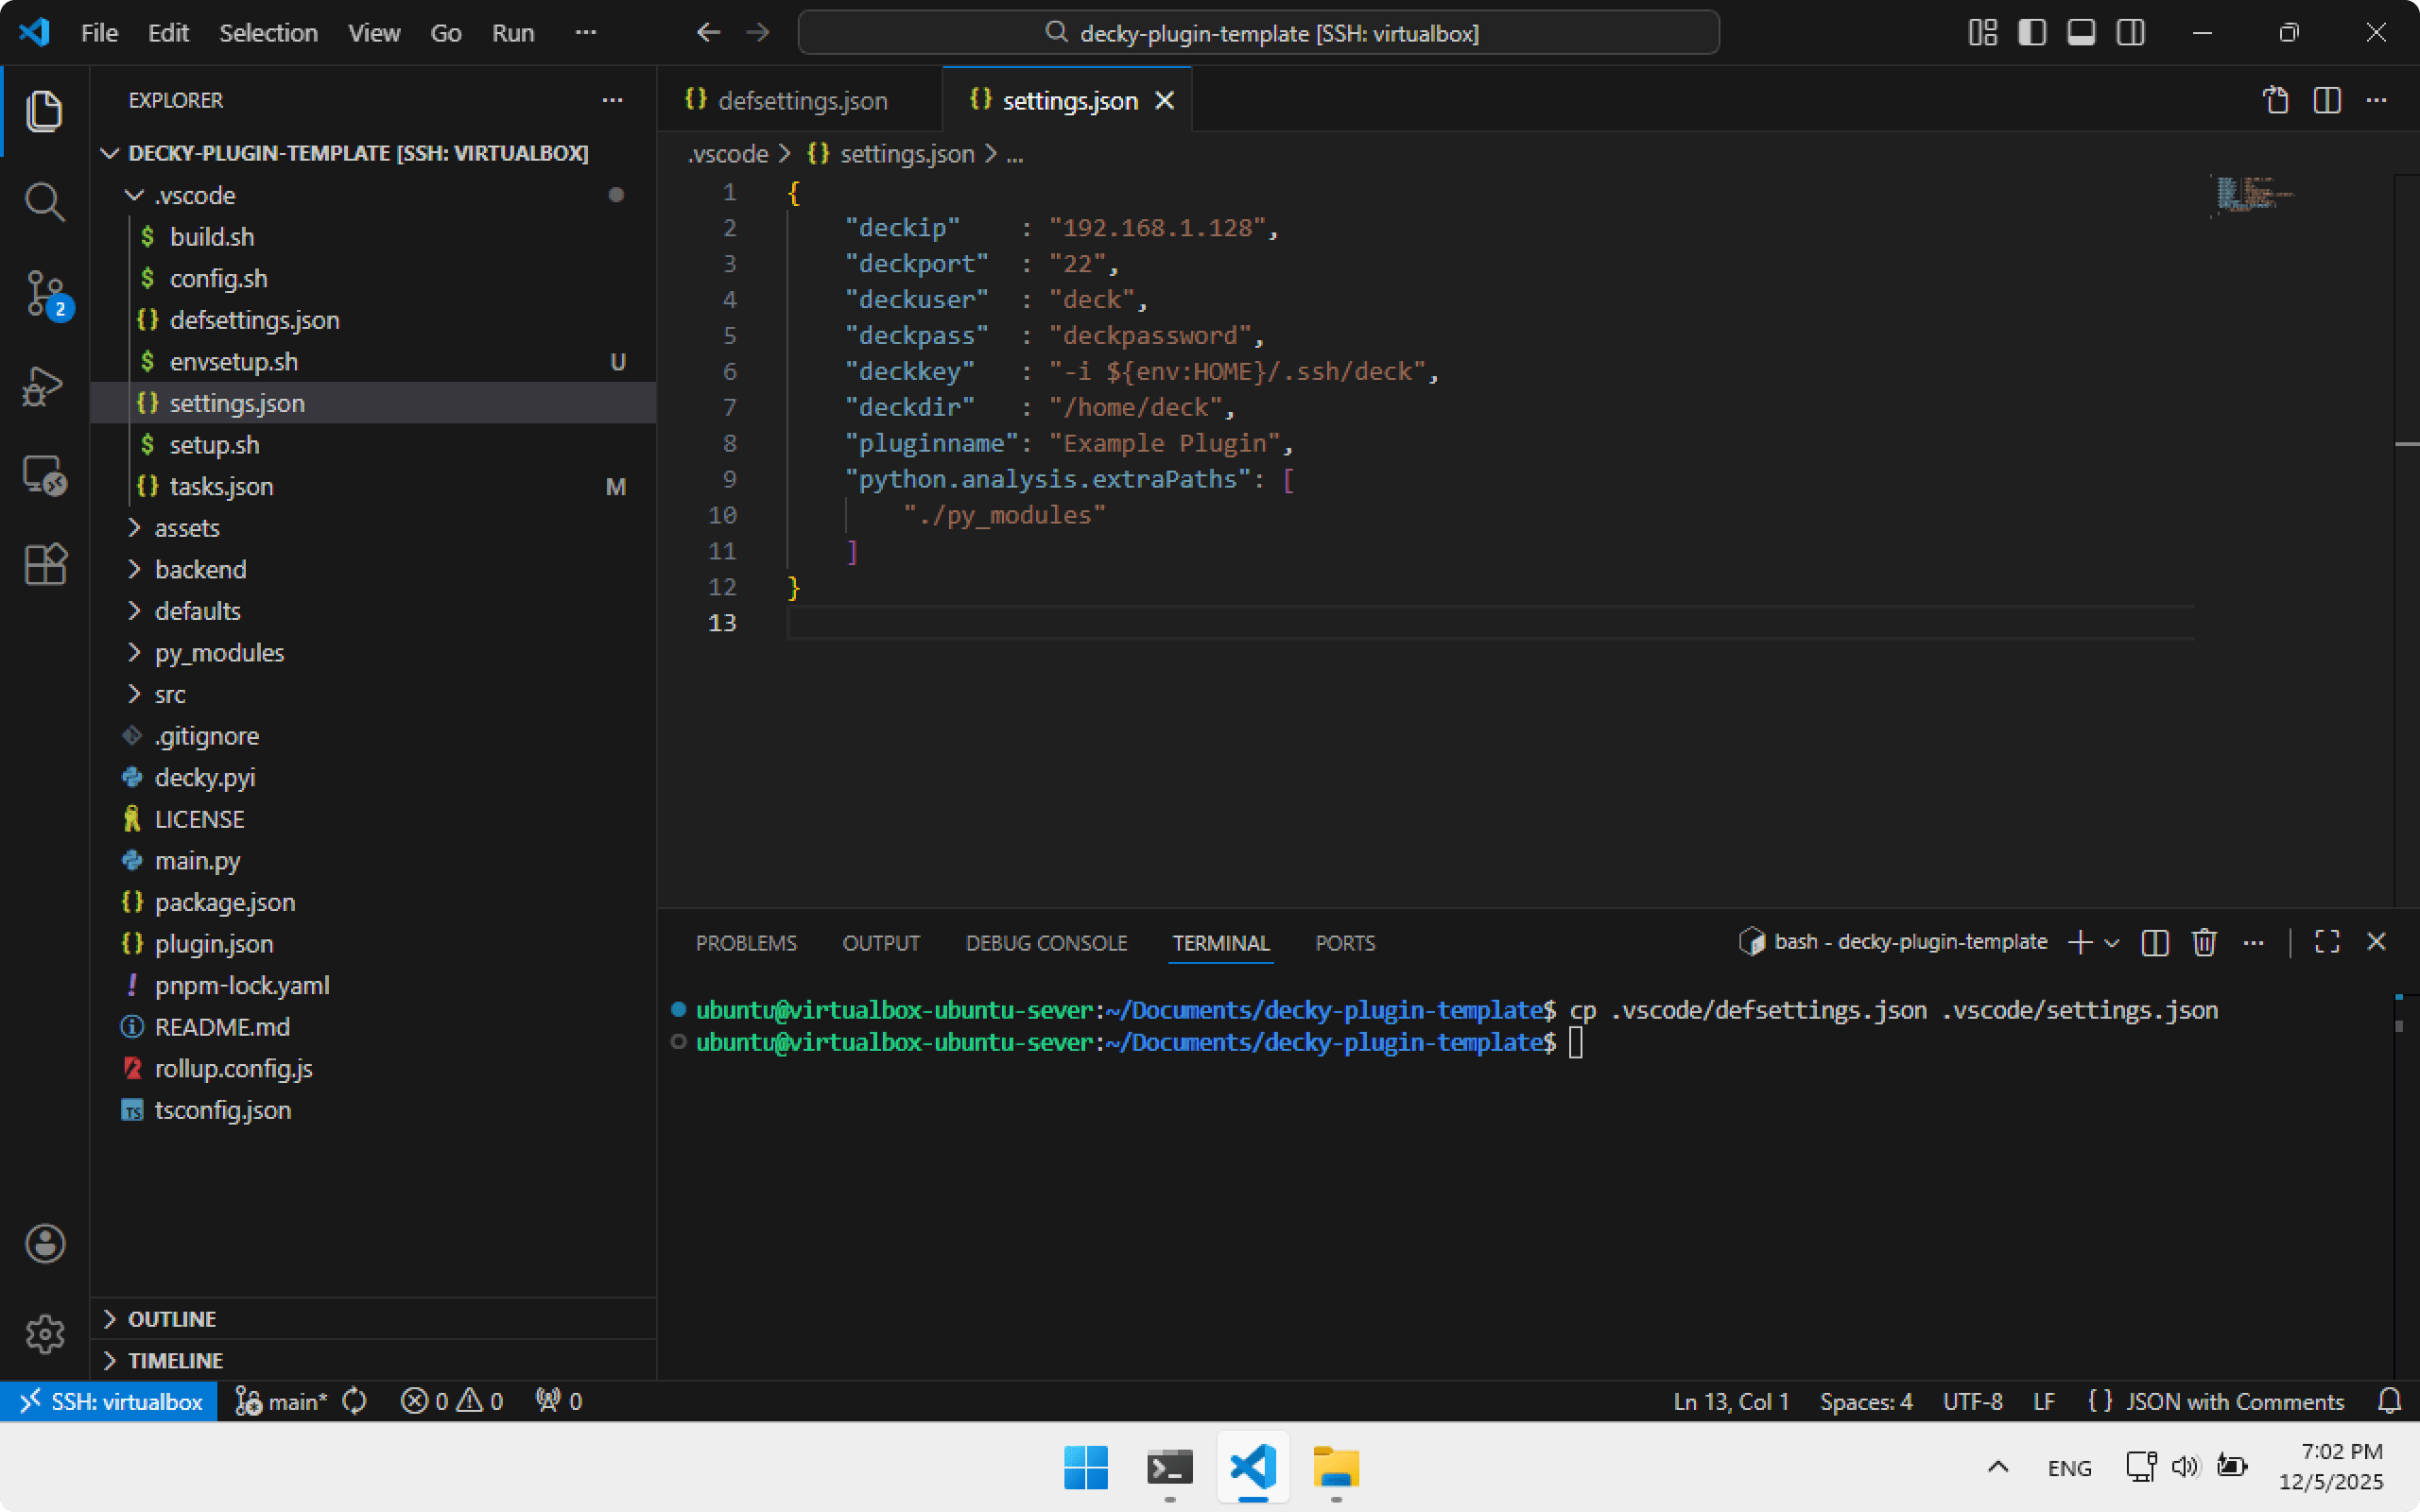
To install plugins directly to Steam Deck after building, we must configure connection parameters. The plugin template provides defsettings.json — use it as a base:
cp .vscode/defsettings.json .vscode/settings.json
Open settings.json inside .vscode and set: deckip, deckpass and deckkey — values we collected earlier. Save.
{
    "deckip"    : "192.168.1.128",
    "deckport"  : "22",
    "deckuser"  : "deck",
    "deckpass"  : "deckpassword",
    "deckkey"   : "-i ${env:HOME}/.ssh/deck",
    "deckdir"   : "/home/deck",
    "pluginname": "Example Plugin",
    "python.analysis.extraPaths": [
        "./py_modules"
    ]
}
Building and installing the plugin on Steam Deck
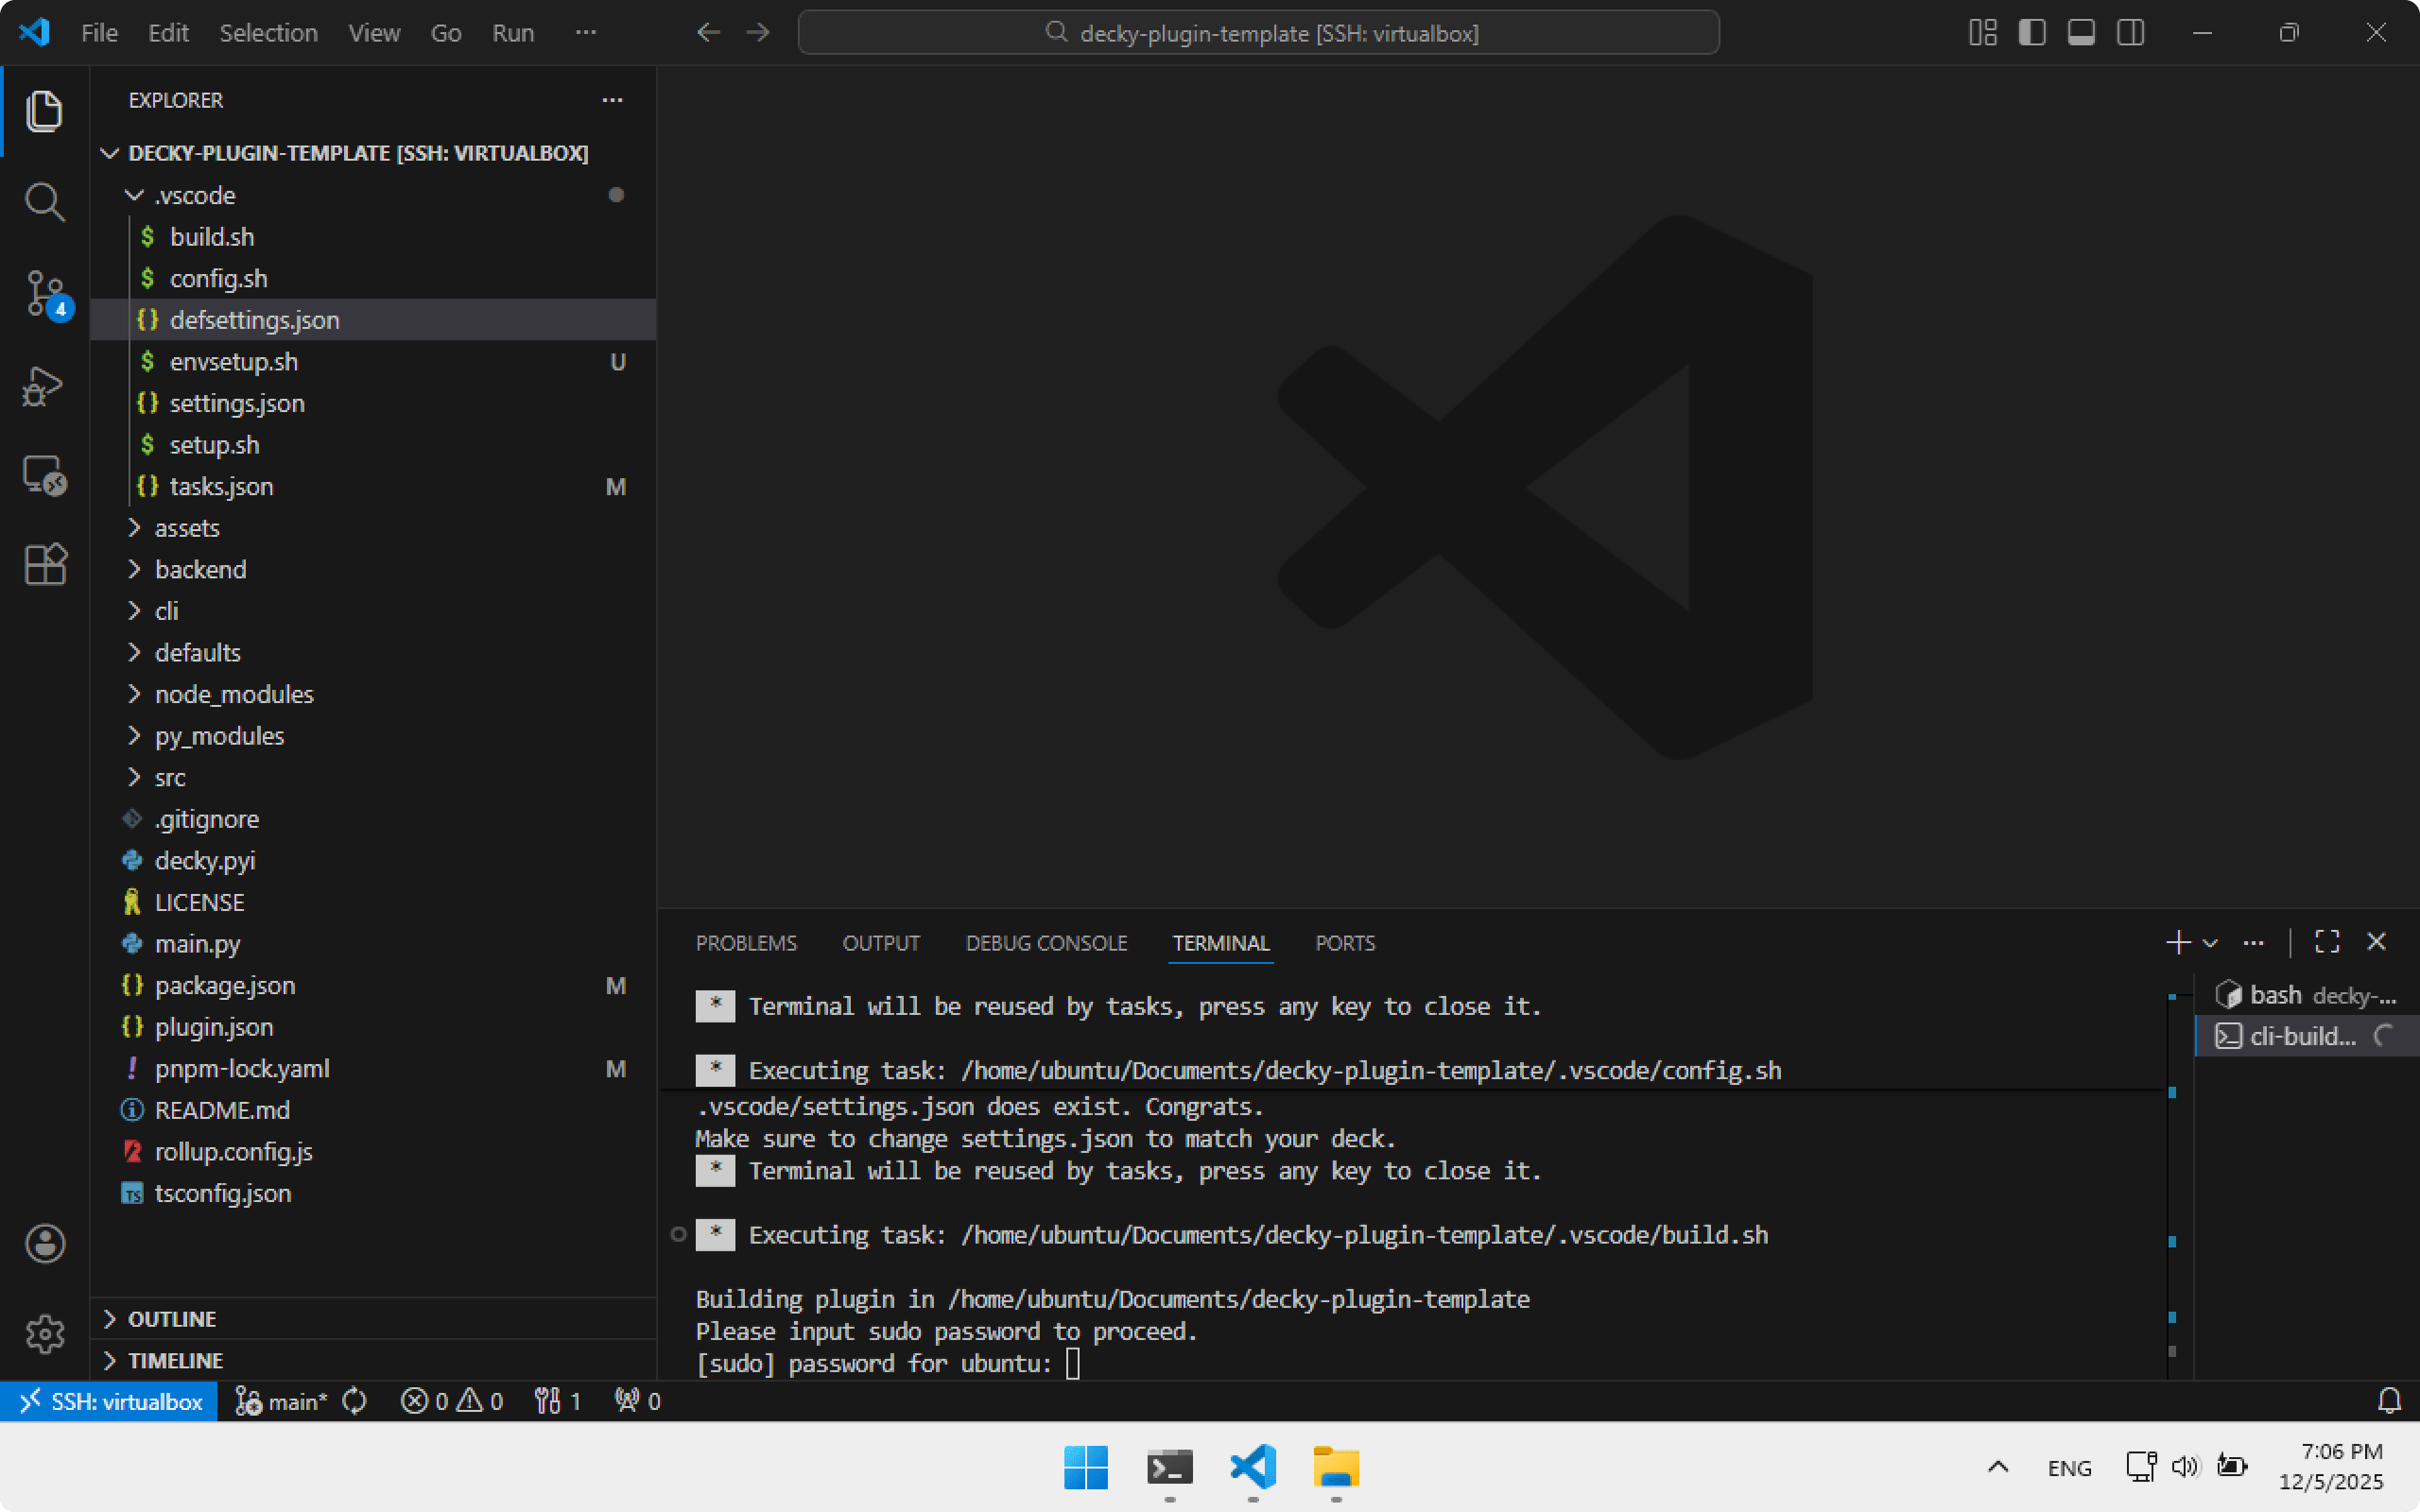
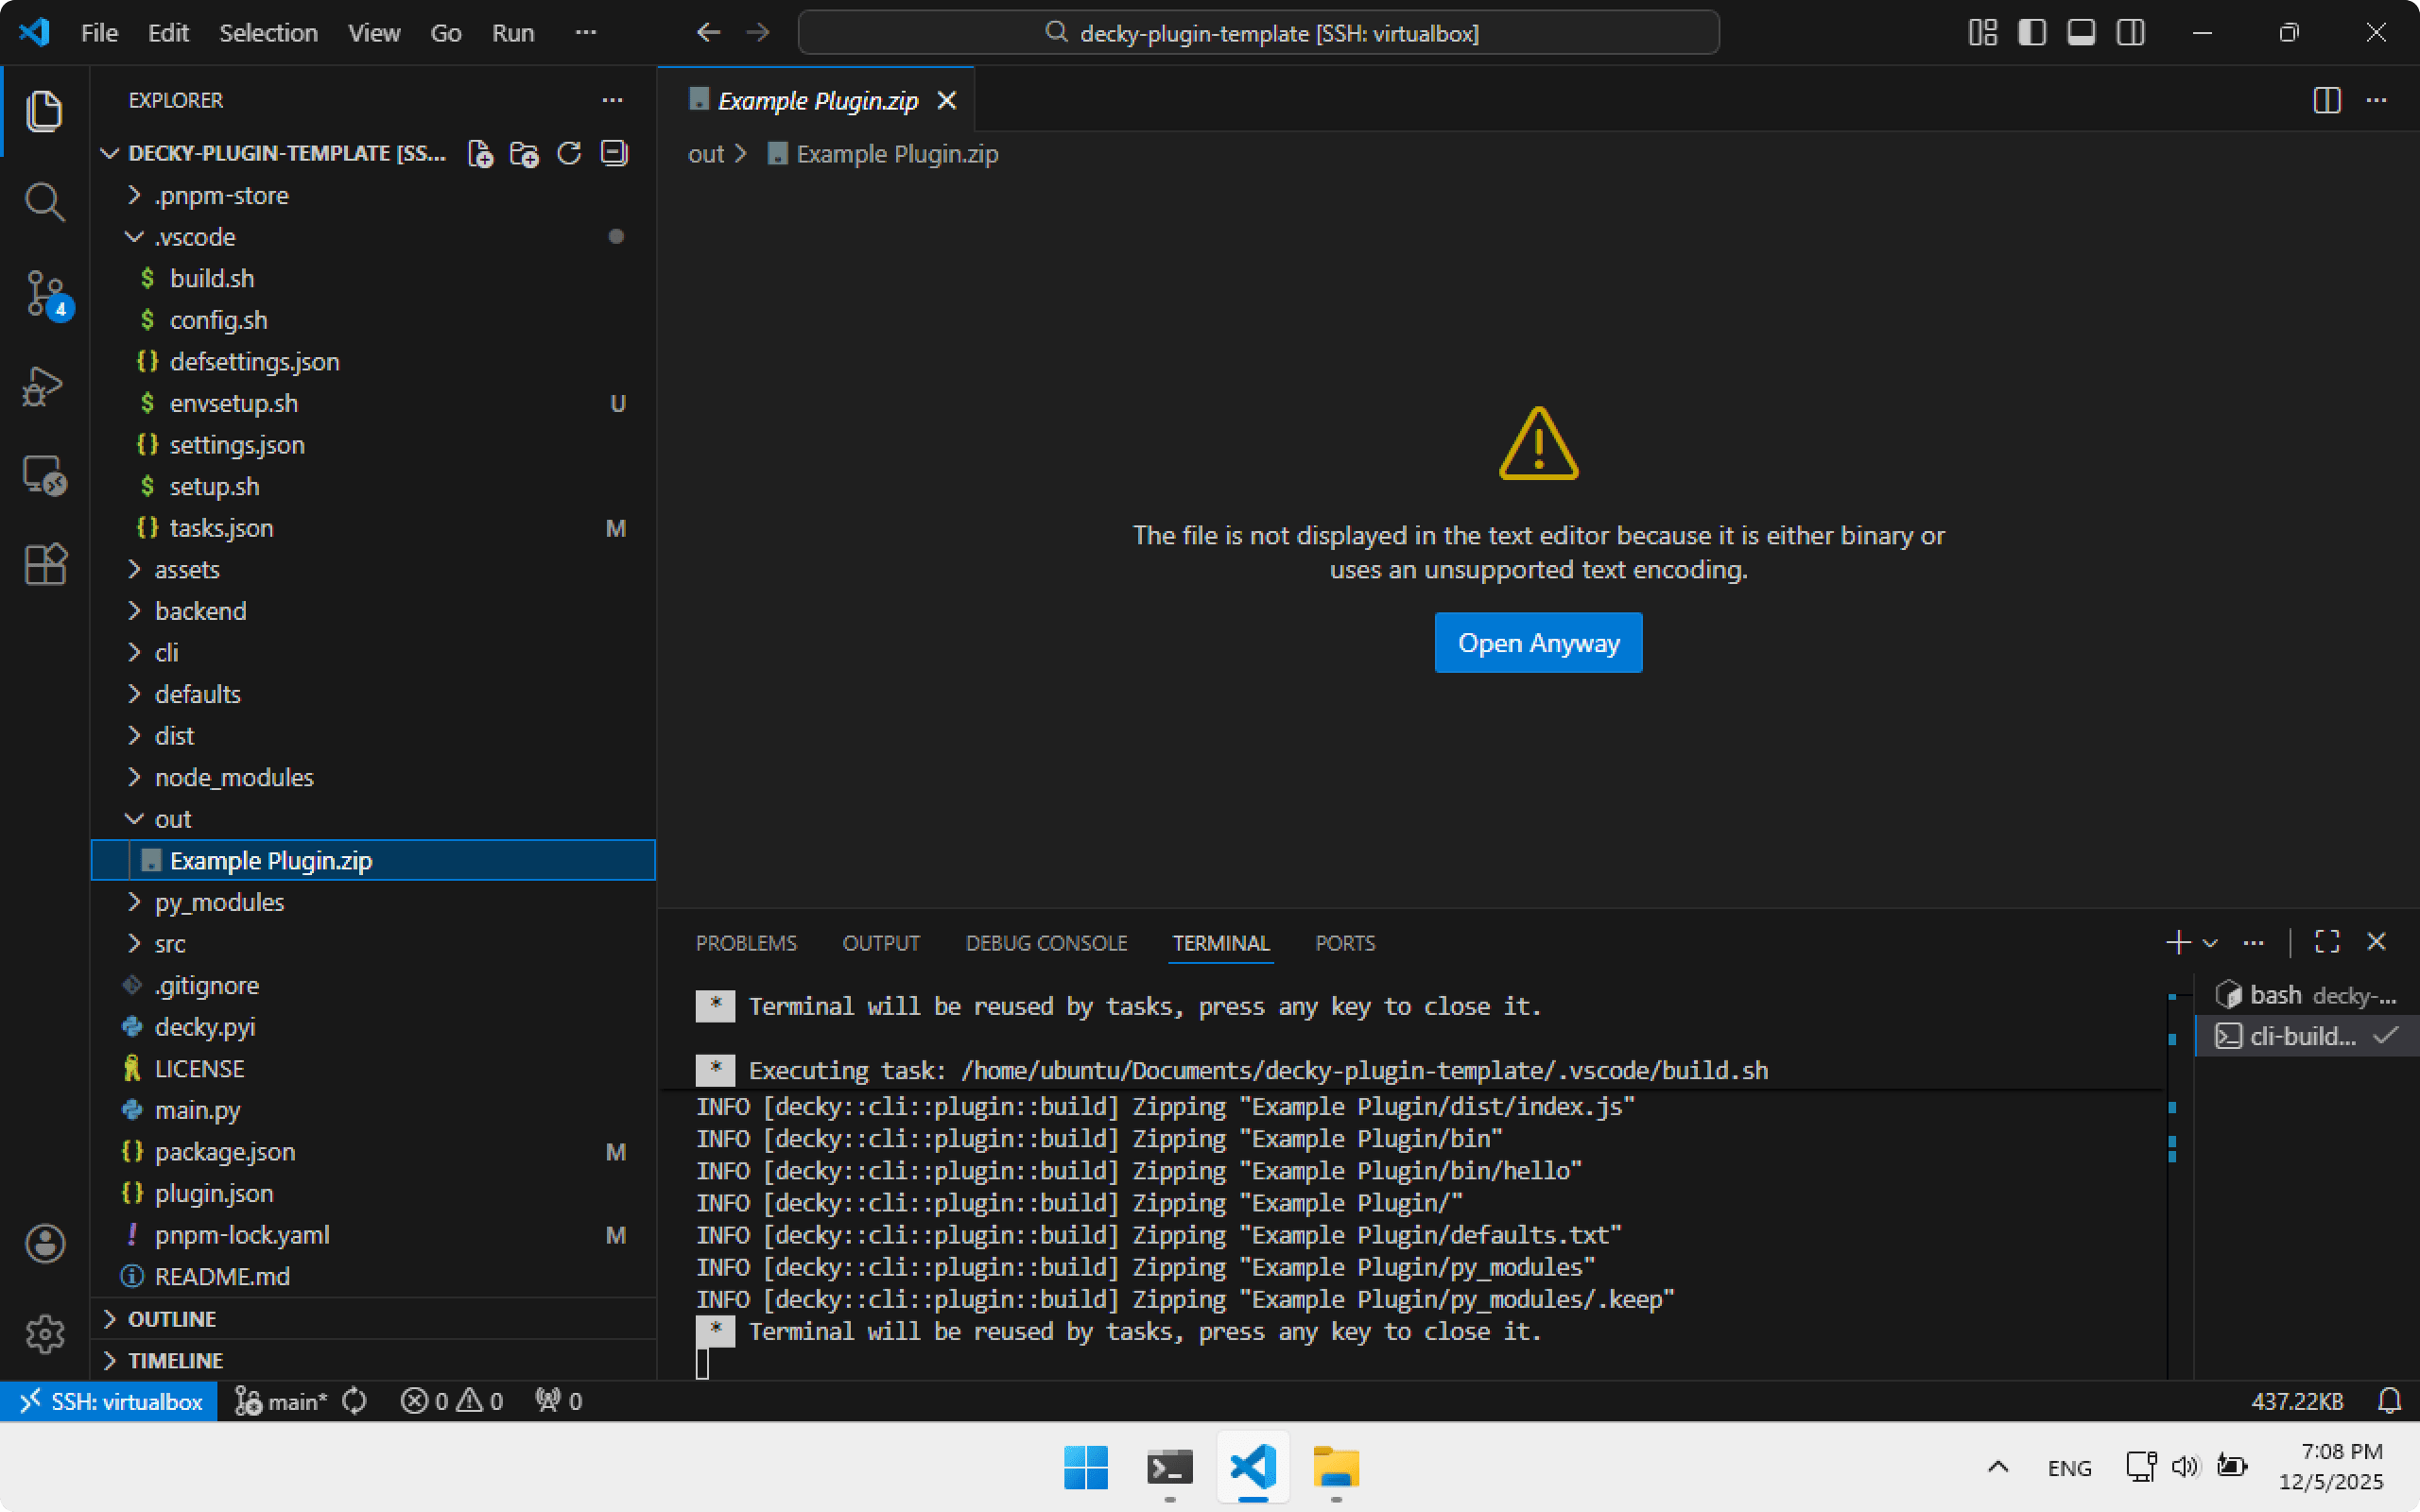
To build a plugin, run the Build task in Visual Studio Code. Press Ctrl+Shift+P, choose Task: Run Task.

Choose Build.
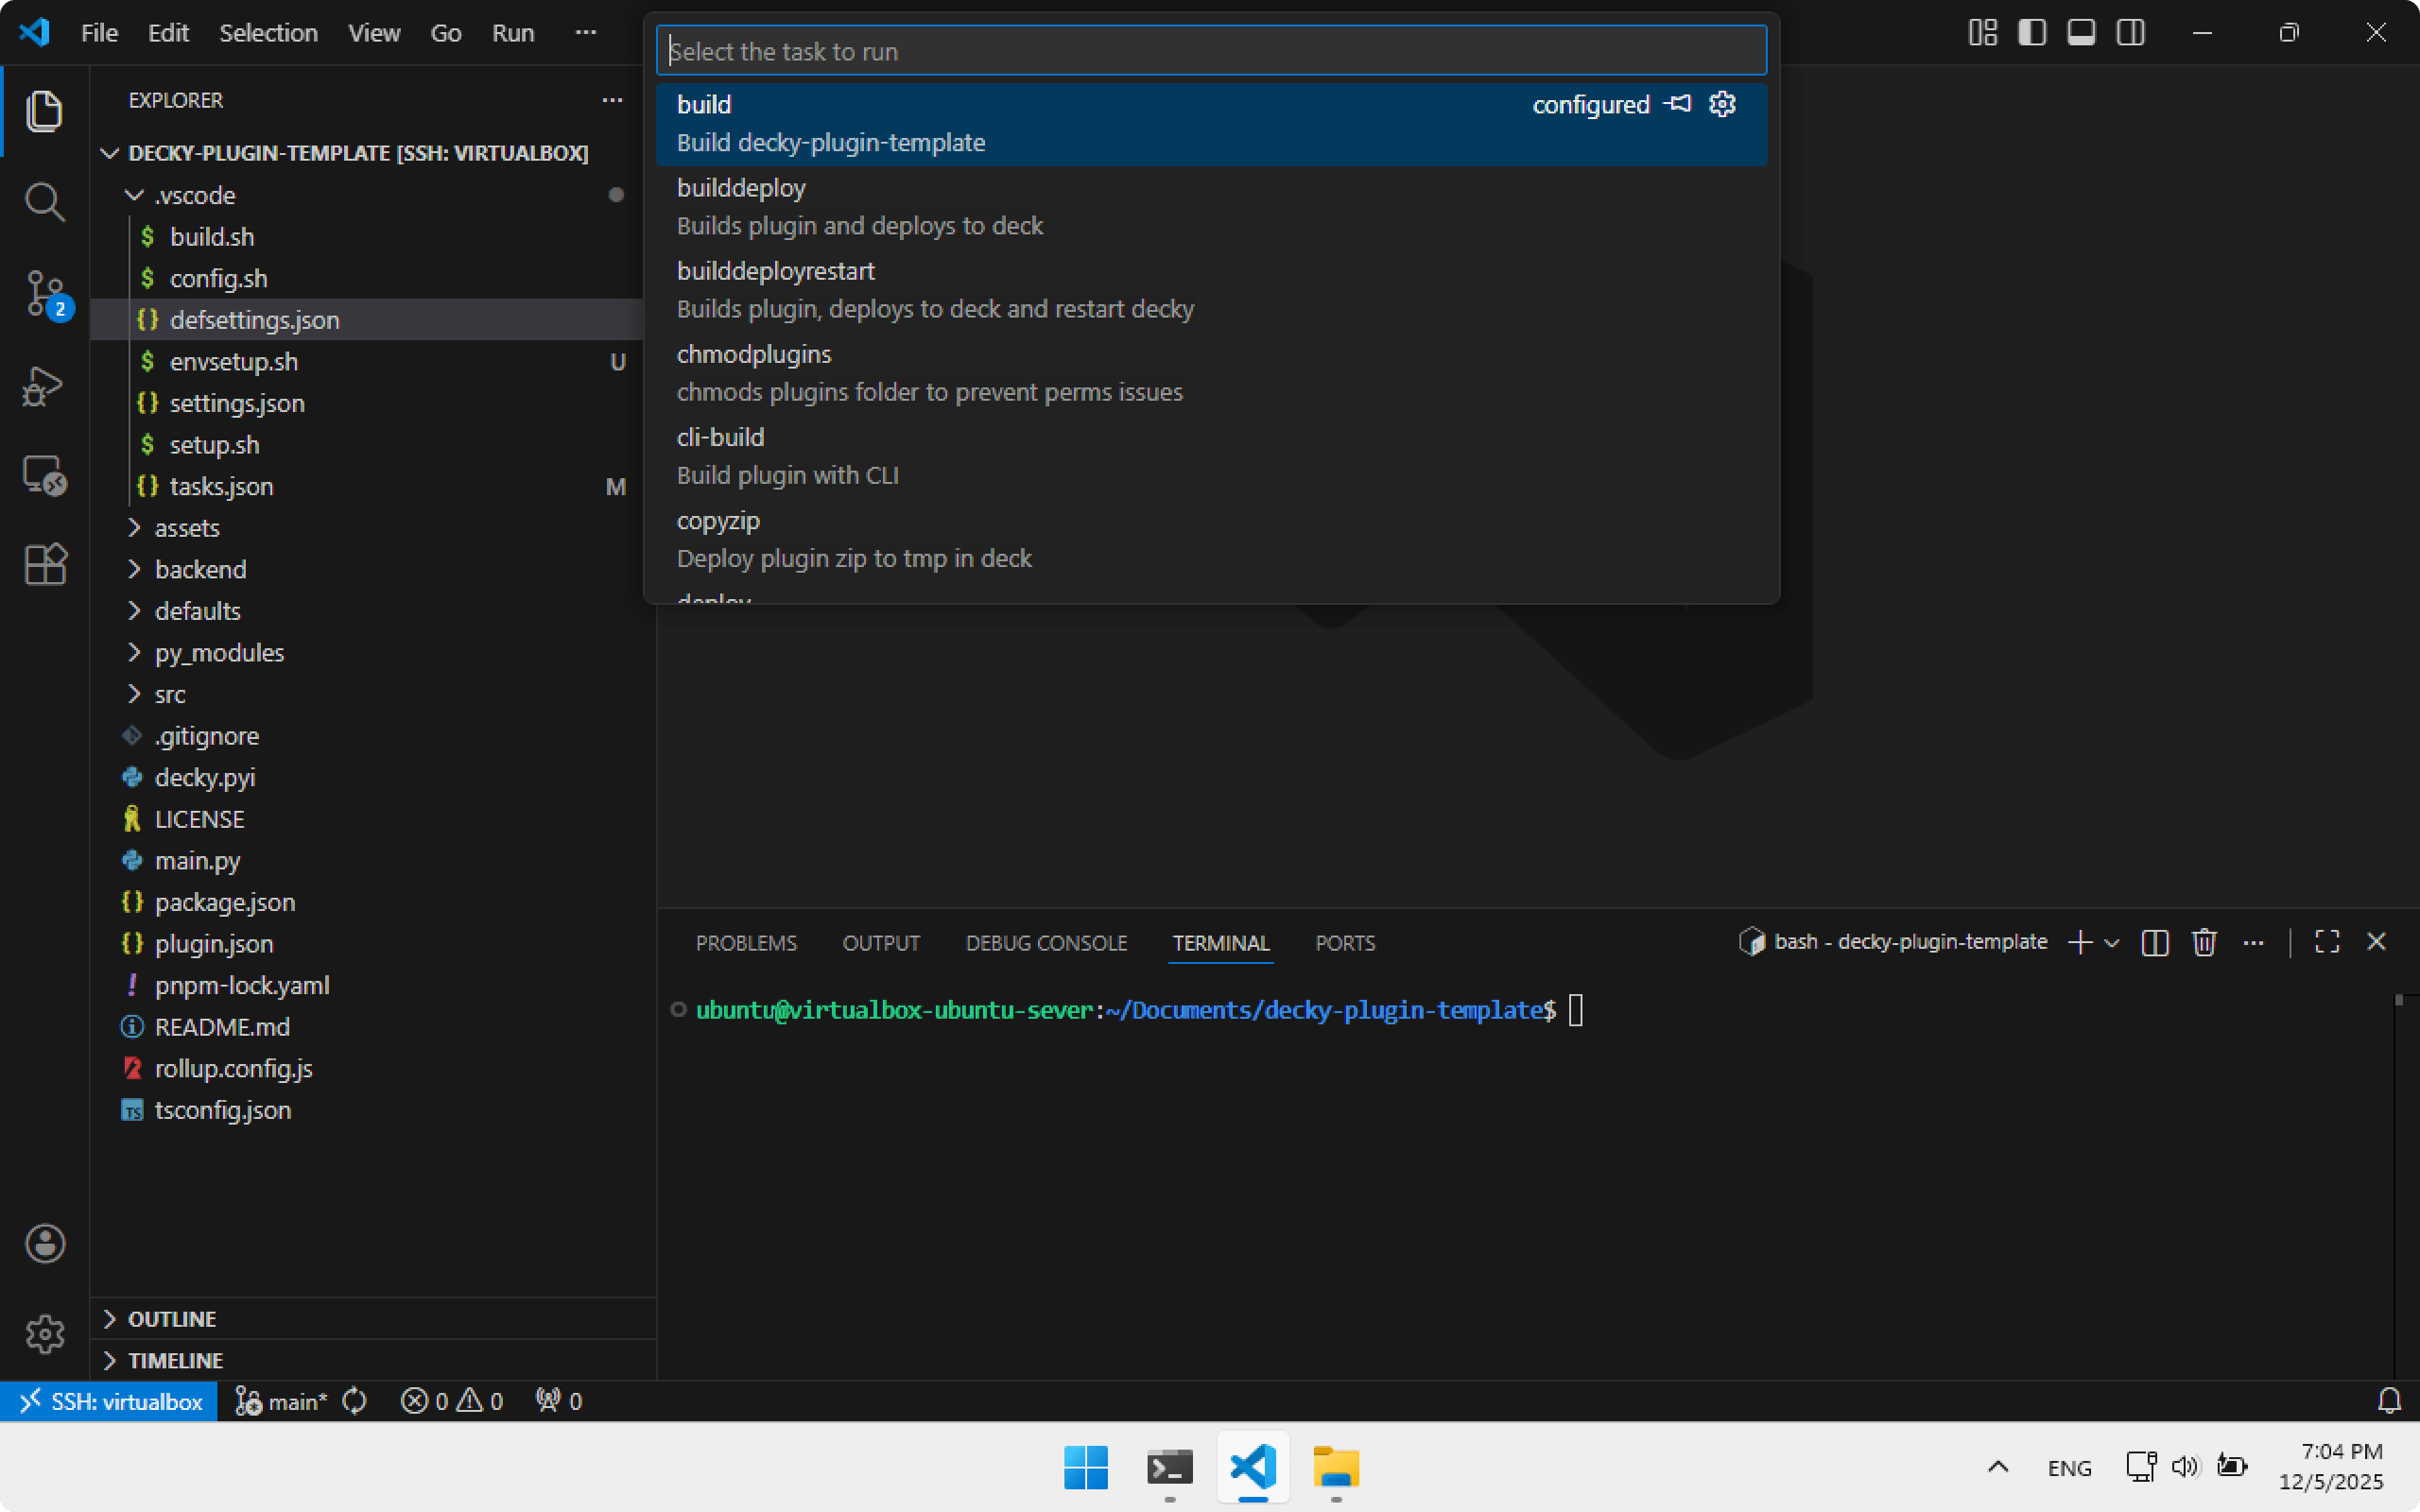
Decky CLI will ask for confirmation — press Enter.
Every build requires entering password password. Later I will show how to avoid that.
After build, a zip with the plugin will appear in the out folder: Example Plugin.zip.
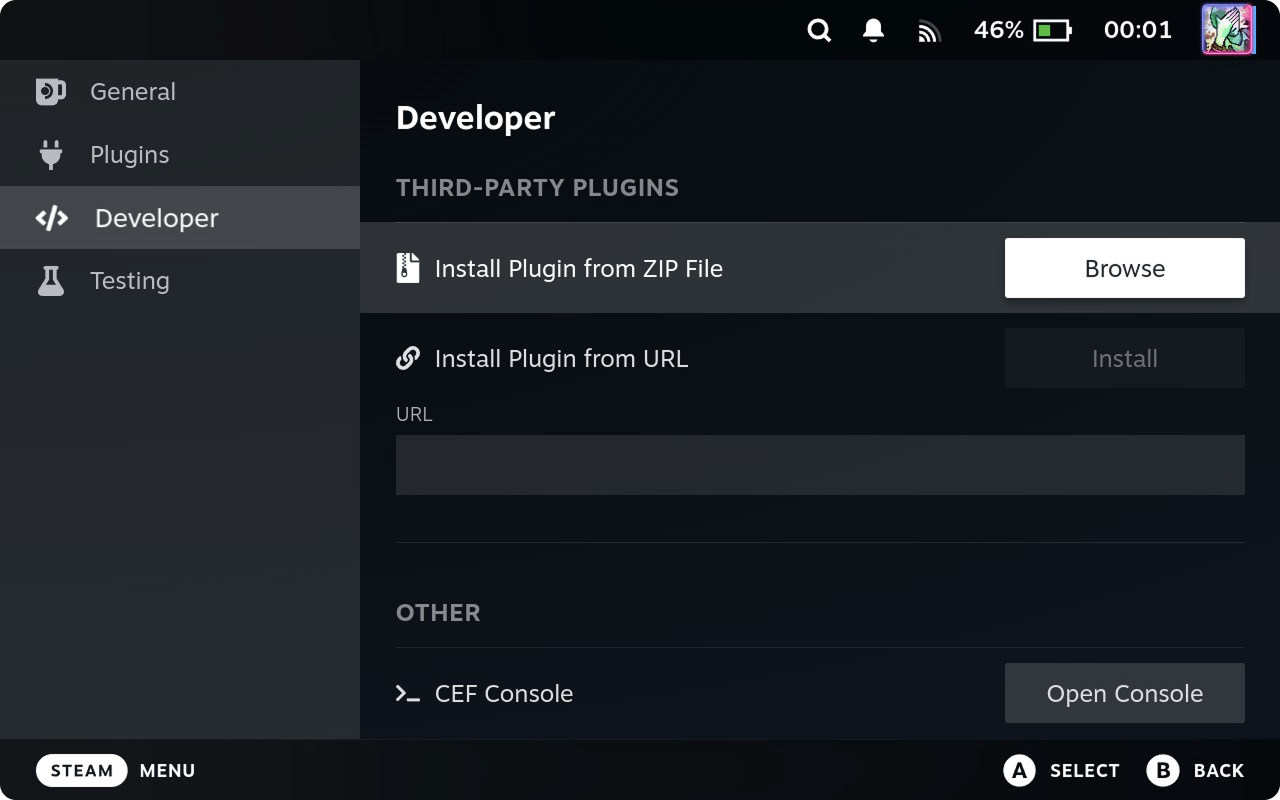
To install it, copy Example Plugin.zip to Steam Deck. Open Decky Loader settings → Developer tab → Install Plugin from ZIP File, choose file. Later we will automate this.
To make builds passwordless, edit build.sh in .vscode and replace the contents. Note the hardcoded password.
Storing passwords in scripts is unsafe, but acceptable for learning. Use environment variables in production.
#!/usr/bin/env bash
CLI_LOCATION="$(pwd)/cli"
printf "Building plugin in $(pwd)"
echo "password" | sudo -S $CLI_LOCATION/decky plugin build $(pwd)

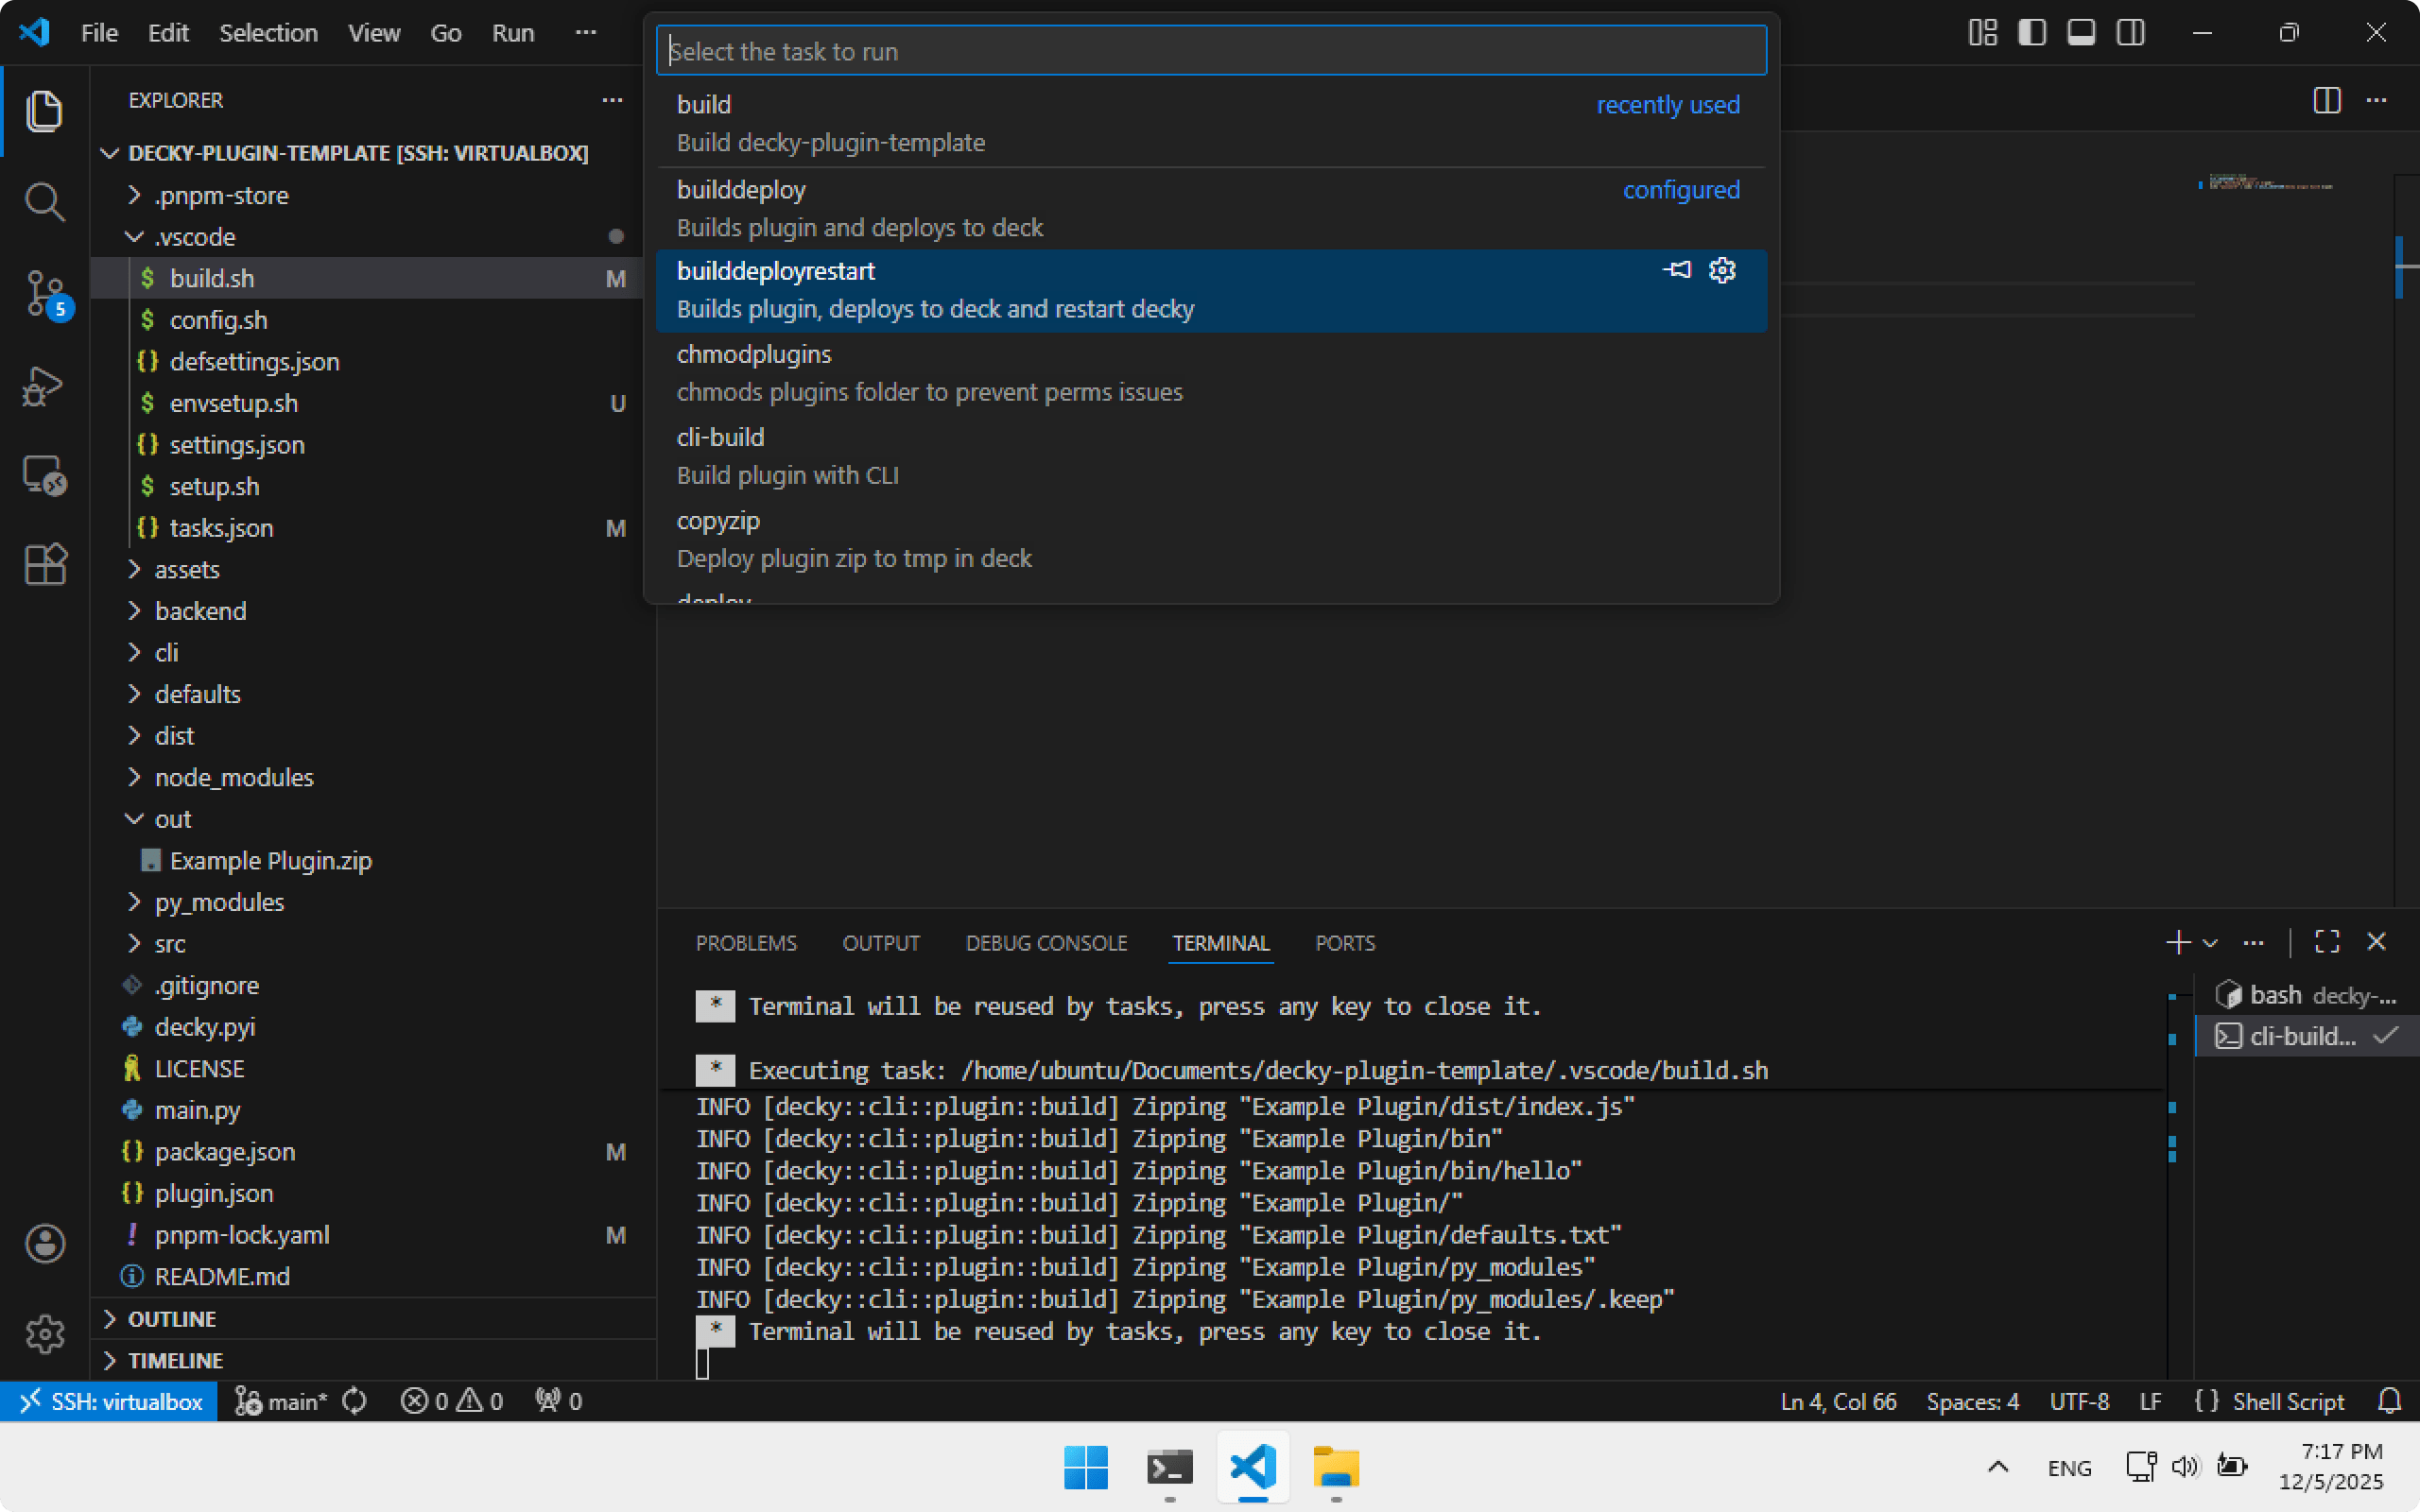
To automatically install the plugin to Steam Deck after build, there are two tasks: builddeploy and builddeployrestart (mine — not included in the official template).
- builddeploy — build and install plugin
- builddeployrestart — build, install and restart Decky Loader
If installing for the first time, builddeployrestart is easier — Decky Loader restart forces an update of the installed plugins list.
Turn on Steam Deck in Gaming Mode — it must be connected to Wi-Fi. Again run Task: Run Task and choose builddeployrestart. Build will start, then installation, then Decky Loader will restart with SteamOS UI.
Now open Decky Loader on Steam Deck — you will see Example Plugin.

Debugging plugin UI
Debugging allows exploring SteamOS UI, plugins, and testing visual changes without rebuilding.
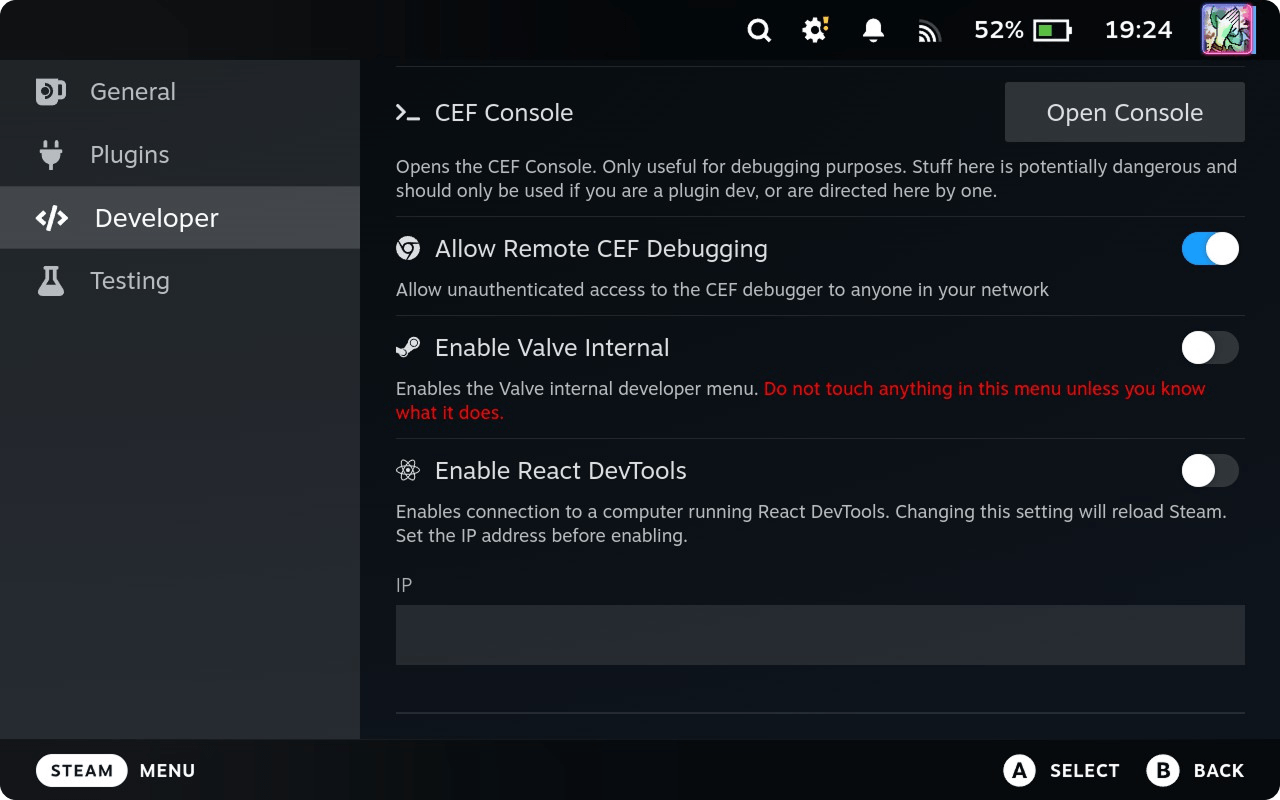
On Steam Deck open Decky Loader settings. In Developer tab enable Allow Remote CEF Debugging.
On Windows open any Chromium-based browser, e.g. Google Chrome.
Enter in address bar:
chrome://inspect/#devices
Click Configure and set 192.168.1.128:8081 — Steam Deck IP and port 8081.
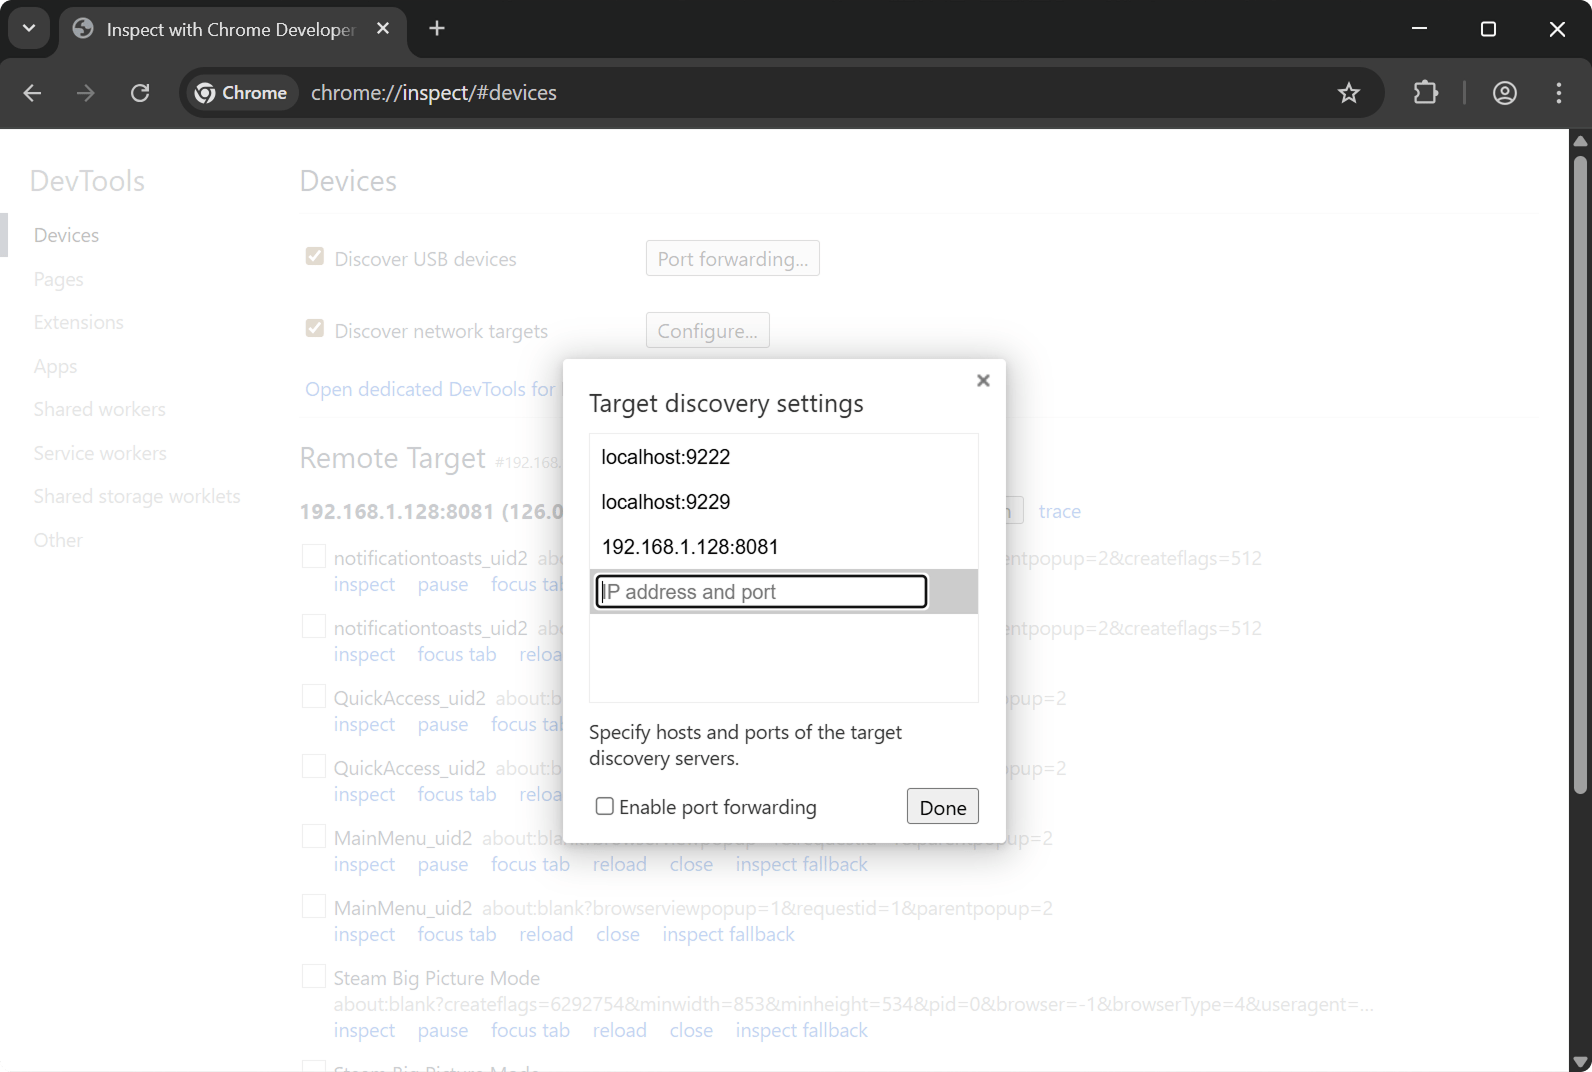
After a few seconds you will see available pages. Sometimes a browser restart is needed. Click inspect to access console and UI info.

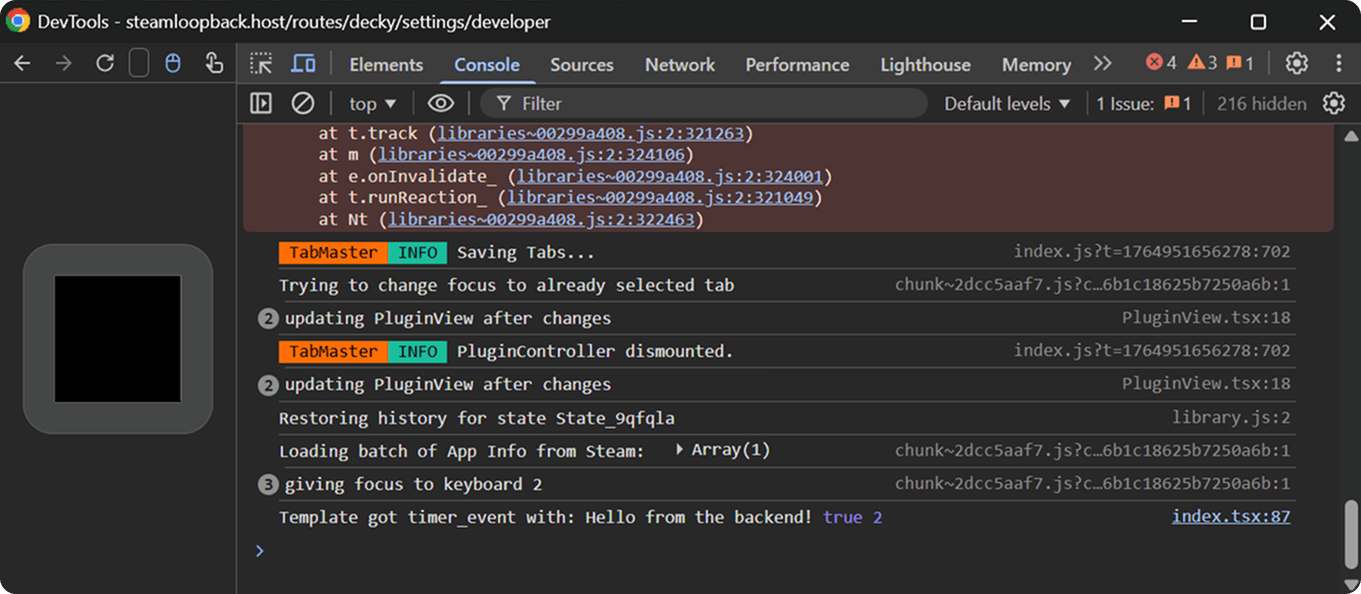
SharedJSContext — shows Decky Loader plugin logs. For example, writing console.log("Hello World"); in plugin will appear there.
QuickAccess_uid2 — contains the QuickAccess UI with your plugin interface.
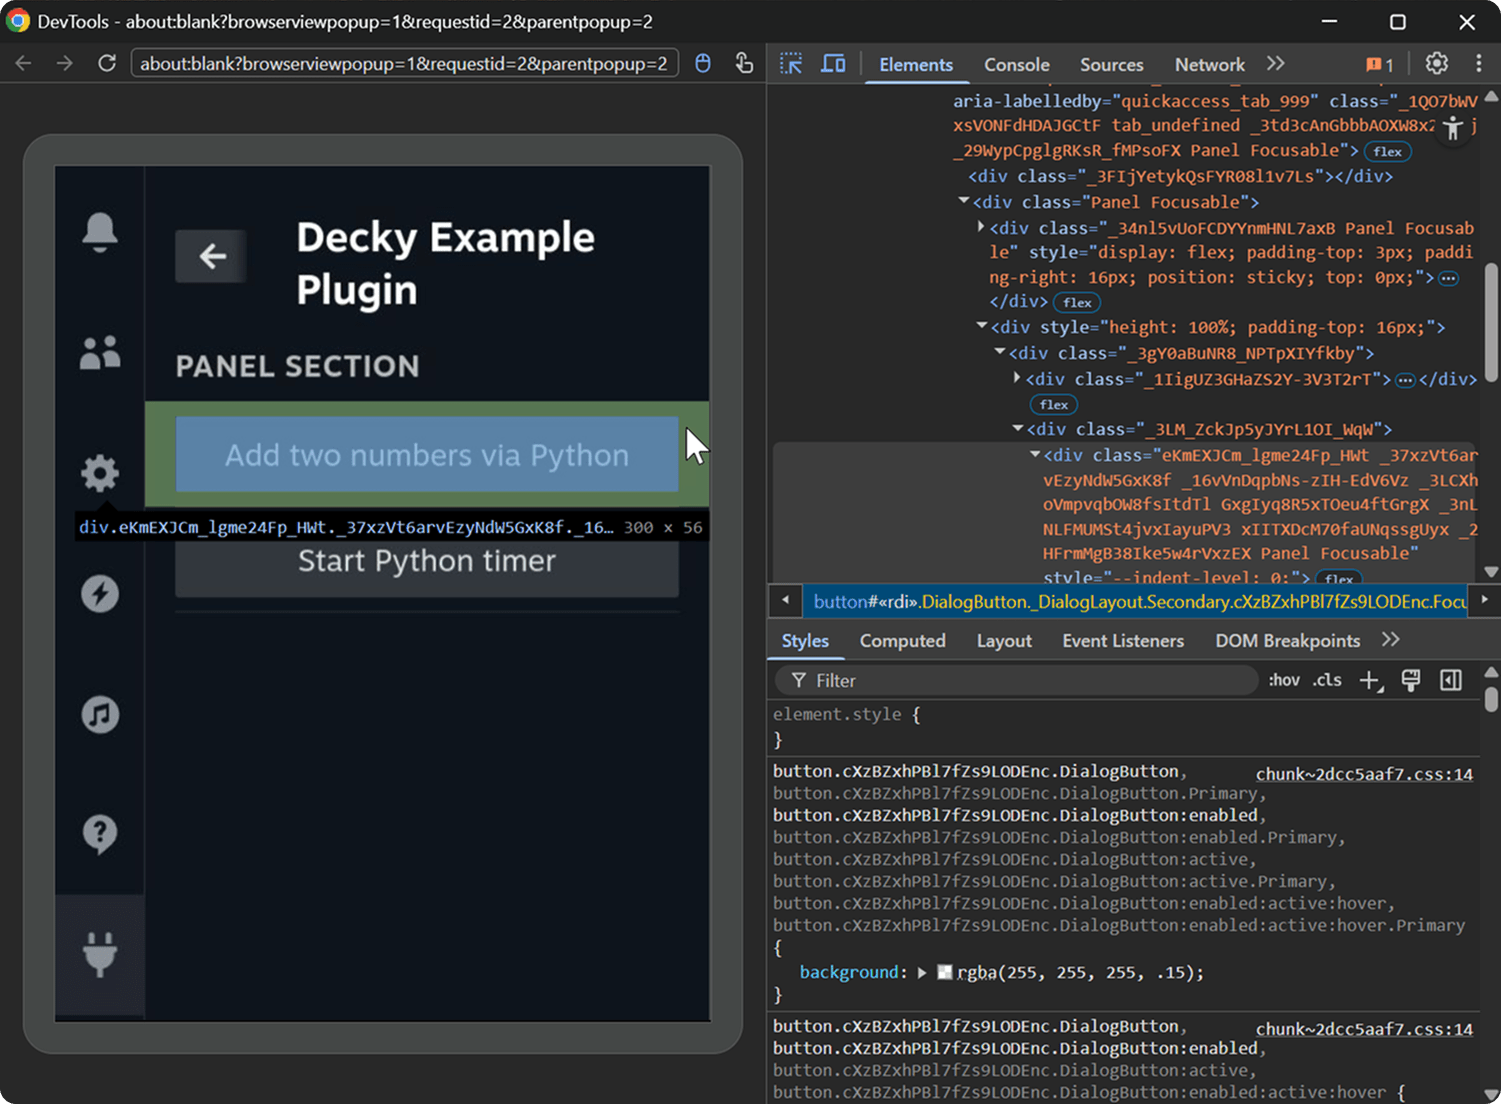
Explore other tabs yourself.
Conclusion
I showed one of the ways to set up a development flow for Decky Loader plugins. Next, explore project structure and take a look at other Decky plugins.